


Setting up Retail POS hardware
Wix Retail POS: Managing Your Cash Drawer
Important:
This article is about Wix Retail POS tablet for brick & mortar businesses.
For info on using POS on a mobile device, click here.
With Wix POS, you can manage your cash drawer (cash register) directly from the tablet and keep track of your finances.
Tip:
To physically open the cash drawer without making a sale, tap the Menu icon  at the bottom left, tap Settings and then Manage Hardware. From there you can tap Open Drawer.
Enabling cash drawer management
Using the POS tablet, you can record the starting amount at the beginning of each shift and the closing amount at the end of the day.
If you usually start shifts with the same amount, you can save time by setting a default starting amount. This default amount can be edited at the beginning of any shift.
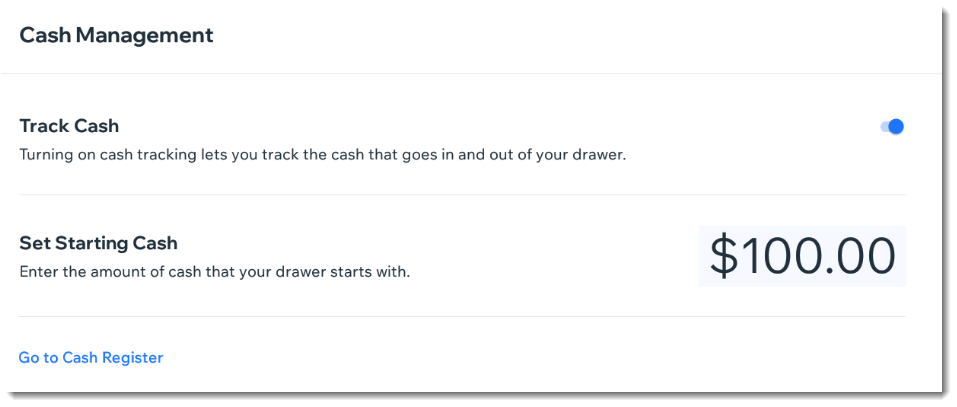
To enable cash drawer management:
Open the POS tablet.
Tap the Menu icon
at the bottom left.Tap Settings.
Tap the Cash Management tab.
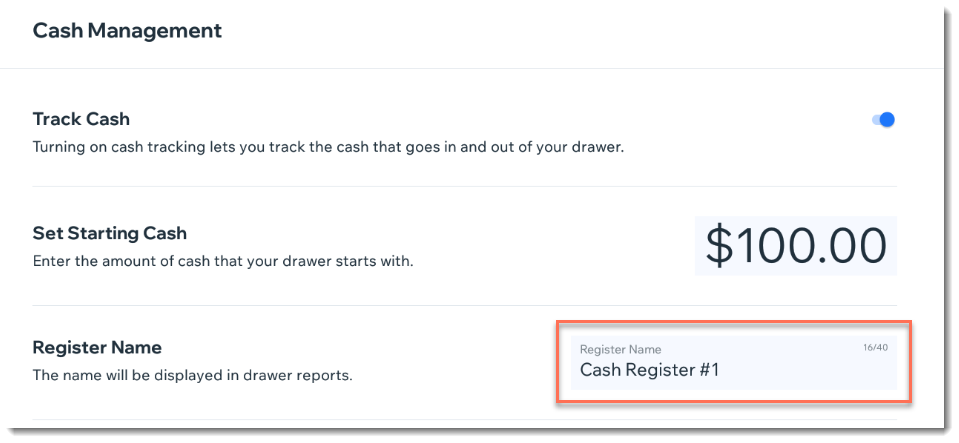
Enable the Track Cash toggle.
(Optional) Enter the default cash amount you have in the register at the start of each day.
Note: You can edit this amount when you start the cash drawer.(Optional) Change the default register name.
Note: This option appears only if you have more than one tablet. Adding a meaningful name will help identify which report is associated to which cash register when reading printed reports.
Starting the cash drawer
Start the cash drawer at the beginning of each shift.
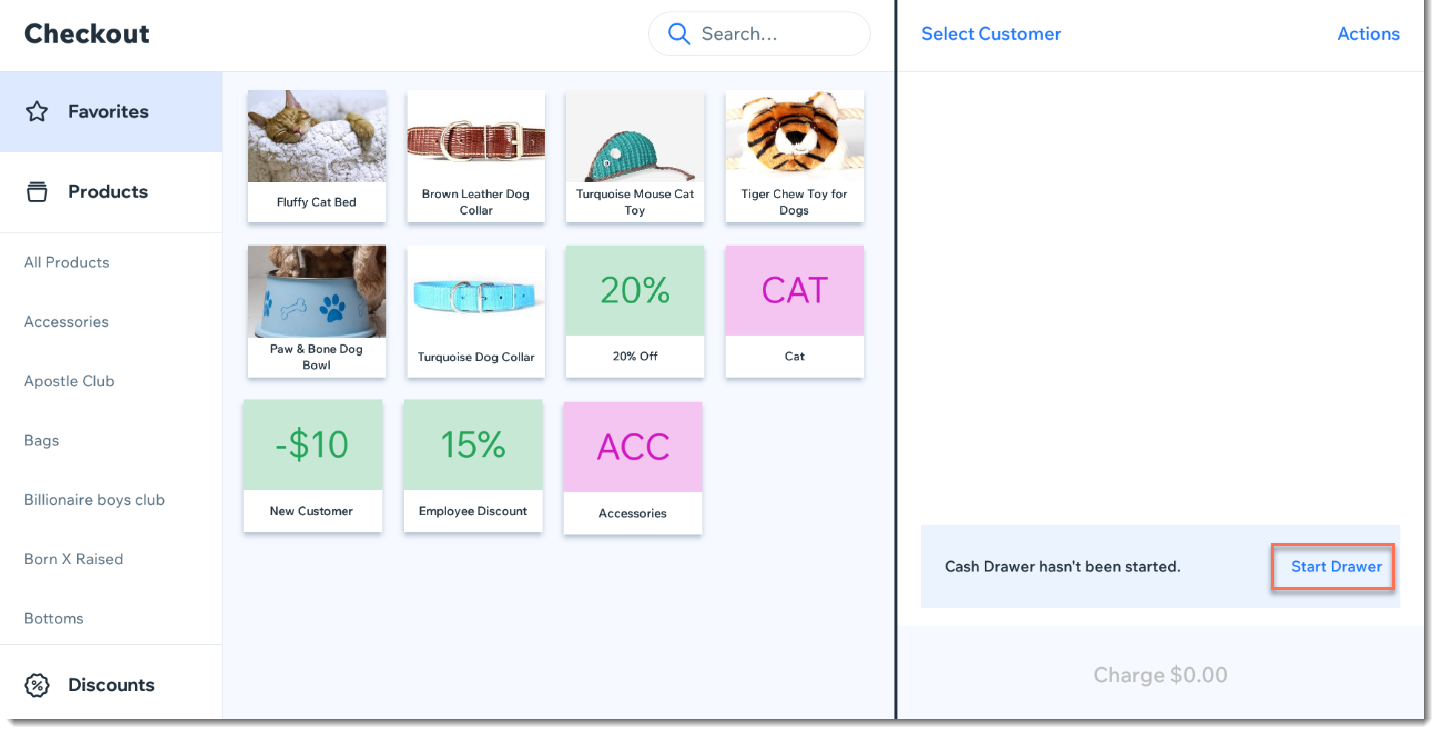
To start the cash drawer:
Open the POS tablet.
Tap Checkout.
Tap Start Drawer.
(Optional) Enter/edit the amount of cash in the drawer.
Tap Start Drawer to confirm.
Viewing your current cash drawer
You can check the status of your cash drawer at any point during a shift. View details like the drawer's starting cash, amounts added or removed from the register, and the expected balance at the end of the shift.
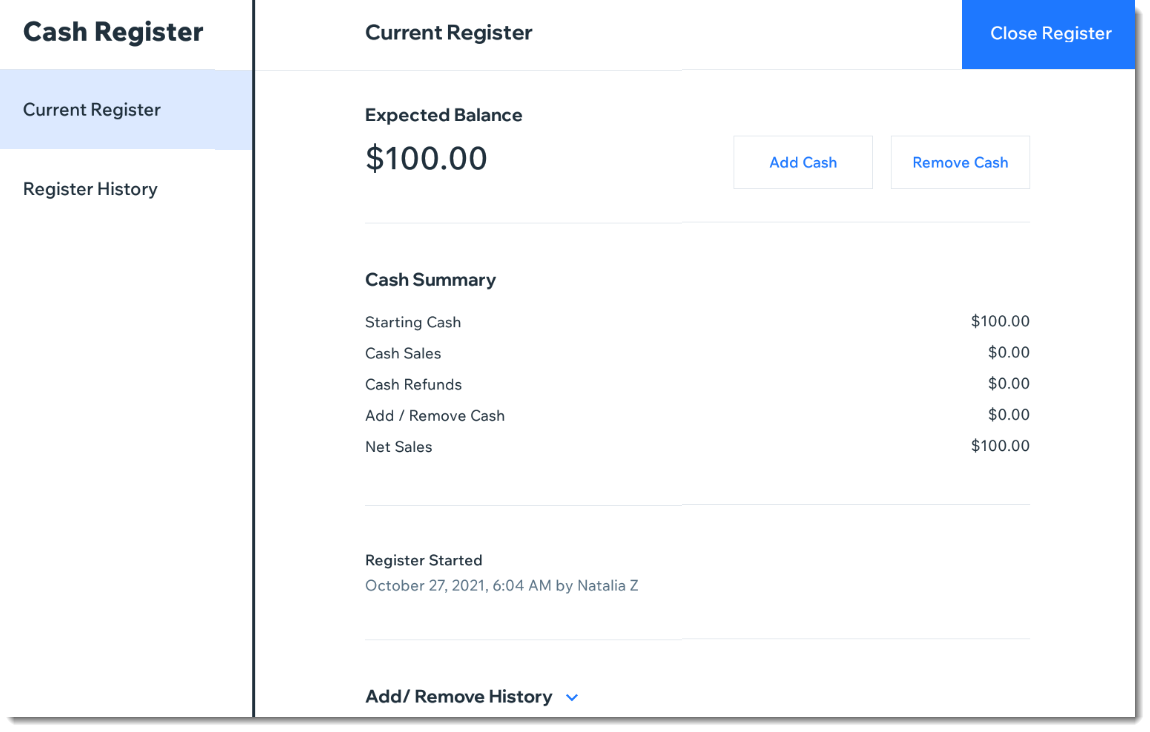
To view your current cash status:
Open the POS tablet.
Tap the Menu icon
at the bottom left.Tap Cash Register.
Adding or removing cash from the cash drawer
You may want to add or remove cash from the drawer with no relation to your sales, for example, when you need to pay a supplier or add cash to balance the register. The expected balance takes into account any amount you add or removed during the shift.
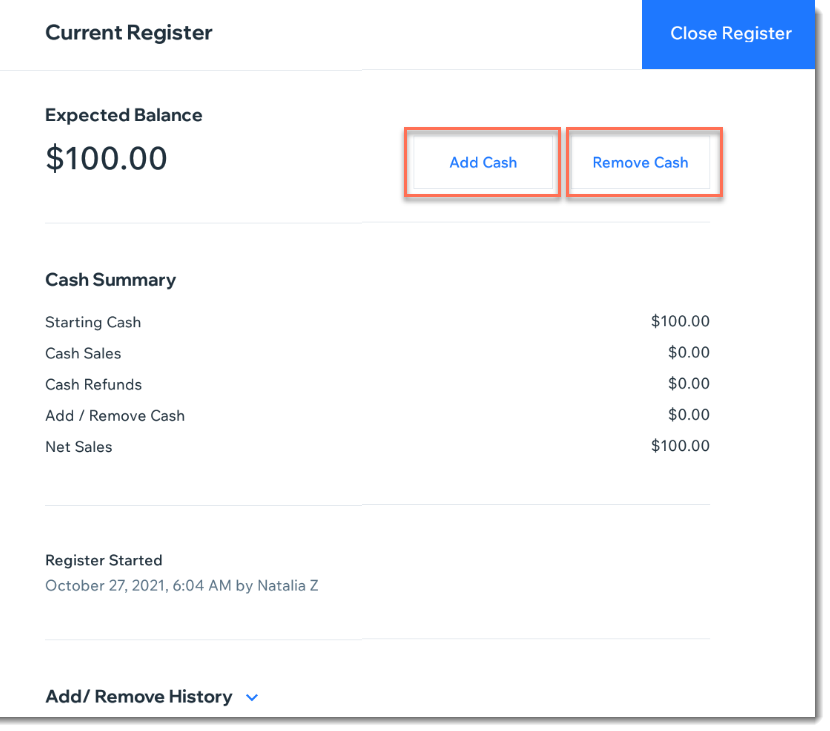
To add or remove a cash amount:
Open the POS tablet.
Tap the Menu icon
at the bottom left.Tap Cash Register.
Select an action:
Add cash:Tap Add Cash.
Enter the amount.
(Optional) Enter a note explaining why the cash was added.
Tap Add Cash.
Remove cash:Tap Remove Cash.
Enter the amount.
(Optional) Enter a note explaining why the cash was removed.
Tap Remove Cash.
Closing the cash drawer
When a shift is over, you can close the cash drawer and check if the money in the drawer matches the expected balance.
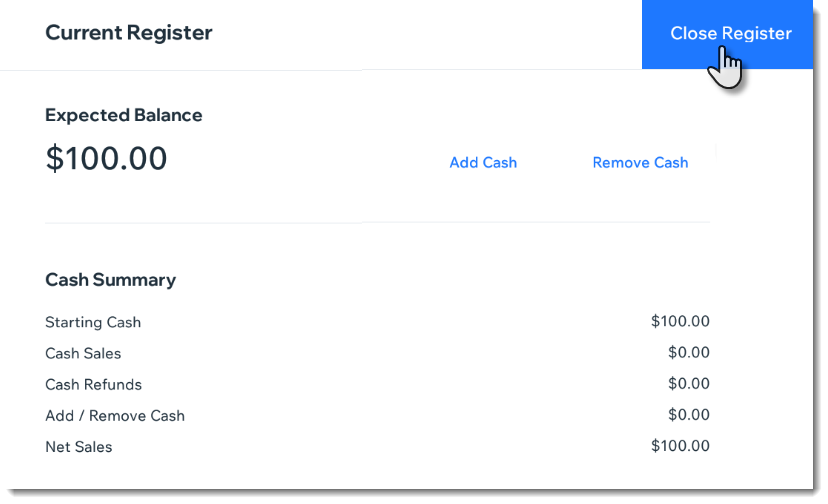
To close the cash drawer:
Open the POS tablet.
Tap the Menu icon
at the bottom leftTap Cash Register.
Tap Close Register.
(Optional) Enter the amount of cash in the drawer.
(Optional) Enter a note.
Tap Close Register.
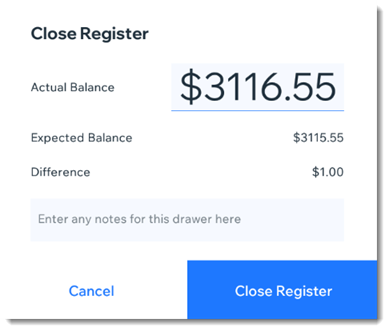
Viewing your cash register history
The register history shows you an overview of cash drawers you saved. Tap a specific saved cash drawer to view details.
To view your saved cash drawers:
Open the POS tablet.
Tap the Menu icon
at the bottom left.Tap Cash Drawer.
Tap Register History.
Tap View next to the relevant saved cash drawer.
(Optional) Tap Email and enter an email address to send a digital copy.
(Optional) Tap Print to print out a hard copy using the receipt printer.
Managing multiple cash drawers
If your business has more than one POS system, reports for each cash drawer are created separately.
When you have more than one cash drawer, each one has its own register name. By default, the serial number is the default name. To make it easier to identify which report is associated with each drawer, you can rename it.
To edit a register name:
Open the POS tablet.
Tap the Menu icon
at the bottom left.Tap Settings.
Tap the Cash Management tab.
If not already enabled, tap the Track Cash toggle to enable it.
Enter a new register name.
Note: This option appears only if you have more than one tablet. When staff print out reports, giving a meaningful name will help identify which report is associated to which cash register.