Google Event Calendar
Adding and Setting Up Google Event Calendar
Add the Google Event Calendar app to your site to keep your audience up-to-date with your schedule.
By displaying your calendar, you can showcase your availability, upcoming events, and more. You can update the calendar layout to show a month, a week, or today's agenda. To align with your brand, you can also customize your calendar's color scheme and fonts.

Step 1 | Add Google Event Calendar to your site
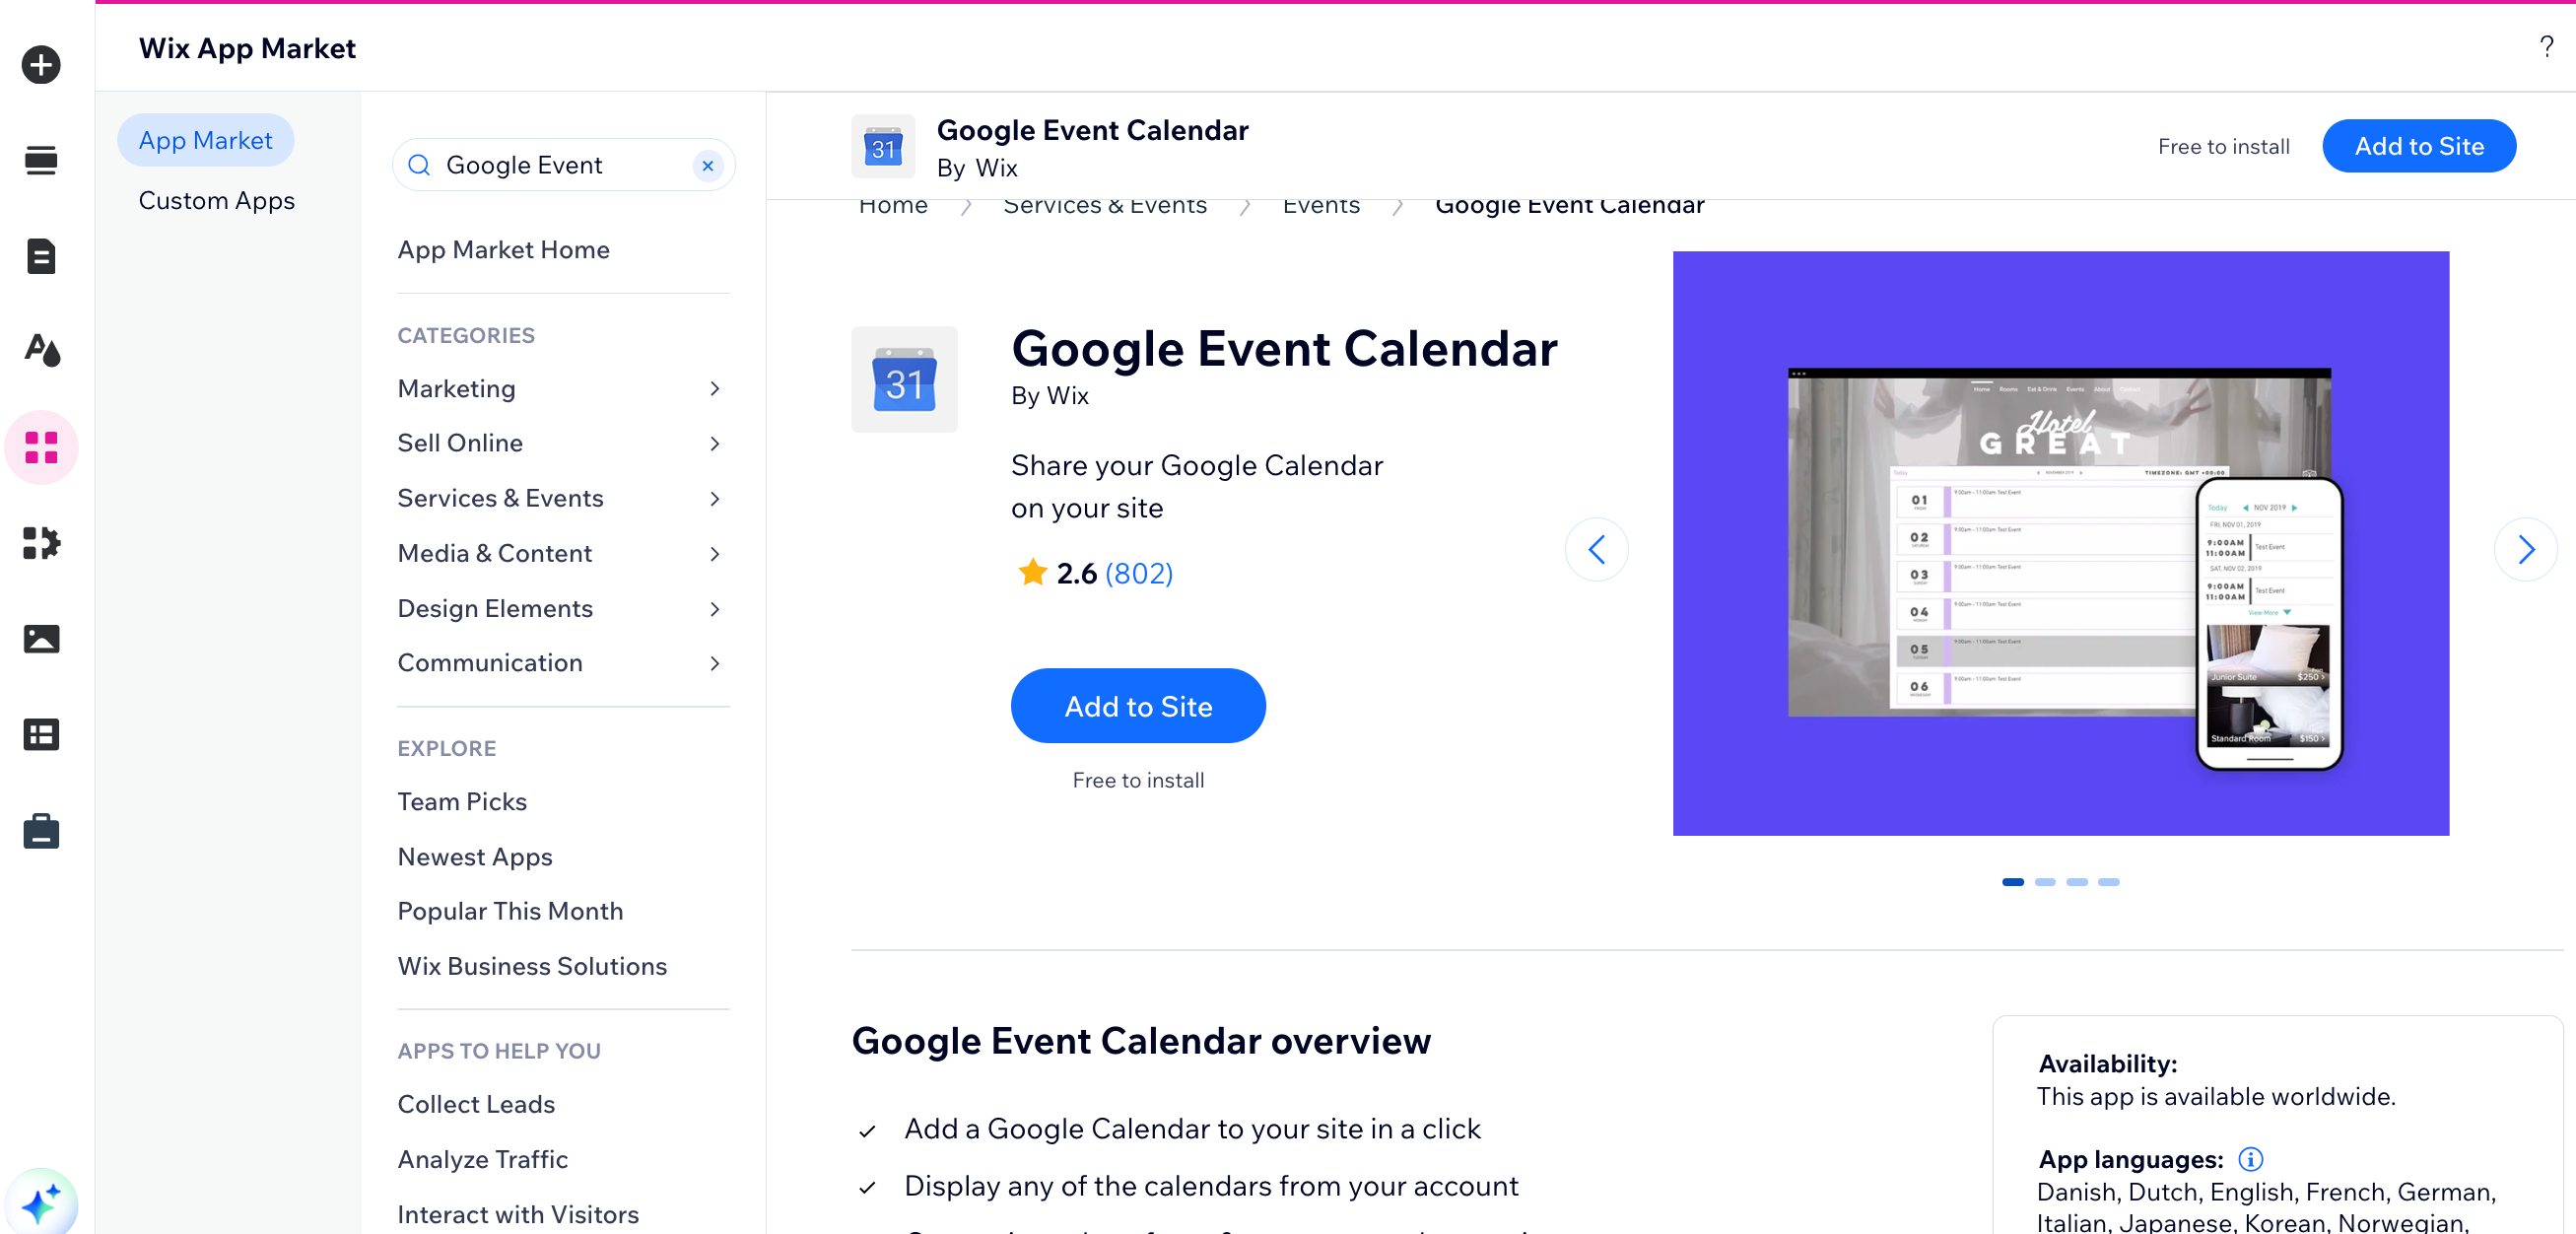
Add the Google Event Calendar app to your site from the Wix App Market.
Wix Editor
Studio Editor
Click Add Apps
 on the left side of the editor.
Search for the Google Event Calendar app in the search bar.
Click Add to Site.
Step 2 | Connect your Google account
You can sign into to any of your Google accounts to sync your event calendar.
To connect your Google account:
Click the calendar in your Editor.
Click Settings.
Click Connect Account.
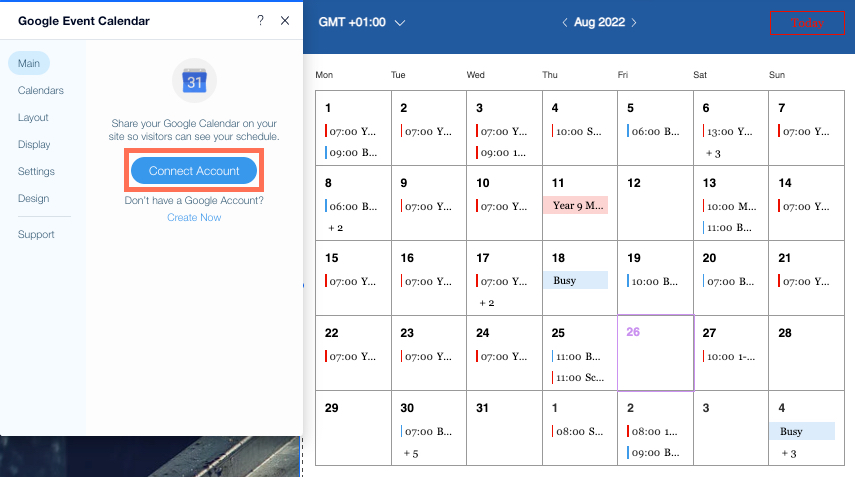
Enter the credentials of the account you want to display.
Click Allow to give access to Wix.com.
Step 3 | Set up your events visibility
Choose which of your events are shown to site visitors, which show as busy, and which events are private.
To select the visibility of your events:
Click the calendar in your Editor.
Click Settings.
Click the Calendars tab.
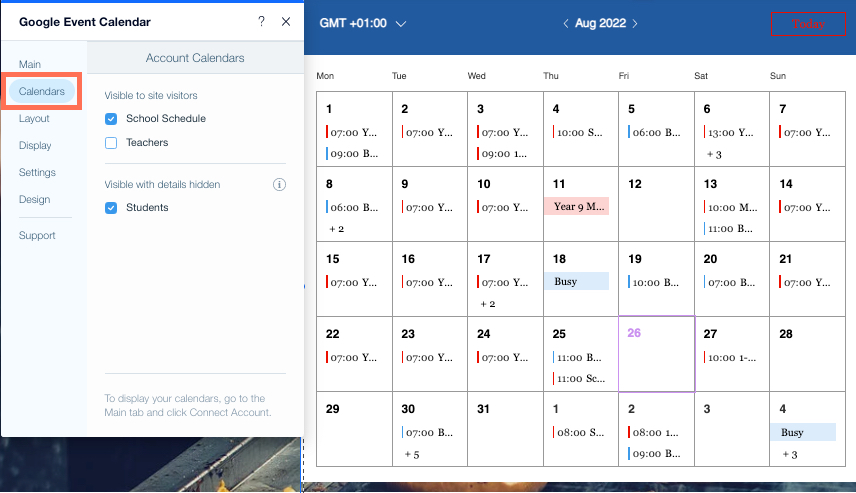
Select the checkboxes next to the calendars you want to be visible to your site visitors, and visible but with details hidden.
Important:
If the Calendars tab shows the message "Not visible to site visitors", your event information is not visible in your site's Google Event Calendar app. To display the details of your events, change your access permissions.
Step 4 | Change the layout, display, and settings
Customize the format of your calendar and how the details of your events appear to site visitors:
In Layout, you can change your calendar to show a month, a week, or the day's agenda.
In Display, you can choose to show time zone, event start time, and how to display private events.
In Settings, you can select 12 or 24 hour time format, which day of the week your calendar starts on, and if your calendar shows your site visitors time zone, or a custom time zone.
To customize your layout, display, and settings:
Click the calendar in your Editor.
Click Settings.
Click to expand steps to customize your layout, display, and settings:
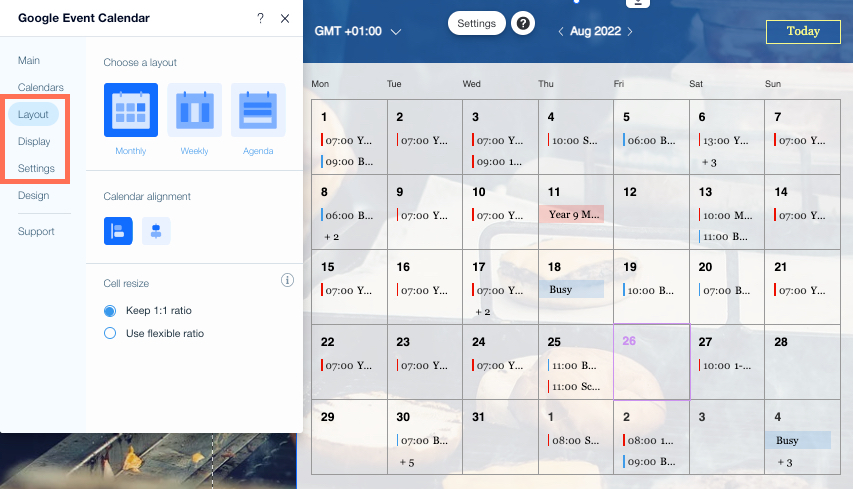
Choose a layout for your calendar
Click the Layout tab.
Choose your layout:
Monthly: Display the entire month in a grid format.Calendar alignment: Choose to align your calendar to the left or center.
Cell resize: Choose how the cell behaves when resized:1:1 ratio: Keeps the cell shape square when you resize the calendar.
Flexible ratio: Changes the cell shape when you resize the calendar.
Weekly: Display the calendar with each day of the week at the top.Calendar alignment: Choose to align your calendar to the left or center.
Calendar height: Choose how the calendar behaves when you add/remove content:Prefixed: Keeps the set height.
Responsive: Automatically stretches your calendar to show all your events each week.
Agenda: Display the calendar in a timeline format with the current day at the top.
Calendar height: Choose how the calendar behaves when you add/remove content:Prefixed: Keeps the set height.
Responsive: Automatically stretches your calendar to show all your events each week.
Update your display settings
Click the Display tab.
Choose your display settings:Show time zone: Click the Show time zone toggle to show or hide the time zone on your calendar.
Show event start time: Click the Show event start time toggle to show or hide the start time on the calendar.
Show private events: Click the Show private events toggle to show or hide private events on the calendar.
Show private events as: Click Private to enter a new name for all private events.
Note: The settings options depend on the layout you choose.
Change your app settings
Click the Settings tab.
Choose your app settings:
Time format: Select how the time is displayed:12 Hours: Morning and afternoon hours appear with an am or pm suffix.
24 Hours: Hours of the day appear as numbers 00:00 - 23:59.
Start week on: Choose a day to start the week.
Language: Select your language.
Time zone: Choose how the time zone is applied:Based on site visitor location: The visitor's location determines the time zone.
Custom time zone: You set the calendar's custom time zone using the available options.
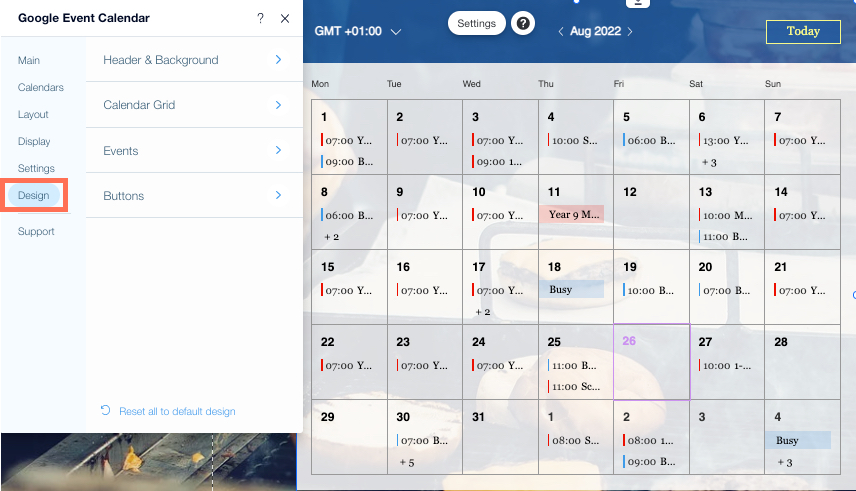
Step 5 | Design your calendar
You can customize your calendar to compliment your site, match your fonts, and align to your brand's color palette.
To design your calendar:
Click the calendar in your Editor.
Click Settings.
Click the Design tab.
Choose the elements you want to customize:
Header and Background
Header background color and opacity: Set a header color and opacity.
Month and year font style and color: Set a text theme, font, and font size.
Background color and opacity: Set a background color and opacity.
Calendar Grid
Calendar Grid: Set a border color and opacity.
Weekday text style and color: Set the weekday text theme, font, and font size.
Date text style: Set a text theme, font, and font size.
Current day color: Set a color to highlight the current day in the calendar.
Current month color: Set a color to highlight the current month in the calendar.
Previous and next month's color: Set the previous and next month's color.
Events
Event name style and color: Set the event name text theme, font, and font size.
Event time style and color: Set the event time text theme, font, and font size.
Event indicator width: Set the event indicator width.
Event corner radius: Set the corner radius.
Event colors: Select 'Use site theme colors', or 'Use Google Calendar colors'.
Buttons
Button style: Choose a button style from the options available.
Font style and color: Set the button text theme, font, font size, and color.
Border color and opacity: Set the button border color and opacity.
Border width: Set the button border width.