Setting up your hotel
Wix Hotels by HotelRunner: Setting Your Open Seasons, Pricing and General Info
Important:
This article refers to the latest version of Wix Hotels by HotelRunner. We are in the process of releasing Wix Hotels by HotelRunner but it's not available to everyone yet. Sign up for more information about Wix Hotels by HotelRunner and join the beta.
For information on the previous version of Wix Hotels, click here.
Manage your property's open seasons, pricing conversions, child pricing policy and more using the General Info section of your site's dashboard.
Step 1 | Add your general info
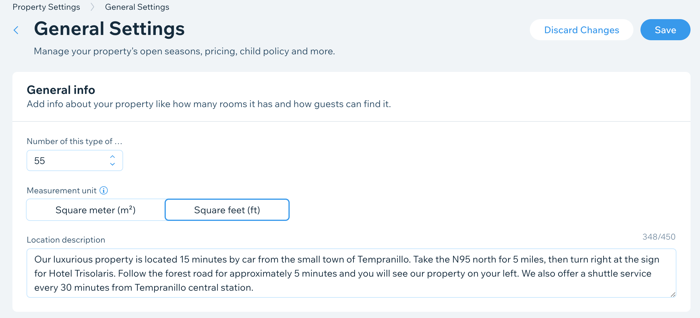
In the General Info section, start by adding the number of rooms, measurement units you use, and a brief description of your property. You can also include directions and transportation services you offer in the description.
To add your General Info:
Go to Property Settings in your site's dashboard.
Click Manage General Settings.
Enter the total number of rooms you offer in the Number of this type of room field.
Select the relevant Measurement unit you use to describe your rooms: Square meter or Square feet.
Enter your Location description.
Click Save at the top.
Step 2 | Set your opening seasons and check-in and check-out times
Now you can set when your property operates and set your check-in and check-out times.
To set your opening seasons and times:
Go to Property Settings in your site's dashboard.
Click Manage General Settings.
Scroll down to the Season and time.
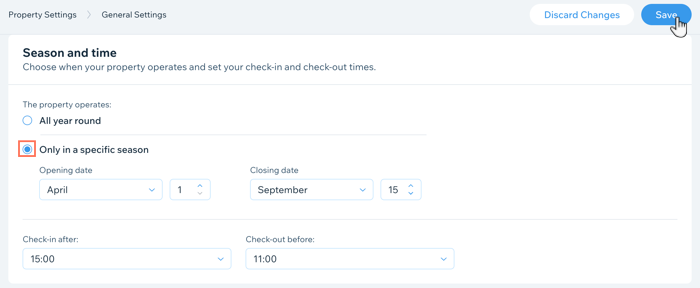
Choose your opening season under The property operates:All year round: Choose this option if you don't close during the off-season.
Only in a specific season: Choose this option if you operate only during a specific season of the year. Select your opening and closing dates in the drop-downs.
Select your Check-in after time from the drop-down.
Select your Check-out before time from the drop-down.
Click Save at the top.
Step 3 | Set your pricing rules for currency conversions
Next, set how you want to calculate your prices when they are converted into foreign currencies.
To set your pricing rules for currency conversions:
Go to Property Settings in your site's dashboard.
Click Manage General Settings.
Scroll down to the Pricing.
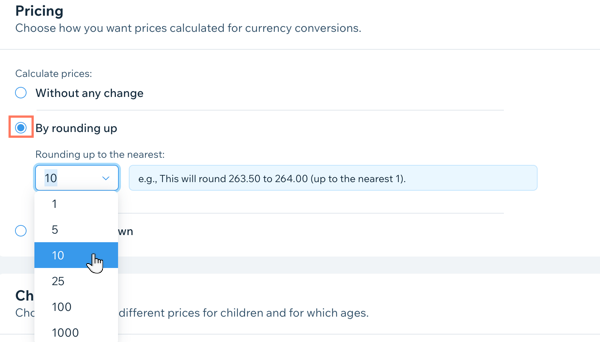
Choose how you want to Calculate prices:Without any change: Select this option to allow for precise currency conversions.
By rounding up: Select this option to round your prices up when converting to foreign currencies. Select the relevant number from the Rounding up to the nearest drop-down.
By rounding down: Select this option to round your prices down when converting to foreign currencies. Select the relevant number from the Rounding down to the nearest drop-down.
Click Save at the top.
Step 4 | Add your child pricing policy
With your currency conversion rules set up, you can now add your child pricing policy. You can also add several different age ranges. For example, you may offer free stays and meals for children under 5 years old. You may also offer discounted rates for children between 6 and 12 years old, and full adult rates for children 13 years old and older.
Tip:
When you create or update your child pricing policies, make sure to update your rate plans for the policies to take effect.
To add your child pricing policy:
Go to Property Settings in your site's dashboard.
Click Manage General Settings.
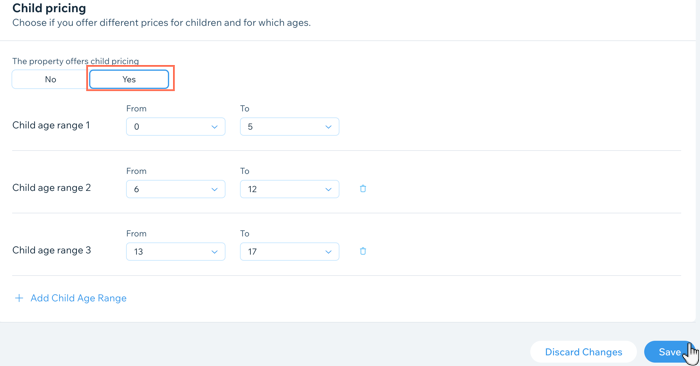
Scroll down to the Child pricing.
Choose the relevant option under The property offers child pricing:No: You do not offer discounted rates for children.
Yes: You offer discounted rates for children:Select the relevant age range using the drop-downs.
(Optional) Click + Add Child Age Range and select the relevant age range using the drop-downs. You can repeat this step as many times as you need.
Click Save.