


Using the Wix app for Wix Events
Wix Events: Creating Membership Plans Using the Wix App
Wix Events integrates with Wix's Pricing Plans app so you can provide membership plans for your guests. You choose how many plans you want to offer (e.g. Gold Plan that gives 30% off all events and a Silver Plan with 20% off).
You also have the freedom to offer different discounts (or no discount) for specific events. For example, you can create a plan that gives members 30% off afternoon concerts and 20% off all evening concerts.
When customers go to buy tickets to your event, on your site or through the Spaces by Wix app, they have the opportunity to purchase the membership plan you created.
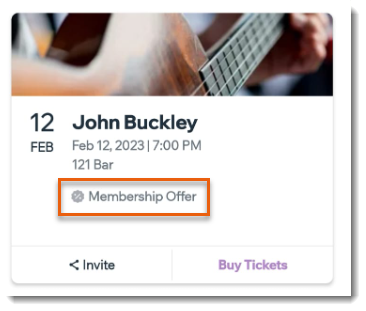
Before you begin:
Create the ticketed event you want to connect to membership plans and create event tickets.
Step 1 | Create a membership option for this event
Start by adding a membership option for your event. If this is the first time you're using the Pricing Plans app on your site, the app will automatically be added in the background.
If you're new to pricing plans, you won't have any ready plans to select. When you finish these first steps, you're directed to create your first plan. Next time you create a membership option for an event, you'll be able to choose a plan you already created and / or create additional plans.
To create a membership option:
Go to your site in the Wix app.
Tap Manage
 at the bottom.
Tap Events.
Select Published Events.
Select the relevant ticketed event.
Tap the Manage tab.
Select Promotion.
Select Memberships.
Tap Create Membership.
Step 2 | Create or connect membership plans
You can now create one or more new plans. Plans you create from here are automatically connected to this event and can be connected to other events in the future.
If you already have existing plans, you can also connect them to this event.
Choose what you want to do:
Create a new plan
Enter the plan's name and description.
List what's included in the plan:Enter the first feature that comes with membership (e.g. First drink free).
Tap + Add More to add additional features.
(Optional) Connect additional events to this plan:
Note: The event you're working on is already connected to the plan.Tap Manage Events.
Select the checkboxes next to events you want to connect to this membership plan.
Enter the discount amount (e.g. 25%) for each event.
Enter the maximum number of tickets a guest can apply the discount to.
Tap Done.

Choose your Payment Options:
Recurring payments: Customers pay each week, month, or year until your plan ends.Enter the price per payment.
Tap the Payment Frequency drop-down and select an option (e.g. monthly).
Tap the Length of plan drop-down and select an option (e.g. plan lasts 6 months).
(Optional) Tap the Free Trial toggle to enable it and select the number of free days.
One-time Payment: Customers pay one amount for the duration of the plan.Enter the plan price
Tap the Length of plan drop-down and select an option (e.g. plan lasts 6 months).
Free plan: Customers do not pay.
(Optional) Add any of these Advanced Settings:Free trial: Enable the toggle to create a trial plan.
Single purchase only: Enable the toggle to limit this plan to 1 purchase per customer.
Allow plan cancellation: Enable the toggle to let guests cancel a plan from their Members Area account.
Custom Start Date: Enable the toggle to let guests decide when the plan goes into effect.
Plan Policies: Enter a policy for this plan that appears on the checkout page.
Collect additional info at checkout: Add a custom form with info you want to collect from your guests.
Customize the Thank You page: Edit the message guests see after purchasing the plan.
Tap Save at the top.
Connect plans you already created
Connect one or more plans you already created. For each one, you can decide the discount offered for this event.
Tap Connect under the relevant plan.

Enter the discount percentage for this event.
Enter the maximum number of tickets a guest can buy with this plan.
Tap Done.
(Optional) Create or connect additional plans.