


Creating your event
Wix Events: Creating a Private Event
When you publish an event, it's visible to all site visitors for viewing and registration. For private or exclusive events, you can limit access by approving site members or password-protecting the event page.
This ensures that only invited guests or approved members can participate, helping you maintain privacy and tailor the event experience to a specific audience.
In this article, learn how to:
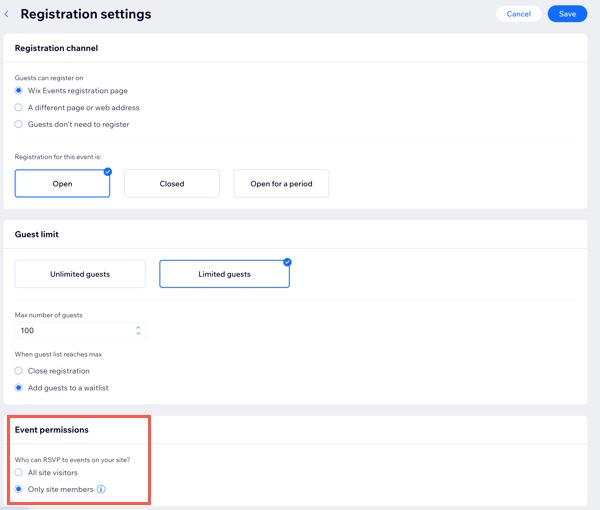
Limiting registration to approved site members
You can create an event that anyone visiting your site can see, but only approved members can register. With member-only events, only users who have signed up as members can RSVP.
Before you begin:
Make sure you have a Members Area added to your site.
To limit registration to approved site members:
Go to Events in your site's dashboard.
Click Manage next to the relevant event.
Click the Settings tab.
Click Edit next to Registration settings.
Select Only site members under Event permissions.
Click Save.
Set up your site signup form so only people you approve can become site members.
Note: This prevents site visitors who aren't invited to your private event from logging in and registering.(Optional) Hide the Events Details page from search engines if you don't want a specific page to appear in search results.
Password protecting event pages
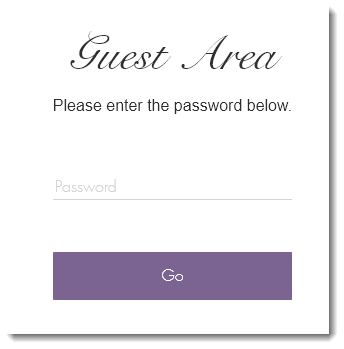
Events include a main event page, an Event Details & Registration page, and a Schedule page. You can password-protect any of these pages to restrict access. When a site visitor tries to view a protected page, they will be prompted to enter the password.
To password protect event pages:
Wix Editor
Studio Editor
Go to the Events page:Click Pages & Menu
 on the left side of the editor.
Click Event Pages.
Click the Settings icon
 next to relevant event page (e.g. Schedule, Events, Events Details & Registration).
Click the Permissions tab.
Click Password holders under Who can access this page?
Enter the page's password.
(Optional) Customize the design of the password window.
(Optional) Hide the Events Details page from search engines.
FAQs
Learn more about creating a private event.
Can I create a private link to an event?
Although Wix Events doesn’t offer a built-in option to create a private link, you can implement a workaround in the editor.
Choose which events to display on the new page.
Click the More Actions icon
 next to the new page.
Click Settings.
Click the Permissions tab.
Click Password holders under Who can access this page?
Enter the page's password.
Copy the page link and share it with guests, along with the password.
Note: Make sure this event is removed from other widgets on your site.
Can I create multiple private events with different guest lists?
Yes. You can host multiple private events with different guest lists by creating separate event pages for each. Password protect each page and share the unique password with the relevant guests.
Do I need to password protect each page of an event?
No. One password on the main event page protects all other pages.