


Using the Wix app to manage your bookings
Wix Bookings: Offering Waitlists Using the Wix App
Avoid losing potential clients who want to book your most popular classes by adding them to a waiting list. If a client tries to book a fully booked class session on your member app, they can choose to join a waitlist rather than seeing the 'Book Now' button.
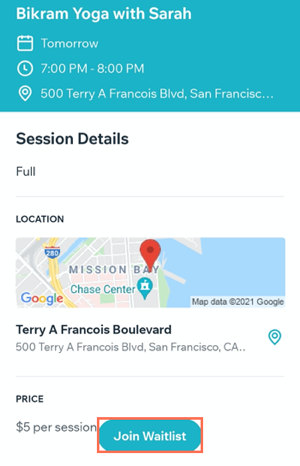
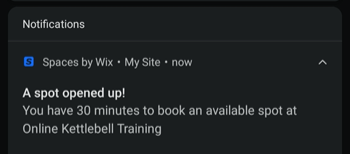
If a spot in the class frees up, the first person on the waitlist receives a notification from their member app. You can choose how long the member has to join the class before the next person on the waitlist is offered the spot. If no one on your waitlist chooses to book the class, the spot opens to the general public.
Note:
Members can only join a waitlist through one of the Wix member apps. If they are not members, invite them to join.
In this article, learn more about:
Enabling the waitlist for your classes
You can enable the waitlist for your classes from the Booking policies section of the Wix app. This allows you to offer waitlists for your most popular classes, all from your mobile device.
To enable the waitlist for your classes:
Go to your site in the Wix app.
Tap Manage
 at the bottom.
Tap Booking Services.
Tap the Settings tab.
Tap Booking Policies.
Tap the More Actions icon
 next to the relevant policy.
Tap Edit.
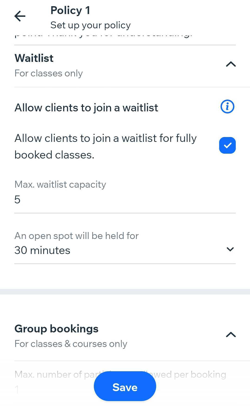
Scroll down and tap the Allow clients to join a waitlist checkbox.
Tap the Max waitlist capacity field and enter the maximum number of clients you can have in the waitlist at one time.
Tap An open spot will be held for and choose a booking time limit before the spot is offered to the next client on the waitlist.
Tap Save to confirm.
Managing your waitlist participants
Add clients to the waitlist for a session or book them in when a slot becomes available using your Wix app.
To manage your waitlist:
Go to your site in the Wix app.
Tap Manage
 at the bottom.
Tap Booking Calendar.
Tap to select the relevant session.
Tap Manage Participants.
Choose what you want to do next:
Add a participant to the waitlist
Tap the Waitlist tab at the top.

Tap the Add icon
at the top right of the screen.
Tap to select the relevant member.
Tap Add Participant to confirm.

Add a participant in the waitlist to a session
Tap the Waitlist tab.
Tap the relevant member to add to the session from the waitlist.
Tap Add to session.

Tap the Payment drop-down under How will you charge your client? and tap the relevant payment option.
(Optional) Tap Notify participant with an email to send an email to your client with the session details.
(Optional) Tap Mark as checked-in to check your client in for the session when you move them from the waitlist to the participants list.
Tap Add Participant to confirm and notify the client that they have been added to the session.

Remove a participant from the waitlist
Tap the Waitlist tab.
Tap the relevant member you wish to remove from the waitlist.
Tap Remove from waitlist.
