


Working with Google Workspace Business Emails from Wix
Google Workspace: Setting Up Business Email Users
Set up your Google Workspace account to start sending and receiving emails from your personalized business email address. You can manage and organize your incoming emails by setting up different business email addresses for different parts of your business.
For example, create individual email addresses for staff members, or separate emails for different departments (like support@mycompany.com or sales@mycompany.com).
Note:
In order to set up additional Google Workspace business emails, you must first purchase additional business emails.
Setting up an admin user
After purchasing your business email subscription, you'll need to set up an admin user account. This allows you to start sending and receiving business emails and using Google Workspace services and tools.
To set up a business email user:
Go to Business Email in your Wix account.
Click Set Up User.
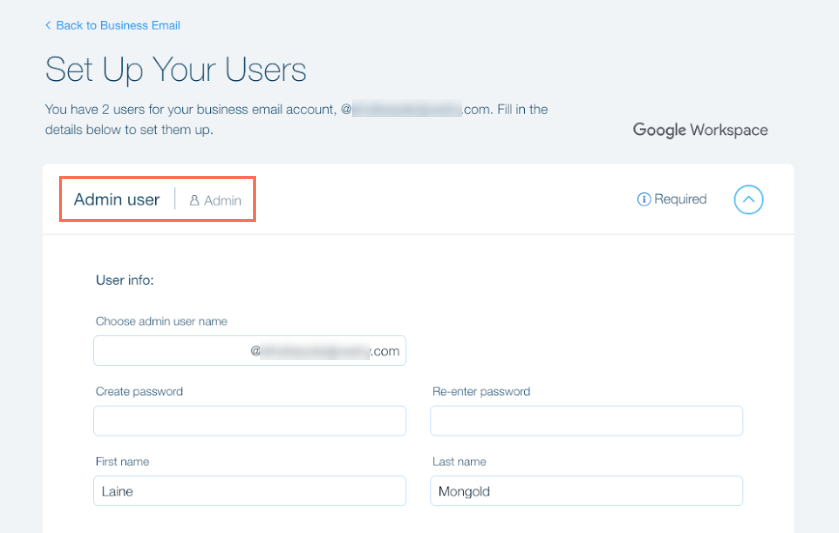
Fill out the user info in the form.
Note: You'll see Admin user when setting up your first user. The admin user can add more users and make changes to the Google Workspace account.
(Optional) Set up additional emails if you purchased more than one business email user.
Tip: You can come back to this later using the 'Setting up additional business emails' steps below.Click Submit.
Setting up additional business emails
Set up additional emails for individual staff members, or separate emails for different departments. You can add new users at any time after you set up your admin user account.
To set up additional business email users:
Go to Business Email in your Wix account.
Click Show User Info on the relevant account
Click the More Actions icon
 next to the account you want to set up
Select Set Up User.
Sign in to your Google Workspace account:Enter your email address.
Click Next.
Enter your password.
Click Users.
Click Add new user.

Enter the user details and set a password (optional).
Click Add.
What's next?
It can take up to 24 hours for Google Workspace services to be available to the new user. If the user attempts to use a service that's not yet available, they'll see a message that they don't have access to it.
FAQs
We are here to help with all your questions. Click a question below to learn more:
How will I be billed for any additional business emails I purchase?
When purchasing an additional business email, you are billed immediately and the renewal occurs on the same date as your existing, original business email subscription. The initial charge covers the period from when you add the additional business email up to the renewal date of the original business email subscription.
Can I purchase as many business emails as I want for a domain?
There is a limit of 300 business emails. Additionally, there is a limit of 20 emails purchased per transaction.