


wix studio
Adding and Customizing Lottie Animation Files
Lottie Files is a great source for high-quality animations to add to your client's site. After importing the animation through its URL, you can resize it as needed and decide whether or not it plays in a continuous loop.
In this article, learn how to:
Before you begin:
In order to import an animation, you need have a LottieFiles account.
Importing animations from LottieFiles
Add as many Lottie animations as you need to liven up your design. After saving an animation to your workspace in LottieFiles, you can copy the URL and paste it directly into the Studio Editor. The animation is instantly added as a new page element.
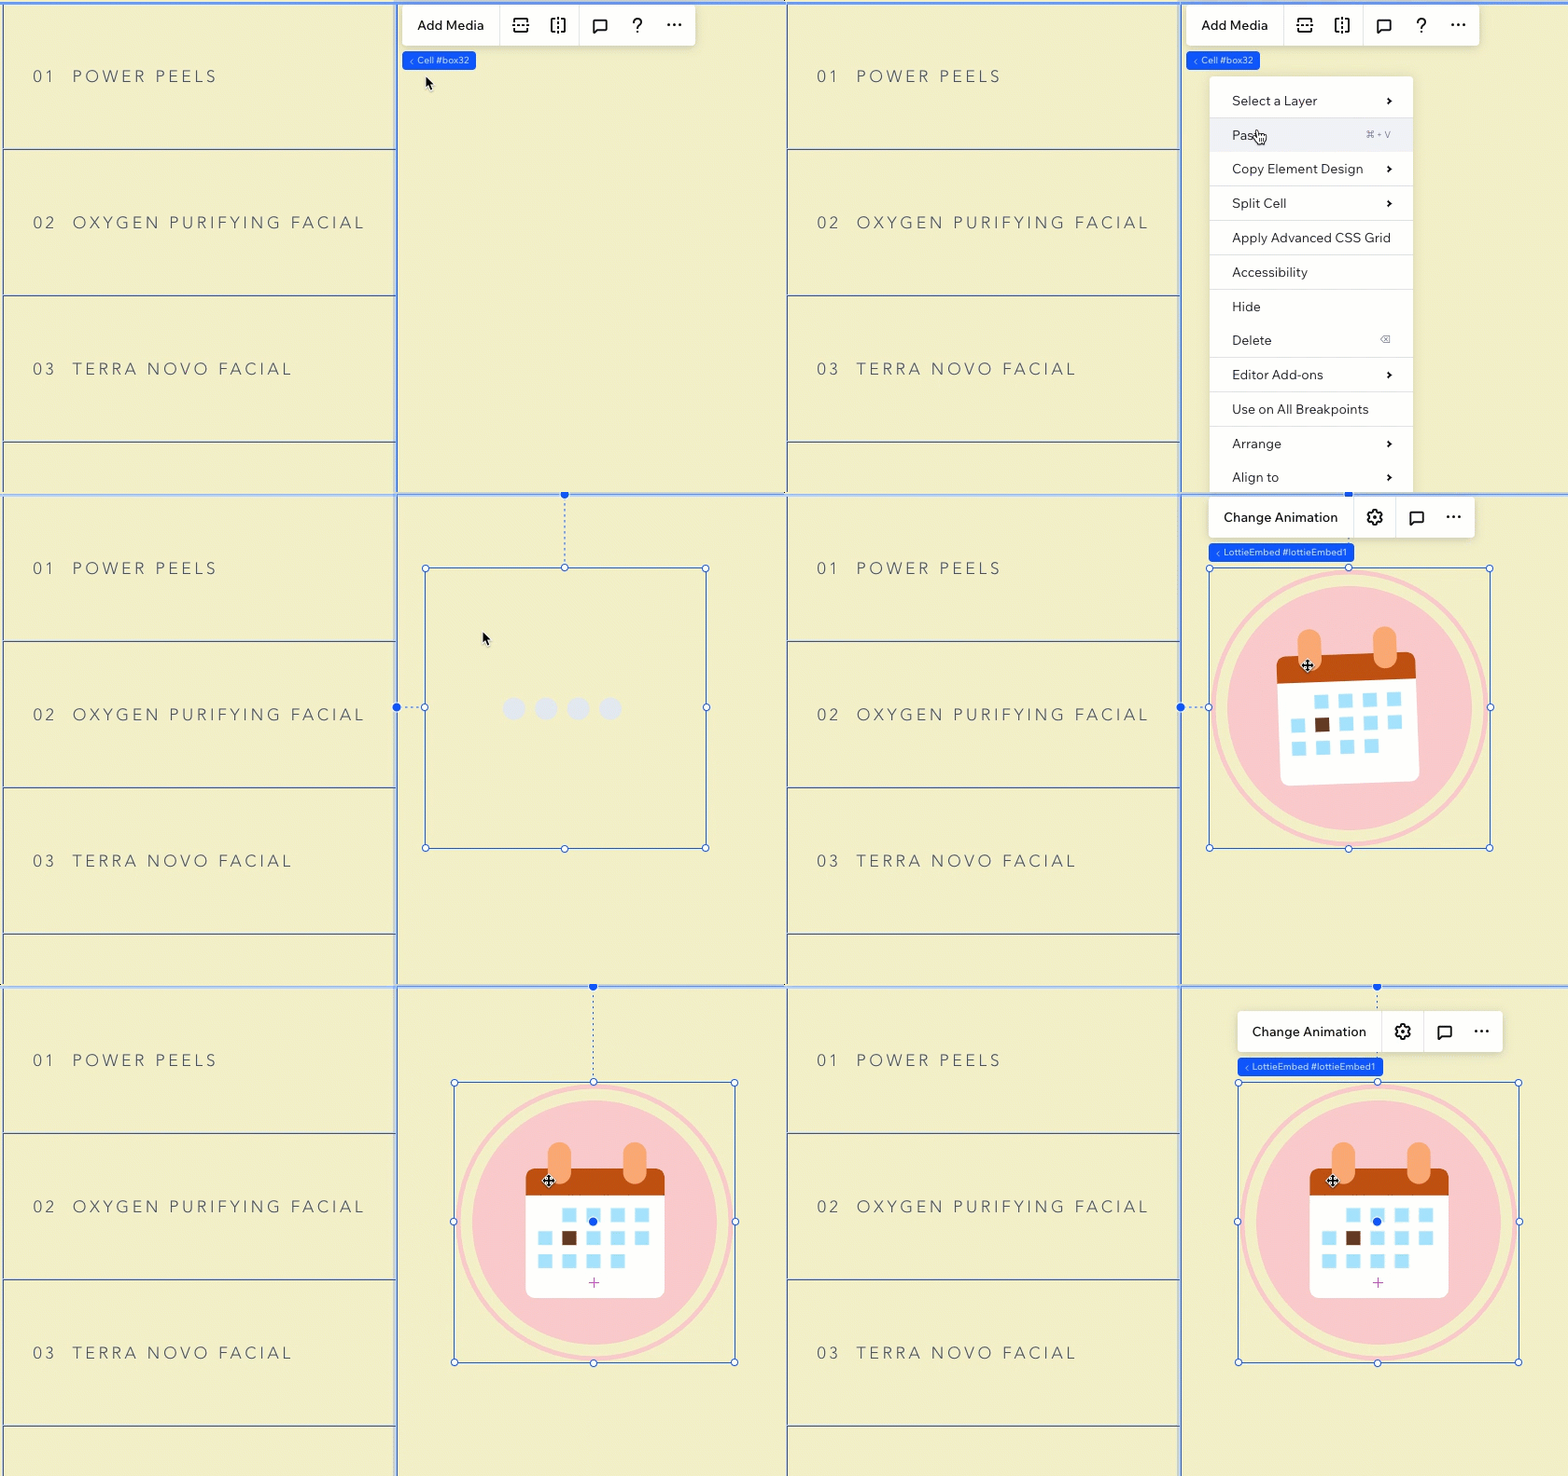
Alternatively, you can add a new Lottie Animation element and paste the relevant URL in the Settings panel.
To add a Lottie Animation element:
Click Add Elements
 on the left side of the Editor.
Click Embed & Social.
Click Lottie Animations.
Click the Add to Site icon next to Lottie Animation.

(In a separate browser tab) Copy the saved animation's URL from your LottieFiles account.
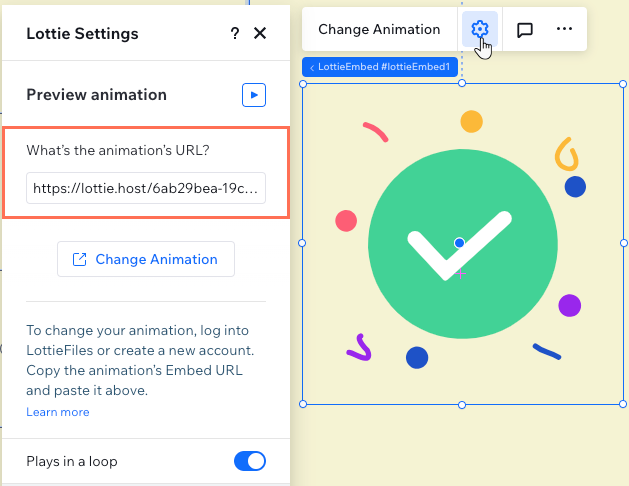
Paste the animation's URL in the Editor:Click the Lottie Animation element in the Editor.
Click the Settings icon .
.
Paste the URL under What's the animation's URL?.
Press Enter on your keyboard.
What's next?
Click Preview animation at the top of the Settings panel to see how it looks before going live.
Working with breakpoints:
You can customize the size of the Lottie animation per breakpoint, so it looks ideal on every screen.
Changing the Lottie animation
If you want to switch to a different Lottie animation, you can easily do so by pasting the new URL in the element's Settings panel.
To change the animation:
Select the Lottie Animation element.
Click the Settings icon
.Paste the new animation's URL under What's the animation's URL?.

Setting the animation to play in a loop
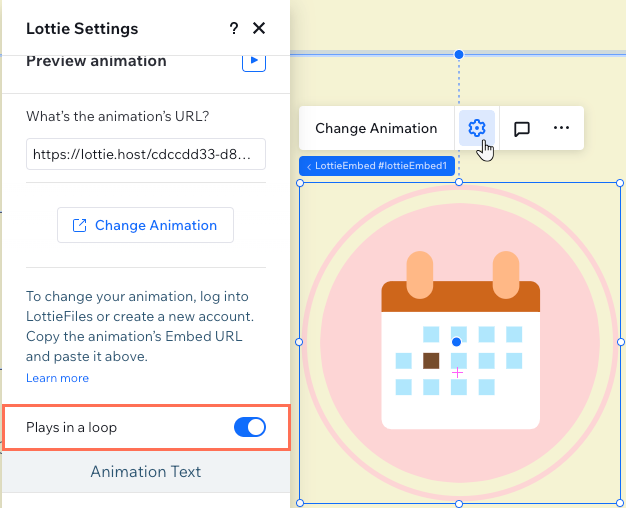
You can choose how the Lottie animation plays on your client's site – only once, or in a continuous loop.
To set how the animation plays:
Select the Lottie Animation element.
Click the Settings icon
.Click the toggle next to Plays in a loop to turn it on or off.
Adding alt text to a Lottie animation
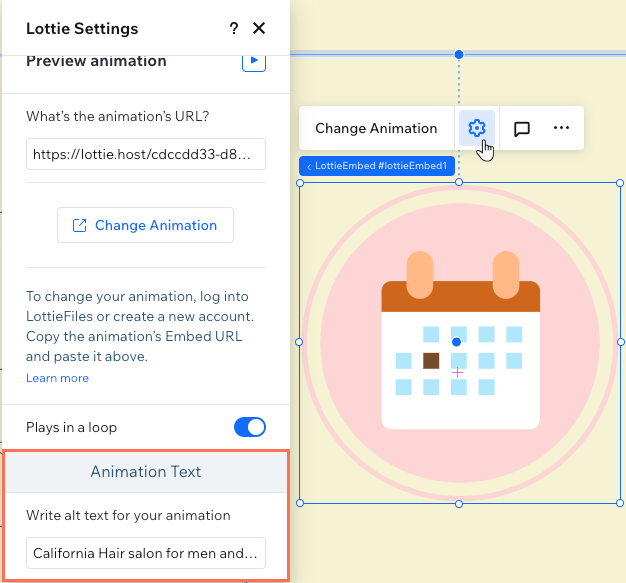
From the Settings panel, add alt text to briefly describe the animation and / or the site. This can improve the site's SEO ranking while helping users with screen readers to understand what the animation is showing.
To add alt text to your animation:
Select the Lottie Animation element.
Click the Settings icon
.Scroll down to Animation Text.
Enter the text description under Write alt text for your animation.
Press Enter on your keyboard.
You should know:
Lottie animations are automatically converted to JSON files when you import them to a Wix site. For technical reasons, not all of the file fields can be contained. Lottie animations may therefore look slightly different on a live Wix site (e.g. displaying a reduced range / amount of motion).