Using the Studio Editor Tools
About CSS Editing
Add your own CSS code to style elements and their individual parts. CSS expands your toolbox while building sites for clients, as you can apply design options and behavior changes that aren't available in the Editor.
Tip:
Check out our Wix Studio Academy webinar on enhancing your design with CSS. For more information about styling with CSS, see the MDN CSS reference docs.
Get more control of your design
Adding CSS to elements opens a whole new range of styling possibilities. It allows you to change the design of an element to your liking, which is especially useful for options that aren't yet available in the Editor.
CSS also gives you the freedom to animate elements as you like. Create your own animations with the properties of your choice, and apply multiple animations to an element if needed.
Another important use of CSS is maximizing responsiveness. For example, use media queries (based on viewport size or device capabilities) to ensure an element looks ideal on all screens.
Note:
Check our supported elements list to make sure you can customize an element with CSS.
Change particular parts of elements
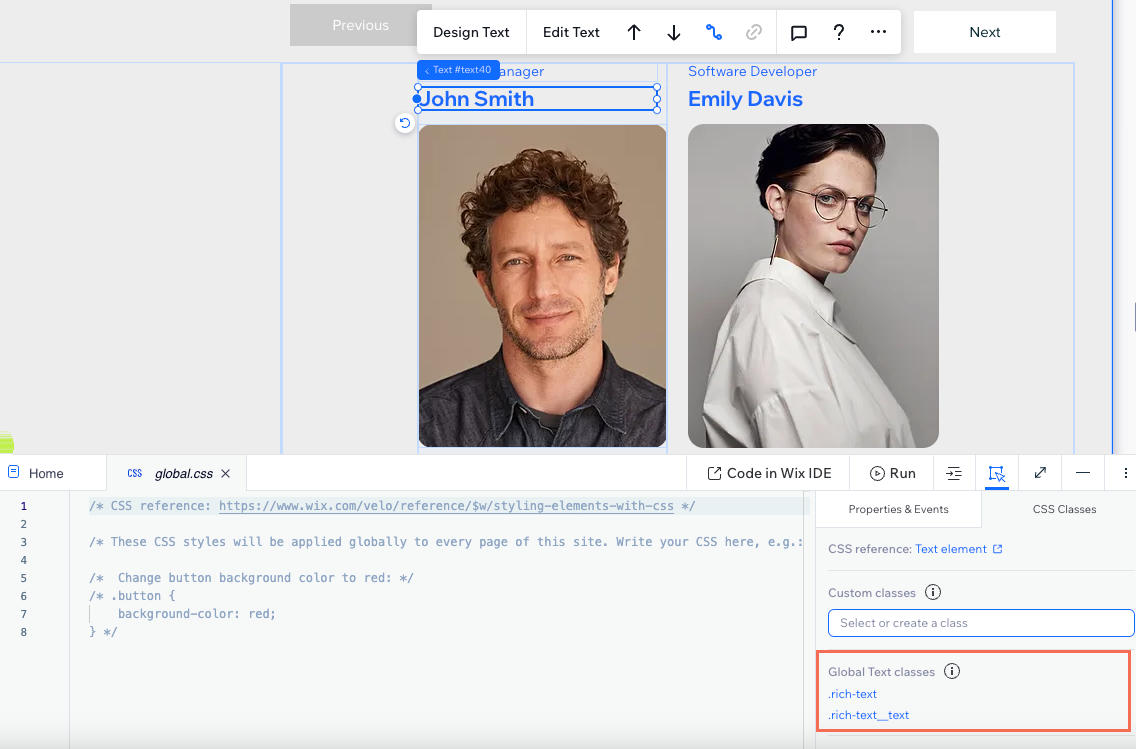
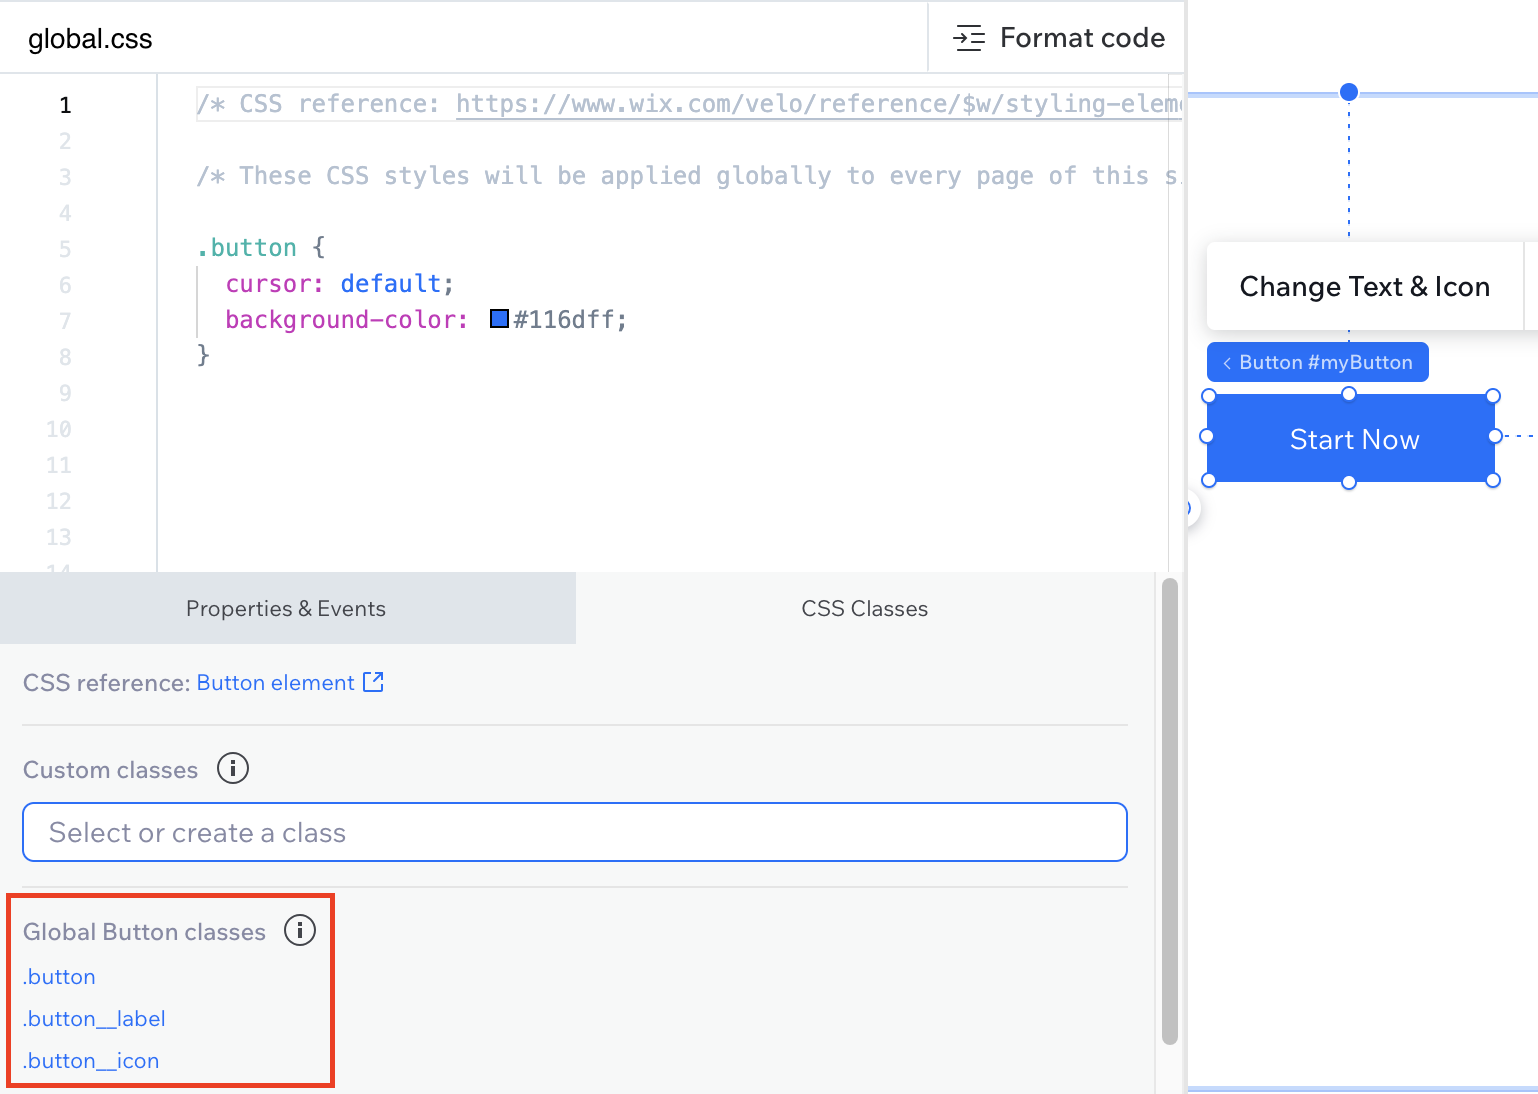
In the Studio Editor, elements are divided into semantic classes so you can customize the individual part you need. For example, buttons have 3 CSS classes:
.button: The entire button element.
.button__label: The text on the button.
.button__icon: The icon on the button.
Once you pick a class from the list, it gets automatically added to the code so you can start working.
Which classes are available?
See the full list of elements and their classes.
Create custom CSS classes
You can also add your own CSS classes to the global.css page. This lets you apply styling and formatting to the elements that you designate with your custom class, rather than all instances of one specific element. Learn all about custom classes
One global page for all CSS edits
The Code panel in the editor includes a global CSS page for all your edits. The code on this page applies globally, to any element with the relevant class, on all site pages.
The CSS code you add to this page overrides selections you make in other panels in the editor. For example, if you use CSS to change the background of all buttons, it overrides the background you set in the Inspector panel.
How to get started
Access the CSS section in the Code panel:Click the Code icon
 on the left side of the editor.
(If this is your first time on this site) Click Start Coding.
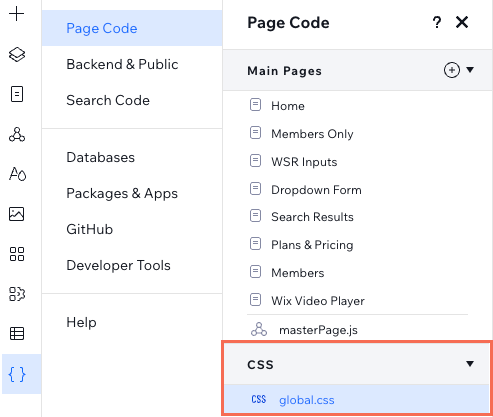
Click Page Code.
Click global.css under CSS.
Start styling an element:Select the relevant element on the canvas.
Note: Make sure the CSS panel is still open.
(In the CSS panel) Select the relevant class under CSS Classes:Our classes: Select a class under Global classes.
Your own class: Type it under Custom classes.
Add your CSS code.