


Dropshipping with Wix Stores
Wix Stores: Dropshipping with Spocket
Spocket is a dropshipping platform that connects product suppliers with store owners.
After you connect your store to Spocket, choose which products you want to sell and then add them to your store. The supplier holds the inventory and takes care of the shipping for you.
Step 1 | Connect to Spocket
To get started, add the Spocket app to your site.
Wix Editor
Studio Editor
Dashboard
Click Add Apps
 on the left side of the editor.
Search for the Spocket app in the search bar.
Click Add to Site.
Click Agree & Add.
Note: An email is sent to the email address associated with your Wix account. Go to the email and click Verify my email.
Step 2 | Add products to your import list
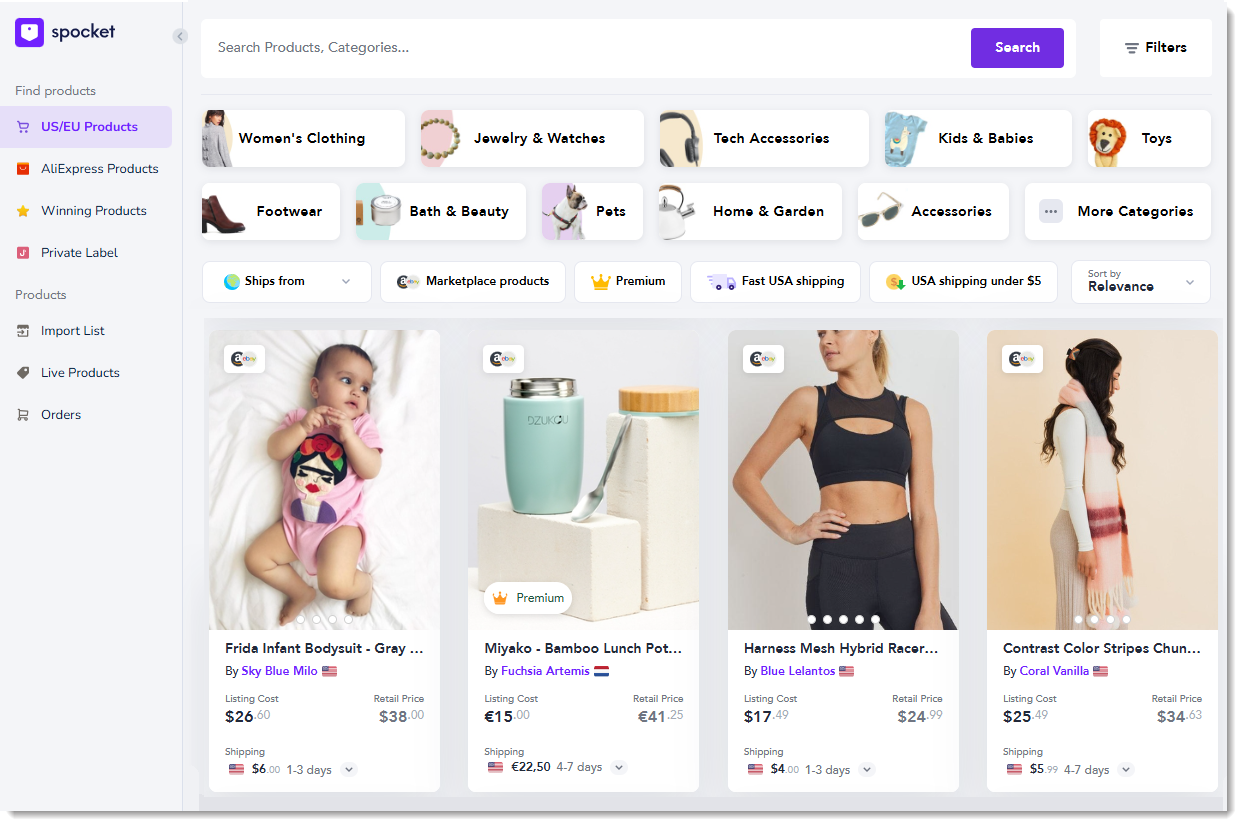
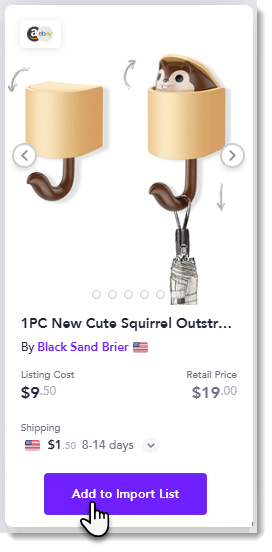
Log in to Spocket and check out the search page. There you can browse and find the perfect products to add to your store. Click to add the products to your Import List.
Tips:
Products added to the Import List do not yet appear in your Wix store.
Premium products are not available with a free Spocket plan.
Step 3 | Customize products and product options
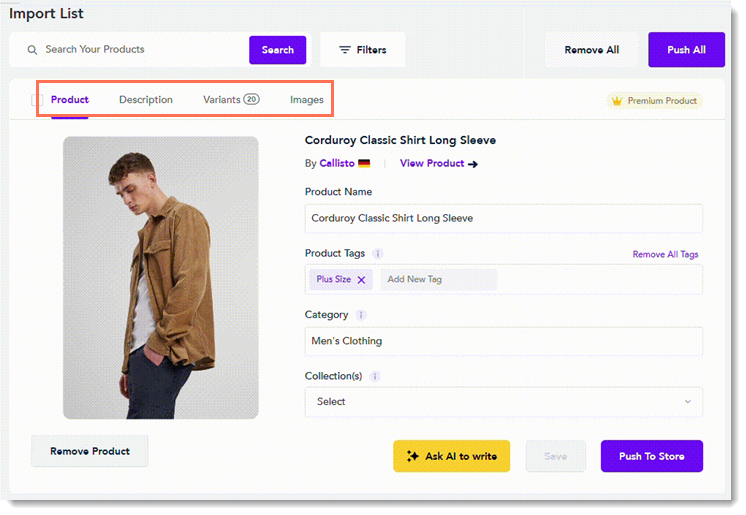
Before you add a product from the Import List to your Wix store, you can customize it. To start, go to the Import List tab in the Spocket dashboard. There, you can choose a product and make any customization you like. You can edit the product name, add a product to one of your Wix store categories, edit the product description to suit the tone of your brand, remove or reorder images, and more.
Make sure to check out all the available tabs.
Tip:
Click the Variants tab to view product options. There you can deselect the checkbox next to any variants you don't want to sell.
Step 4 | Add products to your Wix store
Now go to your Import List to add products to your Wix site.
To add all the products at once, click Push All at the top of the Import List.
To add individual products, click Push To Store under the relevant product.
Learn more about importing products to your store.
Step 5 | Set pricing
There are two ways to set pricing in Spocket. First, you can set global pricing rules. These are rules that determine your default price markup and margins for products.
Learn how to set pricing rules
Additionally, you can override the pricing rules by setting a specific price for a product. To do so, from the Import List, select a product and go to the Variants tab. There you can enter a Sales Price for each variant you want to edit.
Notes:
Every product has at least one variant.
When you set Global Pricing Rules, the rules won't apply to products already in your Import List or active on your store. To apply the rules to these product, you can remove them from your Import List and re-add them.
Important:
When a price is set through a price rule, it automatically goes up or down when the supplier changes the price. We recommend using price rules to help your price margins stay consistent.
When you manually edit a price, and the supplier modifies the price, you get a notification in Spocket about the change. You can then decide whether you want to change the price or leave it as is.
Step 6 | Set up shipping
In the search page, you can view the supplier's basic shipping price.
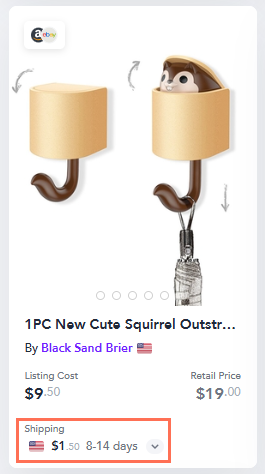
Click the product image to view more information on shipping times and charges to different destinations.
Suppliers' shipping rates do not automatically sync with your Wix store, so you'll need to create shipping rules in your Wix dashboard. You may want to charge for shipping or increase the product price so that it covers the shipping cost and then offer free shipping - the choice is yours. You can use the supplier's rates and destinations to help guide you.
Wix Stores' shipping rates by product rule allows you to create product groups and charge different rates for different groups.
To set shipping rules, head over to your Wix dashboard. Learn more about setting up shipping rules
Step 7 | Pay for Spocket orders
After you make a sale of a Spocket product, you need to pay the supplier for the order to set the fulfillment process in motion.
To pay for Spocket products so they can be shipped:
Go to the My Orders tab in the Spocket dashboard.
Select the relevant order.
Click Checkout.
Click Place Order.
Learn more about paying for Spocket orders.
FAQs
Click a question below to learn more about Spocket.
What happens after I complete payment?
After you pay for the order, the following happens:
The supplier ships the order to your customer. The order is "blind shipped" in neutral packaging.
A shipping confirmation email including the tracking number is sent to your customer.
Note: Sending shipping confirmation emails when an order is fulfilled by a third party can be disabled in the eCommerce Settings tab.The tracking number and link as well as the shipping carrier name are added automatically to the relevant order in your Wix dashboard.
How do I handle an order containing my own products and Spocket products?
If an order contains your own products and Spocket products, the tracking number for the Spocket shipment is added automatically. You can then fulfill the rest of the order (your products) in the regular way. Learn more about managing tracking numbers for mixed orders (dropshipping and your own products).
What happens if a suppliers discontinues a product I sell?
When a product is discontinued, you receive an email to let you know.
How can I remove a product I've been selling?
Go to the My Products tab in the Spocket dashboard and click Remove From Store under the product.