


Using the Wix app for Wix Events
Wix Events: Customizing Events Displayed in the Member Apps
The Wix mobile apps include the Wix app, where you can run your business on the go, and the Spaces by Wix app that lets people connect with your business and community. Through these apps, Wix Events is fully accessible on mobile to both you and your members.
You can customize what your members see in the member apps.
Learn more about member view customizations:
Make general customizations (color, logo, etc.)
Making general customizations to Spaces by Wix
Customize the way members see your site in the Spaces by Wix apps. Add your logo for a personal touch, change the colors to match your style, decide which tabs are displayed and more.
To customize your site in Spaces by Wix:
Go to your site in the Wix app.
Tap Manage
 at the bottom.
Tap Mobile App.
Tap Edit.
Do any of the following:Customize the header
Edit the navigation tabs
Add new elements to your tabs
Manage your tab elements
Customize your site info
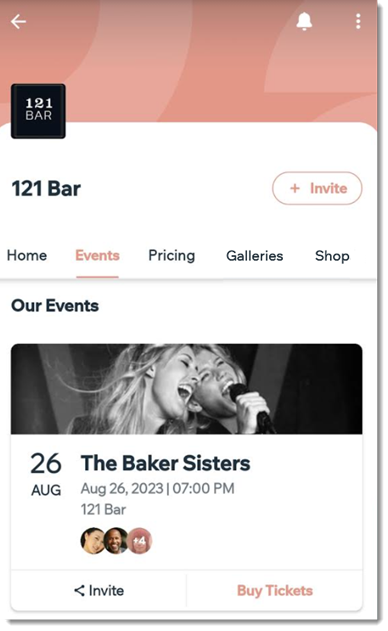
Customizing the Events Lists
You can display your events in one or more tabs. After you select which events appear in each tab, you can customize the display. For example, you can show or hide the event image or edit the button text.
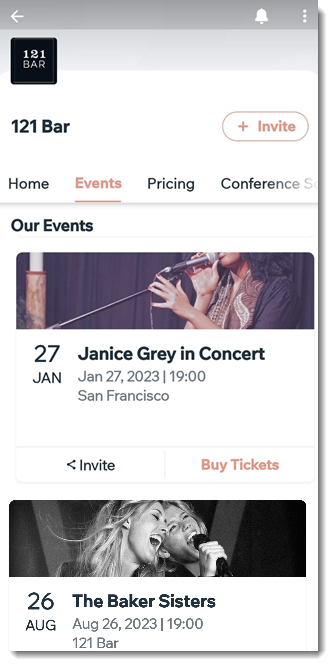
To edit the events tab:
Go to your site in the Wix app.
Tap Manage
at the bottom.Tap Mobile App.
Tap Edit.
Tap the Events tab.
Tip: You may have previously changed the tab name.Tap the Edit icon
 .
.Tap Customize element.
Choose what part of the event list you want to customize:
Display events in a different tab
You can display this list of events in another tab.
Tip: If you want to move your event list to a new tab, you can create the tab first.
To display events in a different tab:
Tap Element Location.
Tap to select a tab.
Customize the title
You can edit the title text or hide the title altogether.

To customize the Events List title:
Tap the Element Title toggle to show or hide it.
If displayed, enter a different title (up to 25 characters).
Select what events you display
There are a number of ways you can select which events you display in this tab.
For example, you may want to display only upcoming Jazz events. To do so, you first need to create a Jazz category and assign all the relevant events to that category. Then you can select Upcoming events and the Jazz category.
You can also manually chose the events you want to display in this tab using the Select Manually option.
To select which events you display in this tab:
Select a display option under Display Events:Upcoming & Past
Upcoming
Select Manually:Tap Select Events.
Choose the events you want to display.
Tap Save.
(Optional) Select an event category.
Note: Option not available if you chose "Select Manually" or if you haven't created categories.
Select how recurring events are displayed
Select whether a recurring event appears once with an indication that this event takes place on multiple dates or display each occurrence of the recurring event.
Select what elements are displayed with each event
Customize what is displayed with each event. For example, if you prefer not to display the guests attending the event, you can hide this element.

Tap the checkbox beside any of the elements to show or hide it.
Tip: If you hid an element from the Events List, you may want to hide if from the Events Details Page as well. Click Customize the Events Details Page to access the Events Details customizations.
Edit the button text
Edit the text that appears on an event button:
RSVP Event Button Text: Edit the button displayed on non-ticketed events.
Ticketed Event Button Text: Edit the button displayed on events with tickets.
Show or hide events from iOS or Android
Tap Element Visibility.
Select iOS or Android to display events only to guests with those types of mobile devices.
Customizing the Events Details Page
After a guest clicks on an event, they land on the Event Details Page. You can select which elements you want to display (e.g. event image, map, guests attending) and which you want to hide.
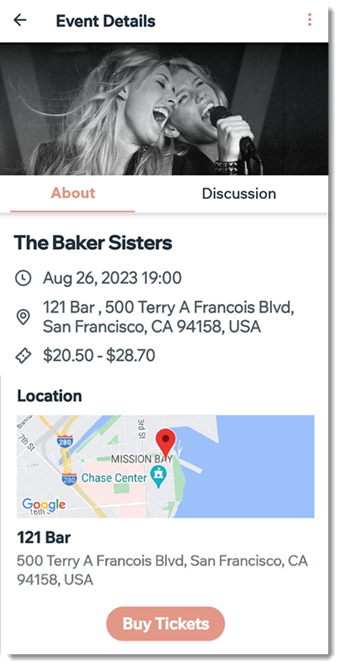
Go to your site in the Wix app.
Tap Manage
at the bottom.Tap Events.
Tap Event Details Page.
Select the checkbox next to the elements to show or hide it on the Events Details Page.
Adding an event schedule, discussion, or guest list
You can add content for your guests in a variety of ways. For example, create a dedicated tab, or even multiple tabs, with info you want your guests to know in advance. You can add the following elements:
Event schedule: Help guests discover more about what's happening at your event and learn when and where each event activity takes place. Learn how to create a schedule for your events.
Event discussion: Increase engagement by letting event guests interact. They can post questions and comments to speakers, hosts, and guests as well as participate in event polls.
Guest list: Let guests see who else is attending your event.
Tip:
We recommend displaying up to 4 tabs.
To add an event schedule, discussion, or guest list
Go to your site in the Wix app.
Tap Manage
at the bottom.Tap Mobile App.
Tap Edit.
Select where to add content related to your event:An existing tab: Tap the relevant tab from the Navigation Tabs list.
A new tab:Tap Edit Navigation Tabs.
Tap + Add New Tab at the bottom.
Enter the tab name (e.g. Conference Schedule) and tap Save.
Add Wix Events elements to the page:Tap + Add Element.
Swipe and tap the Events tab at the top to select Event content.
Tap to select the content you want to add (e.g. Event Schedule, Event Discussion, Event Guests).
Customize the added content:Element Title: Enable this toggle to add a title that appears before the content.
Select Event: Choose which event this content is connected to.
Element Visibility: Choose which devices you want to show this element on (Android, iOS or both).
When ready, tap Add at the top right.
(Optional) Repeat steps 5 to 8 to add more content about your event.
Tap Done.
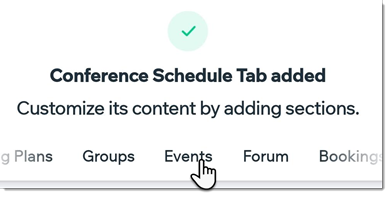
Tip
You can add other elements that are not under the Events heading, like an Announcements element, buttons, images and more.