


Selling event tickets
Wix Events: Creating Tickets
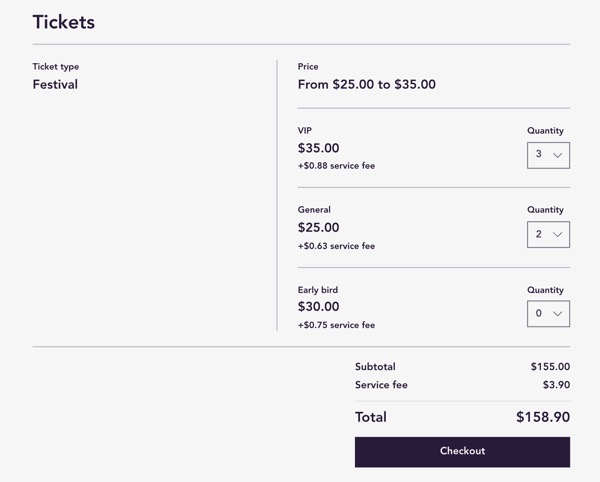
You can create one or more ticket types for your event (e.g. Orchestra and Balcony) and set a ticket price for each one.
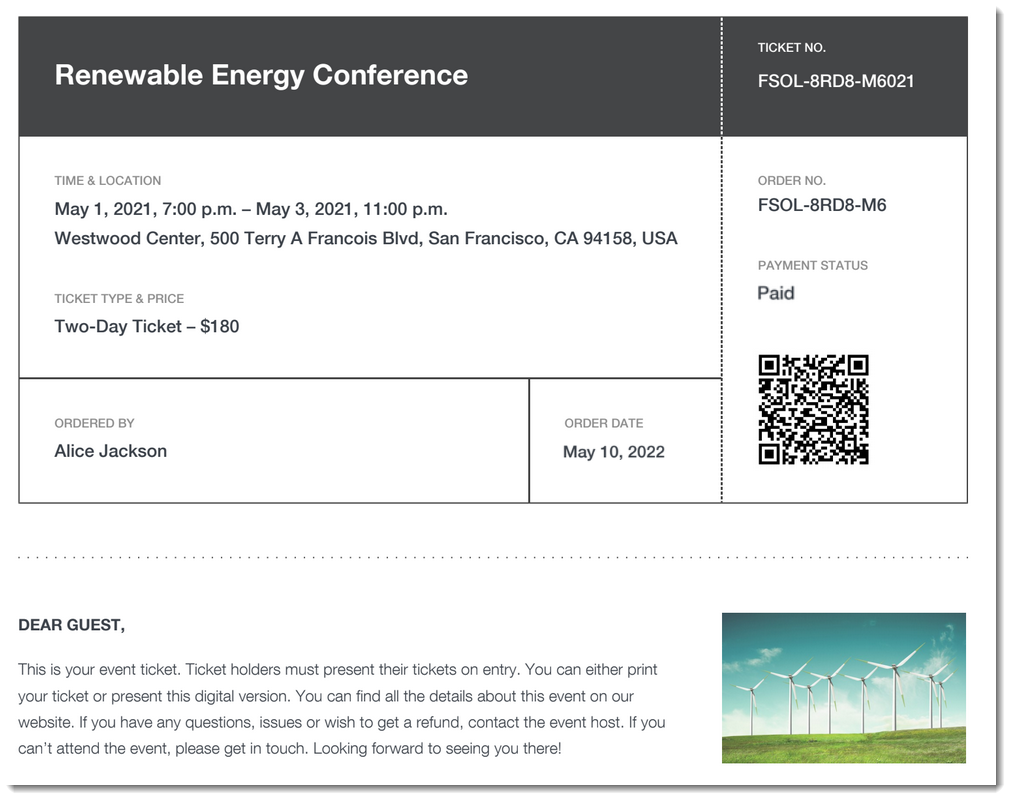
After setup, site visitors registering for an event can select the tickets they want to purchase. Guests receive a confirmation email which includes their ticket in PDF form.
Important:
To sell tickets for which you collect payment, you must:
Step 1 | Create an event
Before you can create tickets, you need to create an event and save it either as a draft or a published event.
Step 2 | Create one or more ticket types
When creating a ticket type, you can choose from these pricing methods:
Fixed price: You set how much the ticket costs (e.g. $20).
Price options: You create a ticket type (e.g. balcony seats) and sell it at different prices (e.g. adults $20, students $10, senior citizens $8).
Pay what you want: The guest chooses how much they want to pay. You can optionally set a minimum price.
Free: Your tickets are free of charge.
To create an event ticket:
Go to Events in your site's dashboard.
Select the relevant ticketed event.
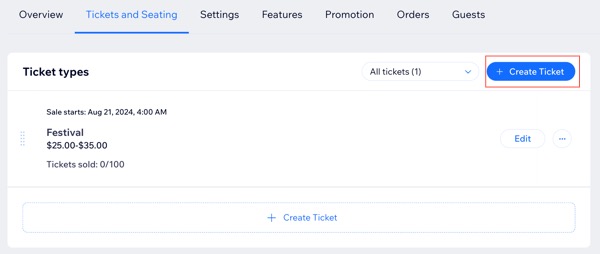
Click the Tickets and Seating tab.
Click + Create Ticket.
Enter the ticket name (e.g. Regular Admission).
(Optional) Enter a ticket description (e.g. Ticket gives access to balcony seating).
Select the pricing method:Fixed price: You choose how much this type of ticket costs. Scroll down and enter the Ticket price.
Price options: Create a ticket sold at different prices (e.g. General Admission ticket with regular and student prices).Enter the Option name (e.g. Adult).
Enter the Price.
Click + Add Price Option to create more price options (e.g. Student).
Pay what you want: The guest chooses how much they pay. You can set a minimum amount by enabling the Minimum price toggle.
Free: Guests can book tickets for free.
Select who pays the Wix ticket service fee (not relevant for free tickets):Pass fee on to buyer: The 2.5 % fee is added to the ticket price. For example, if you set the ticket price to $100, buyers pay $102.5 and you receive $100.
Absorb fee: The 2.5 % fee is included in the ticket price. For example, if you set the ticket price to $100, buyers pay $100 and you receive $97.5
(Optional) Set a limit to how many of this type of ticket you sell:Select Limited number of tickets available under Ticket quantity.
Enter the maximum number.
(Optional) Edit the default ticket policy that appears on the PDF ticket.
(Optional) Set the date and time this ticket becomes available for purchase:Click the Set ticket sale period toggle to enable it.
Enter a start date and time.
Enter an end date and time.
(Optional) Select the Hide tickets from the event details page when they are not on sale checkbox.
Click Create Ticket.
Need to create more ticket types?
Click + Create Ticket to create another ticket type (e.g. VIP Ticket).
Step 3 | Customize your event's ticket settings
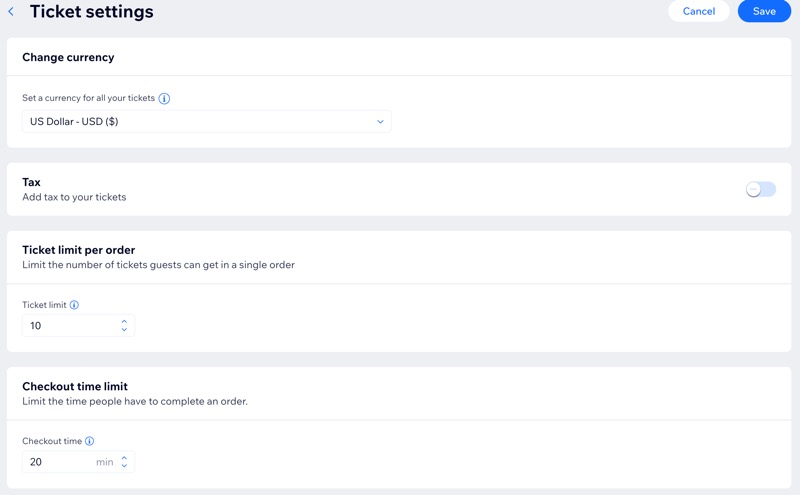
Ticket settings apply to all tickets created for the same event. You can choose the currency, tax collection, ticket purchase limits, and adjust the order completion time at checkout.
To customize your event's ticket settings:
Go to Events in your site's dashboard.
Select the relevant ticketed event.
Click the Settings tab.
Click Edit next to Ticket settings.
Edit the following settings:Change currency: Choose a currency for all your tickets.
Note: It is not possible to change the currency after selling tickets.
Tax: Set how you want to collect tax on ticket sales.
Ticket limit per order: Set the maximum number of tickets a guest can purchase in one order (up to 50).
Checkout time limit: Decide how long guests have to complete their ticket purchase before the tickets are released for others. You can select a limit between 5 and 30 minutes.
Click Save.
Step 4 | (Optional) Create a seating map
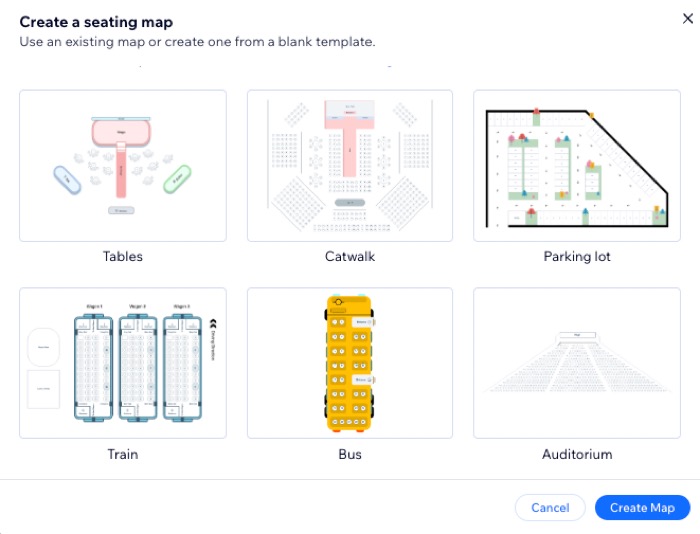
You can create a seating map for your venue, linking each ticket type to a specific set of seats. This allows guests to choose exactly where they will sit when purchasing tickets.
What's next?
Customize the design of your event ticket PDF to match the theme of your event.
FAQs
Click a question below to learn more about creating event tickets.
How do I create different ticket areas (e.g. orchestra, balcony) each with different pricing (e.g. adult, student)?
To create different areas with tickets sold at different prices, create multiple tickets using the Price options method.

For example, start by creating an Orchestra ticket. Select Price options as your pricing method and create Adult, Student, and Seniors prices. Then, after saving this ticket type, click New Ticket and create a Balcony ticket with Adult, Student, and Seniors prices.
For which events does Wix charge a ticket service fee on ticket sales?
Wix may charge a ticket service fee on tickets for which you charge a fee. Learn more about Wix Events ticket service fees.
Note: Ticket service fees aren't collected for tickets paid for by the Manual payment method.
Do I need a Premium plan to "sell" free tickets?
No. A Premium plan is required to sell tickets for which you charge a fee.
Tip: Create a membership plan to offer tickets at reduced rates.
How do my guests receive their tickets?
When guests buy tickets, they receive a PDF in their confirmation email. When they arrive at the event, they can display the PDF digitally or print it out and present.
Do I have to include a PDF ticket in the confirmation email?
You may prefer not to include a PDF ticket. This makes sense if, for example, you are hosting an online event.
To remove the PDF ticket, you can edit the confirmation email and deselect the PDF option.
How do guests purchase "Pay what you want" tickets?
If you created a "Pay what you want" ticket, guests enter the amount they want to pay. If you set a minimum, they must enter an amount above that price.

Can guests add tickets to their Apple Wallet?
Guest using an iOS device can add the tickets to their Apple Wallet.
How can I check guests in when they arrive?
There are a few check-in options to choose from:
Check-in by Wix app: Let others check in your guests. After adding staff members to an event, this mobile app lets them check in guests, scan tickets and manage the guest list.
The Wix app: Use this mobile app to scan tickets or manually check guests in.
Your site's dashboard (desktop): You can manually check guests in by accessing the relevant event in the Events tab.
What happens if a guest doesn’t finish purchasing tickets?
When a guest starts the checkout process, their selected tickets are held for 20 minutes. If they don’t complete the purchase, the tickets are released for others to buy. This can cause the event status to change between "available" and "sold out."