


Managing your calendar & bookings
Wix Bookings: Viewing and Editing Client Info
The Contact List is where you keep track of your clients' contact details, booking history, emails, chats, and more.
Any time a visitor books a service, submits a contact form, or interacts with your site in other ways, the information appears in their Contact Card.
In this article, learn more about:
Tip:
In the Contact List, click a client's name to open a smaller Contact Card on the right. Click View to view a client's full contact page.

Adding or removing a contact
Add or remove contacts from your contact list whenever you need. Keeping your contact list up to date is important for your marketing communications and promotions.
To add or remove a contact:
Go to Contacts in your site's dashboard.
Depending on your needs, follow the steps:
Add a new client:Click + Create New.
Click Contact.
Enter the contact's details.
Click Save.
Create a new segment: Learn more about creating and managing segments.
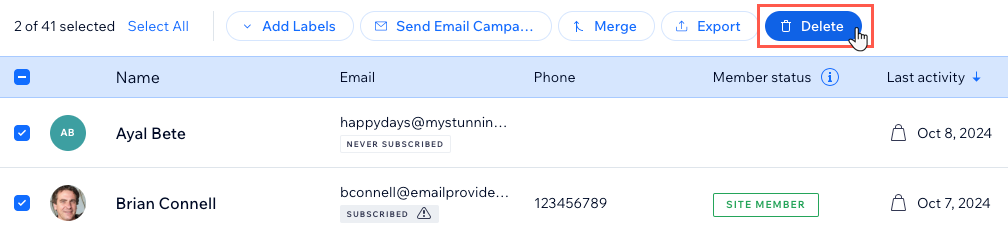
Remove a contact:Select the checkbox next to the relevant contact(s).
Click Delete.
Click Delete to confirm.
Editing a client's contact details
Each client has a contact card with their personal contact details including their email address and phone number.
You can add more information in any of the preset fields (e.g. company name or position) or by creating a custom field that suits your business (e.g. for a dog grooming business you could add a "Dog's Name" field).
To edit a client's contact details:
Go to Contacts in your site's dashboard.
Click the name of the contact to open their Contact Card.
(In the Contact Card) Click the More Actions icon
 .
.Click Edit contact info.

Edit the client's personal info (e.g. email, phone number).
(Optional): Click Add New Field at the bottom to add a new information field such as phone number, email, birthday. You can also create a custom field.
Click Save.
View a client's upcoming and past bookings
You can review any client's booking history with you using their contact card. For example, you can check their progress based on the number of training sessions with you. This is useful when you start offering new services you think the client might be interested in
To view a client's upcoming and past bookings
Go to Contacts in your site's dashboard.
Click the name of the contact to open up their Contact Card.
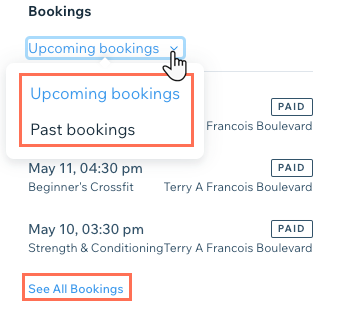
(In the Contact Card) Click the drop-down under Bookings and choose from the following options:Upcoming bookings: View a list of the client's most recent future sessions.
Past Bookings: View a list of the clients most recent past sessions.
See All Bookings: View all of the client's bookings.
Tip:
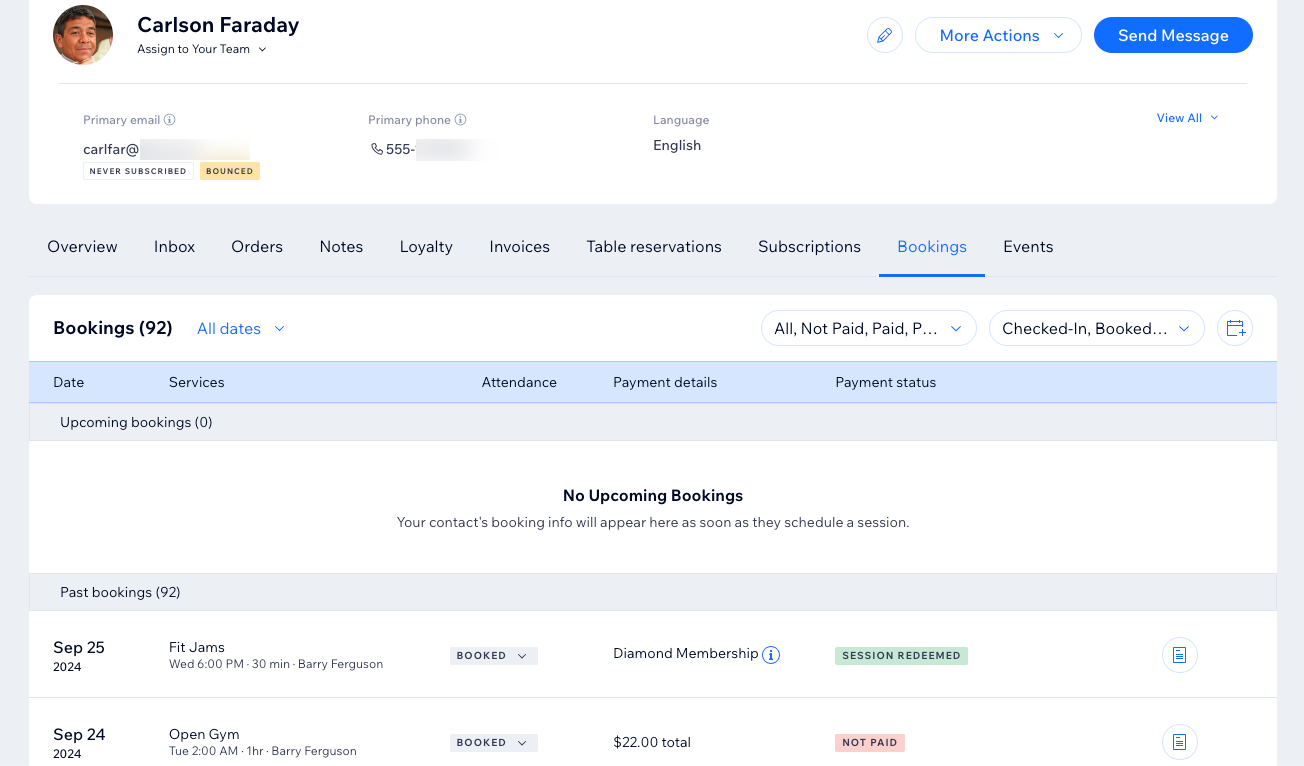
You can also click View Contact at the top of the contact side panel and then the Bookings tab to see an expanded view.
Updating a client's payment status to "paid"
When you receive an offline payment (for example, when the client pays you in person or through an app), you can update your records to show that the service was paid in full.
To update a client's payment status to "paid":
Go to Contacts in your site's dashboard.
Hover over the relevant client and click View.
Click the Bookings tab.
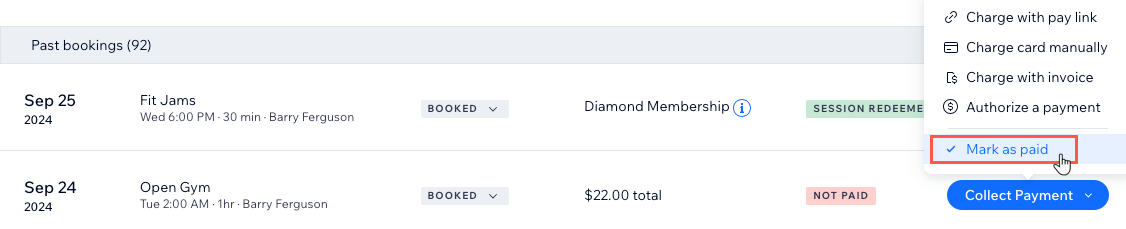
Hover over the relevant unpaid session and click Collect Payment.
Click Mark as Paid.
Note: You cannot undo this action.
Tip:
You can also update a client's payment status from the Bookings Calendar.
Viewing clients' Booking Form responses
You can add custom fields to the form clients fill out when they book a service with you. When clients book sessions, you can access their replies to custom fields in the Contact List tab.
To view clients' Booking Form responses:
Go to Contacts in your site's dashboard.
Hover over the relevant client and click View.
Click the Bookings tab.
Hover over a booking and click the View Booking Form Responses icon
 .
.

Adding notes to client profiles on the contact list
You can add a note to a contact to help you keep track of important client information. This note is just for you - clients don't see it.
To add a note to a client profile on your contact list:
Go to Contacts in your site's dashboard.
Click the name of the contact to open their Contact Card.
(In the Contact Card) Click Add Note under the Notes section.
Enter your note.
(Optional) Click the Select type drop-down menu and select one of the following:Meeting summary
Call summary
Click Done.

Tip:
You can also add a note to a specific booking.
Assigning staff tasks to a client's contact card
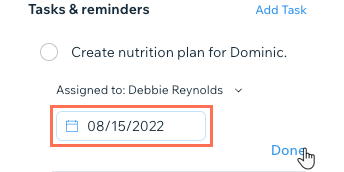
You can assign tasks to yourself or your staff members on a client's contact card. This is a great way to manage follow-ups with the client. For example, asking your head coach to create a nutrition plan for one of the athletes at your gym.
To assign staff a task on a client's contact card:
Go to Contacts in your site's dashboard.
Click the name of the contact to open their Contact Card.
(In the Contact Card) Scroll down to the Tasks section.
Click + Add Task.
Enter the task description.
Select the relevant staff member to assign the task to from the Assign Task to drop-down.
Set the due date for the task in the field provided.
Click Done.
Managing your contacts using labels
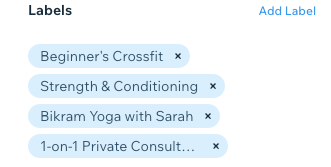
Labels allow you to categorize contacts into different groups based on their relationship with you and your business. You can use existing labels - or ones you create - to filter your Contact List.
Some labels appear automatically. For example, any client who books a service automatically gets the label for that service. You can add your own labels to contacts
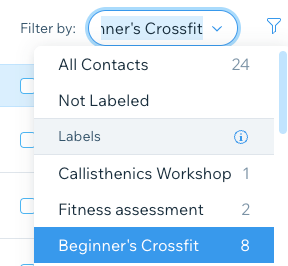
To filter by label, click the Filter by drop-down and select a label.
What's next?
You can also download a list of clients who booked during a specified time period (e.g. a list of all clients who attended classes during a particular week) by exporting a bookings report.