


Wix Bookings
Wix Bookings: Adding Your Business and Regional Details
When using Wix Bookings, it's important that you add your business and regional details to help your clients find you with ease, both physically and online. It's crucial to keep these settings in your site's dashboard updated. When you specify your currency, language, and time zone, these details are what your clients see on your site.
By doing this, you're making it easier for your clients to interact with your business. If you're a yoga instructor in New York, for example, setting your currency to USD, your language to English, and your time zone to Eastern Time ensures your local and international clients can book your classes without any confusion. It creates a smooth, hassle-free booking experience for your clients.
Step 1 | Add your basic info
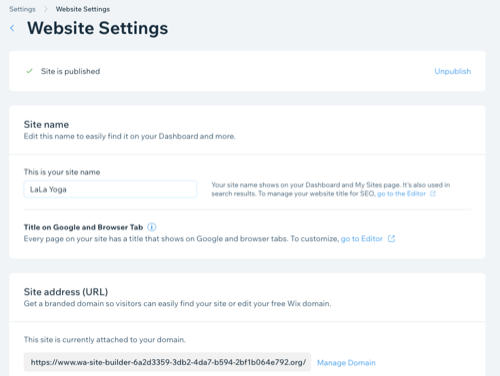
Start by adding your basic site information. This can include your site name, the site address attached to your domain and your Facebook username.
To add your basic information:
Go to your site's Settings.
Click Website Settings.
Check your site name is correct, in the Site Name section.
Do any of the following to update the information about your site:Site Address (URL): If your site has a domain, check the URL is correct.
Favicon image: Upload an image to appear on web browser tabs next to your site name.
Social image: Upload an image to appear alongside your site URL when shared on social media sites like Twitter and Facebook.
Facebook username: Enter the Facebook username you want to link to your site.
Note: Facebook uses this username to verify likes you get on your website.
Click Save.
Step 2 | Add your business info
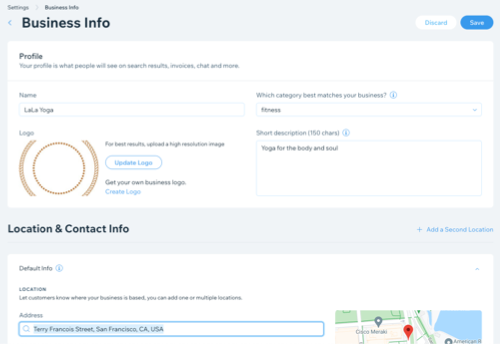
Next, add your business details that people see on search results, invoices, chats and more. Include all business addresses and set your default hours so clients know where and when they can reach you. You can also improve your branding by adding a logo and a short description of your business.
Note:
Make sure to set your business address to the same country by selecting the correct business address from the drop-down. If you type the address but don't select it from the drop-down, it may not save correctly. If the business address is empty or not in the same country, the correct tax rates won't appear.
To add your business info:
Go to your site's General Settings.
Click Business Info.
Enter your Business Name.
Enter your business Category so you show up in the right search results.(Optional) Enter a short description of your business and the kinds of services you offer.
(Optional) Upload an existing logo or create one using the Wix Logo Maker.
Add your primary business address.
 (Optional) Add an address description if additional directions are required.
(Optional) Click + Add New Location at the bottom of the page if your business has multiple locations.
Add your contact information such as your number and email address to your primary business address.
Click Apply.
Click Save.
Step 3 | Set your language and region details
Your language and region details help Wix Bookings to determine a number of your site settings, including the first calendar day in your bookings calendar.
To set your language and region details:
Go to Language & Region in your site's dashboard.
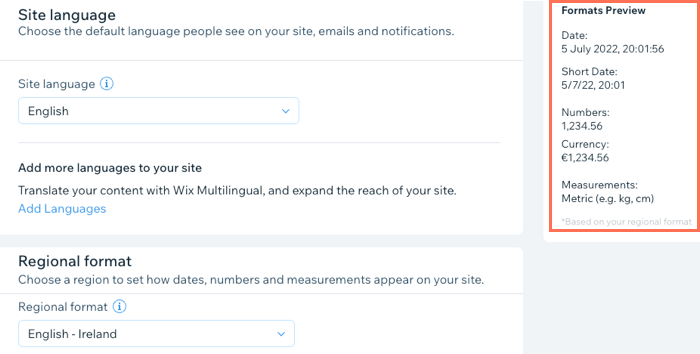
Click the Site Language drop-down to set your site's default language.
Click the Regional format drop-down to set your site's region. This ensures that dates and numbers appear in the format of the region you choose.
Click the Currency drop-down to set the currency you get paid with. This also sets the currency visitors see on your site.
Click the Time zone drop-down to set both your site's time zone and the time zone of your business location.
Click the Account Language drop-down to set your account language - this doesn't affect the language people see on your site.
Tips:
You can set which time zone you display on your site or let clients choose which time zone they prefer to see.
Make sure to set the correct time zone so that your site functions properly. You can check this in the Formats preview window.
What's next?
Once you set up your site's basic business and contact information, you may want to add personnel with specific duties. Learn more about setting staff permissions.