


File Share
Wix Apps: Creating Folders in the File Share App
With the File Share app, you can create a file sharing library where people can exchange ideas and collaborate on projects.
You can create folders on your live site or from your site's dashboard to organize your file sharing library. Folders make it easier for your site visitors to find the content they're looking for.
In this article, learn more about:
Creating folders from your site's dashboard
Go to File Share in your site's dashboard.
(Optional) Navigate to the place that you want the new folder to be. For example, to create a subfolder inside the "Spanish" folder, click the "Spanish" folder.
Click + Add New at the top right.
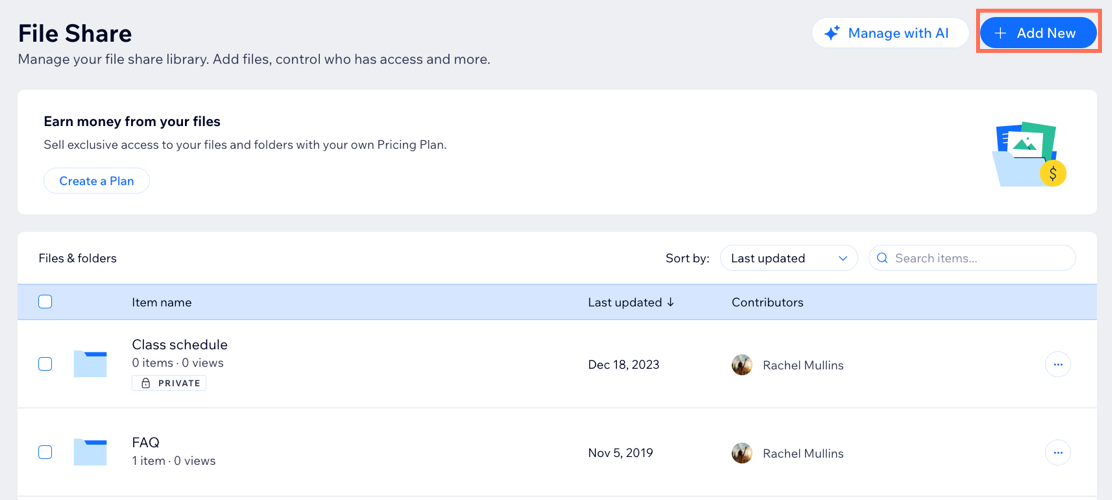
Select Folder.
Enter a name for the new folder in the What's the folder name field.
Click Save.
Creating folders on your live site
Go to the File Share app on your live site.
Log in using the email address associated with your Wix account.
If necessary, navigate to where you want the new folder to be. For example, to create a subfolder inside the "Spanish" folder, click the "Spanish" folder.
Click New Folder.
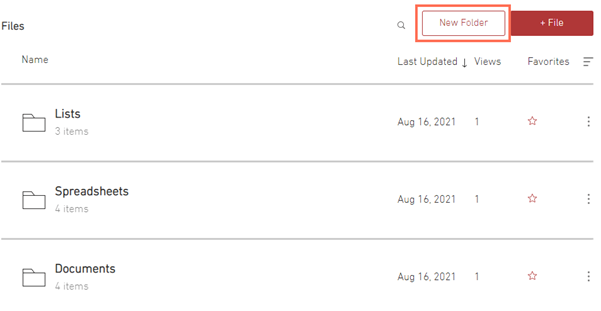
Enter a name for the new folder.
Press Enter on your keyboard.
FAQs
Click a question below to learn more about creating folders in the Wix File Share app.
Can I create subfolders within a folder?
Yes. You can create subfolders within any existing folder. While in a folder, click + Add New, name your folder, and then drag and drop files into the new folder.
How do I rename a folder?
You can rename a folder in your File Share app directly from your dashboard.
Go to File Share in your site's dashboard.
Click the More Actions icon
 next to the relevant folder and select Rename.
Enter the name of the folder.
Click Save.
Can I delete a folder?
Yes. You can delete a folder in your File Share app directly from your dashboard. Deleting a folder deletes all files and subfolders within it.
Go to File Share in your site's dashboard.
Click the More Actions icon
next to the relevant folder and select Delete.Click Delete.