


Managing Retail POS orders
Wix Retail POS: Creating Invoices
Important:
This article is about Wix Retail POS tablet for brick & mortar businesses.
For info on using POS on a mobile device, see our help articles on mobile POS.
If you need to provide your customer with an invoice, you can do so from your desktop computer. Once the invoice is created, you have the option of collecting partial or total payment in advance. You can also create an invoice for a paid order.
If you are making a custom order for a client, for example a custom-made table that isn't in your regular product list, you can add it to the order and set a custom price.
Step 1 | Create a manual order on desktop
Note:
It's not currently possible to create an invoice on the tablet. You can vote for this feature.
To start, go to the Orders tab on your desktop computer and create a manual order. You can select any store products or Wix Bookings services to add to the order. You can also add a custom item.
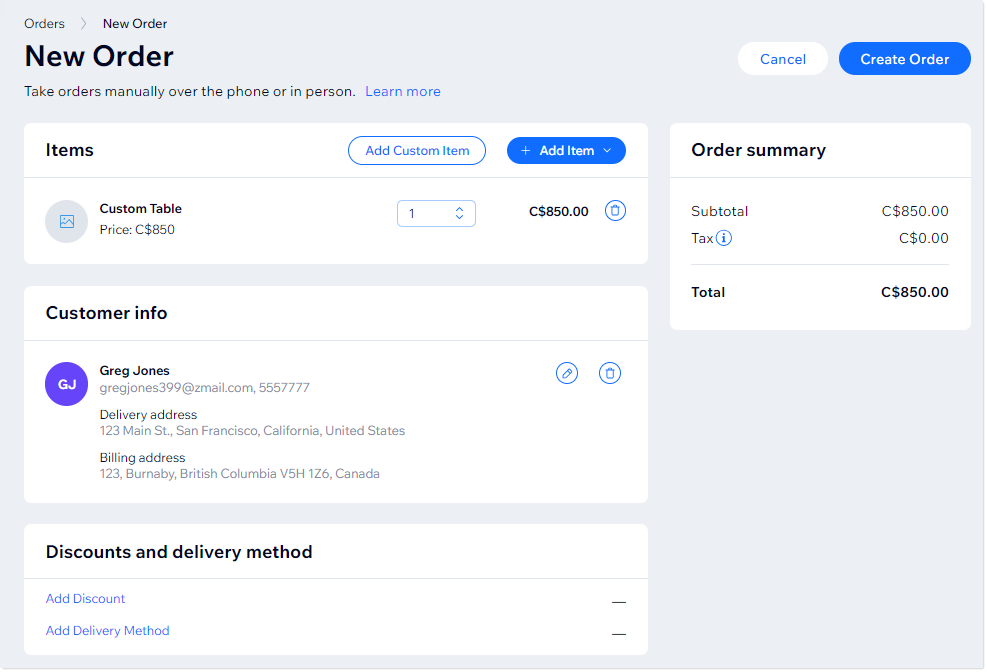
You don't need to select a shipping option.
Learn how to manually create an order.
Step 2 | Create an Invoice for the order
Now that you have your order, select it from the list of orders in the dashboard and create an invoice.
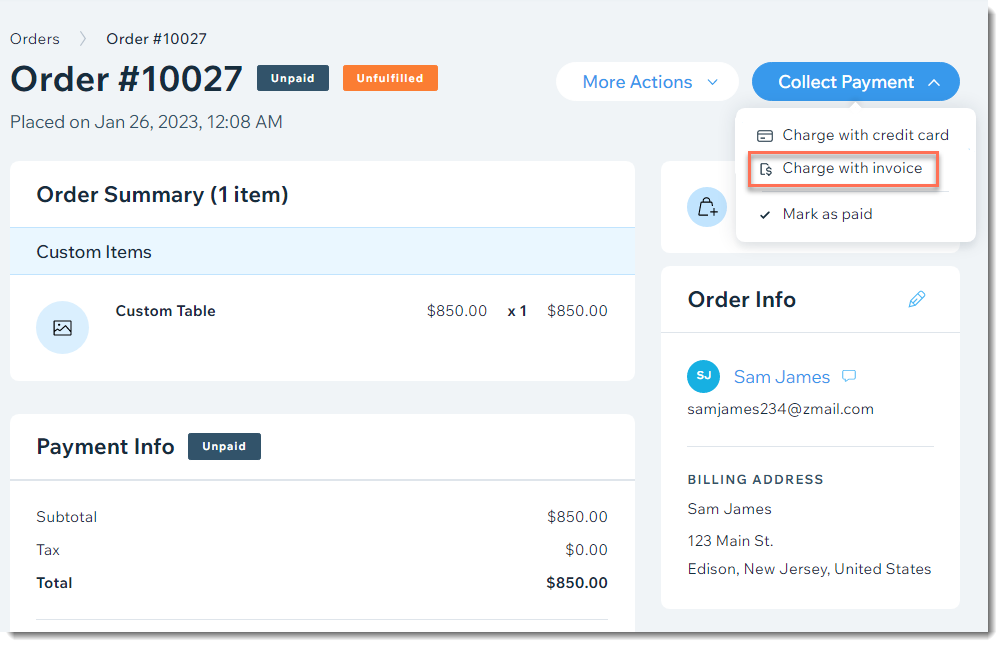
You can optionally send the invoice to your customer or print it out using the options at the top of the invoice.
Learn more about creating invoices for unpaid orders.
Step 3 | (Optional) Collect a deposit
If you want to charge your customer some (or all) of the order price before they come to pick up the order, you can do so on the POS tablet.
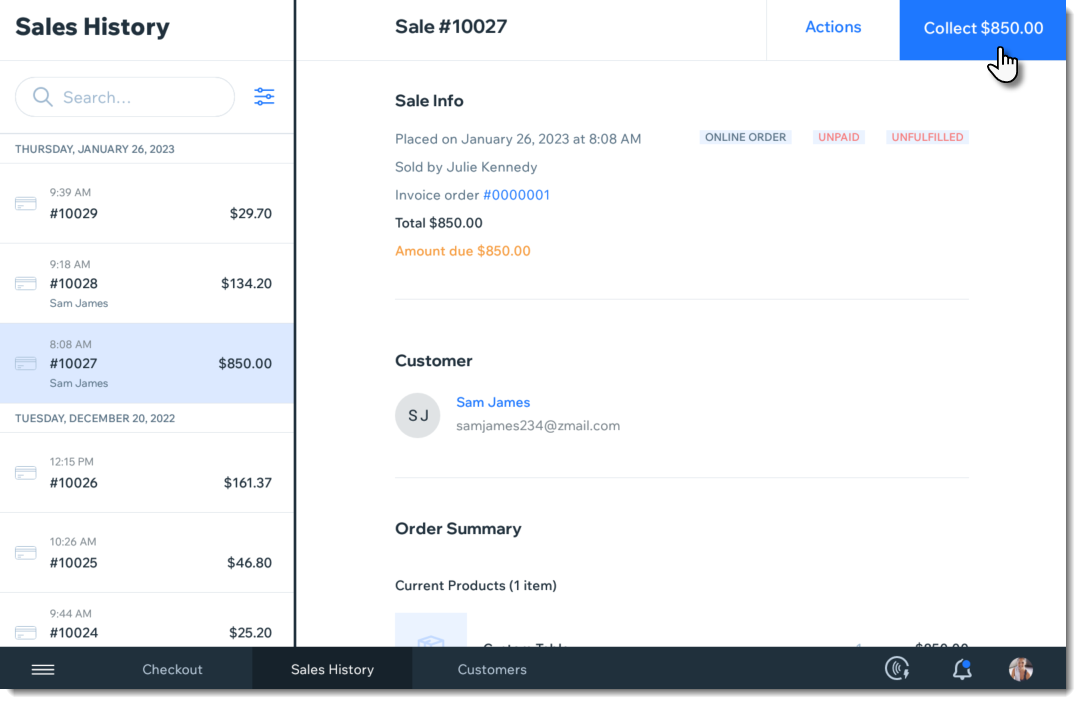
To collect a deposit:
Open the POS tablet.
Tap Sales History from the bottom bar.
Tap the relevant sale.
Tip: You can click to view the invoice number to view the invoice.Tap Collect at the top right.
Tap Split Total at the top right.
Enter the deposit amount.
Tap Continue.
Select a payment method (e.g. cash) and complete the first part of the payment.
Tap Continue.
Tap Mark as Partially Paid.
Step 4 | Complete the sale
When you're ready to complete the sale, go into your Sales History in the POS tablet to complete the order. You can collect the entire amount of the sale or the balance if you collected a deposit.
To accept payment and complete the sale:
Open the POS tablet.
Tap Sales History from the bottom bar.
Tap the relevant sale.
Tip: You can click to view the invoice number to view the invoice.Tap Collect at the top right.
Accept payment as you would for any POS sale.