


Wix FAQ App
Managing Your Questions in the Wix FAQ App
You can manage your Wix FAQ questions in your site's editor or dashboard. Add or delete questions and categories, edit or duplicate existing questions, and copy links to questions.
In this article, learn more about:
Adding a new question
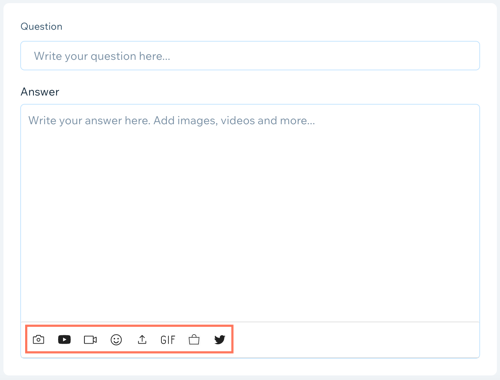
You can add as many questions as you want to your FAQ and customize them with images, videos, GIFs, maps, and emojis. You can also add content from your Twitter and YouTube accounts.
Tip:
If you want to copy questions and answers from another document and paste them into the FAQ app, be sure to remove all formatting first.
Learn how to add a question in:
Your site's editor
Click the FAQ app in your editor.
Click Manage Questions.
Note: If a pop-up does not open, try turning off your pop-up blocker or updating your browser version.Click Add New.
Select Question & Answer from the drop-down menu.
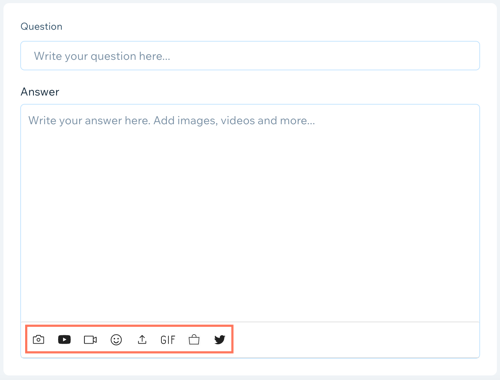
Enter your new question under Question.
Add an answer for your question under Answer.
(Optional) Add media to your answer using the icons on the bottom of the editor.
Select a category for your new question under Choose a category.
Click Save.
Your site's dashboard
Go to FAQs in your site's dashboard.
Click Add New.
Select Question & Answer from the drop-down menu.
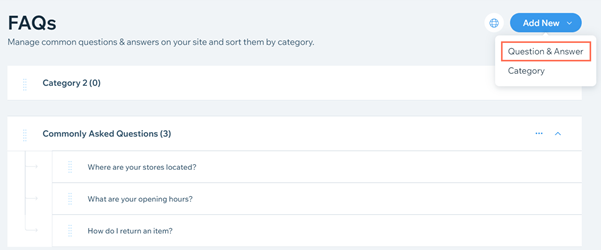
Enter your new question under Question.
Add an answer for your question under Answer.
(Optional) Add media to your answer using the icons on the bottom of the editor.
Select a category for your new question under Choose a category.
Click Save.
Editing an existing question
After you've created a question, you can edit it in your site's editor or in your dashboard.
Learn how to add a question in:
Your site's editor
Click the FAQ app in your editor.
Click Manage Questions.
Note: If a pop-up does not open, try turning off your pop-up blocker or updating your browser version.Hover over the question that you want to edit.
Click the Edit icon
 .
.Edit the question and answer.
Click Save.
Your site's dashboard
Go to FAQs in your site's dashboard.
Hover over the question that you want to edit.
Click the Edit icon
 .
.Edit the question and answer.
Click Save
Adding linked text to an answer
You can add links to your answer by selecting some text and adding a URL to it. For example, you can add the name of a product to your answer and add a link to the name. You can also link to sections within your site.
Learn how to add linked text in:
Your site's Editor
Click the FAQ app in your editor.
Click Manage Questions.
Note: If a pop-up does not open, try turning off your pop-up blocker or updating your browser version.Hover over the question that you want to edit.
Click the Edit icon
.Select the text that you want to add the link to.
Click the Link icon
 .
.
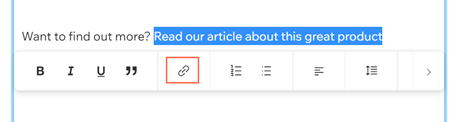
Select whether you want to add a link to a web address or to a section.Web Address: Enter the URL you want to link to. You can choose to open the link in a new tab. You can also choose to tell search engines to ignore this link so it won't appear in search results.
Section:
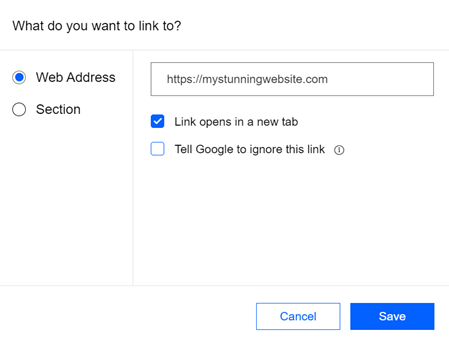
Click Save.
Your site's dashboard
Go to FAQs in your site's dashboard.
Hover over the question that you want to edit.
Click the Edit icon
.Select the text that you want to add the link to.
Click the Link icon
.
Add a link to a web address or to a section on your site. Tip: You can choose to open the link in a new tab. You can also choose to tell search engines to ignore this link so it won't appear in search results.
Click Save.
Duplicating a question
If you have a question that you want to use as a template for a new question, you can duplicate it in your site's editor or your dashboard.
Learn how to duplicate a question in:
Your site's editor
Click the FAQ app in your editor.
Click Manage Questions.
Note: If a pop-up does not open, try turning off your pop-up blocker or updating your browser version.Hover over the question that you want to duplicate.
Click the Show More icon
 .
.Select Duplicate from the drop-down menu.
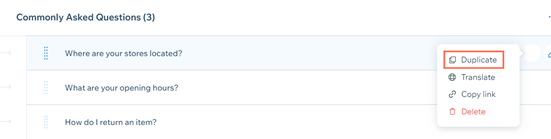
Edit the question and answer.
Select a new category for the question if required under Choose a category.
Click Save.
Your site's dashboard
Go to FAQs in your site's dashboard
Hover over the question you want to edit.
Click the Show More icon
 .
.Select Duplicate from the drop-down menu.
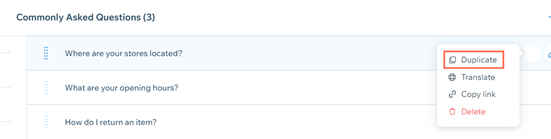
Edit the question and answer.
Select a new category for the question if required under Choose a category.
Click Save.
Sharing a question
You can share specific questions from your FAQ on Facebook, Twitter, or LinkedIn. You can also copy a direct link to specific question that you can share anywhere.
Tip:
You can select which social networks appear as sharing options on your FAQ in the Settings panel. Learn More
Learn how to share a question from:
Your site's editor
Click the FAQ app in your editor.
Click Manage Questions.
Note: If a pop-up does not open, try turning off your pop-up blocker or updating your browser version.Hover over the question that you want to share.
Click the Show More icon
 .
.Select Copy Link from the drop-down menu.
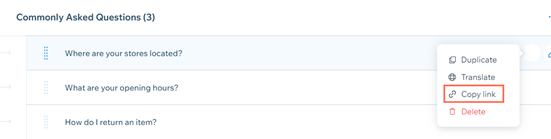
Select a sharing option on the Copy and share link pop-up.Click Copy to get a direct link to the question.
Click Share on Facebook to share your question on Facebook.
Click Share on Twitter to share your question on Twitter.
Your site's dashboard
Go to FAQs in your site's dashboard.
Hover over the question that you want to share.
Click the Show More icon
.Select Copy Link from the drop-down menu.
Select a sharing option on the Copy and share link pop-up.Click Copy to get a direct link to the question.
Click Share on Facebook to share your question on Facebook.
Click Share on Twitter to share your question on Twitter.
Your live site
Go to your FAQ on your live site.
Click the question that you want to share.
Select a sharing option in the bottom left corner of the question.Click the Facebook icon
 to share your question on Facebook.
Click the Twitter icon to share your question on Twitter.
Click the LinkedIn icon to share your question on LinkedIn.
Click the Copy icon to get a direct link to your question.
Deleting a question
If you don't need a specific question on your FAQ anymore, you can delete it in your site's editor or your site's dashboard.
Learn how to delete a question in:
Your site's editor
Click the FAQ app in your editor.
Click Manage Questions.
Note: If a pop-up does not open, try turning off your pop-up blocker or updating your browser version.Hover over the question that you want to delete.
Click the Show More icon
 .
.Select Delete from the drop-down menu.
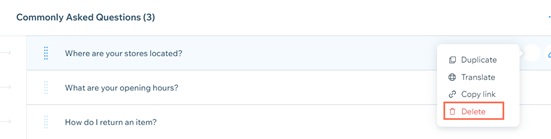
Click Delete on the pop-up.
Your site's dashboard
Go to FAQs in your site's dashboard.
Hover over the question that you want to delete.
Click the Show More icon .
Select Delete from the drop-down menu.
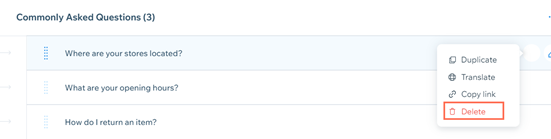
Click Delete on the pop-up.
Reordering your questions
If you need to change the order of your questions in your FAQ, you can reorder them in your site's editor or your site's dashboard.
Learn how to reorder your questions in:
Your site's editor
Click the FAQ app in your editor.
Click Manage Questions.
Note: If a pop-up does not open, try turning off your pop-up blocker or updating your browser version.Hover over the question you want to move.
Click and drag the question to a new position.

Your site's dashboard
Go to FAQs in your site's dashboard.
Hover over the question you want to move.
Click and drag the question to a new position.

Translating a question
If you have a multilingual site, you can translate your FAQs in your site's dashboard.
To translate your FAQ:
Go to Multilingual in your site's dashboard.
(If you have more than one secondary language) Select the language to translate to from the drop-down menu beside Translate your apps' content.
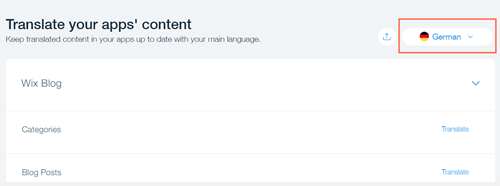
Go to the Wix FAQs section.
Click Translate beside Wix FAQ Questions.
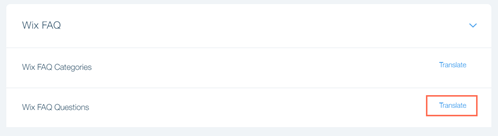
Click Translate beside the question you want to translate.
Enter a translation for your question, or click the Google Translate icon
 to automatically translate it.
Click the Checkmark icon
 to save your translation.
Click View and Edit Translation to edit your translated answer.
Click Save.