wix studio
Adding Mouse Effects
Elevate your design's interactivity with our captivating mouse effects. Add a mouse effect to an element you want to highlight – the visitor's cursor movement triggers it automatically.
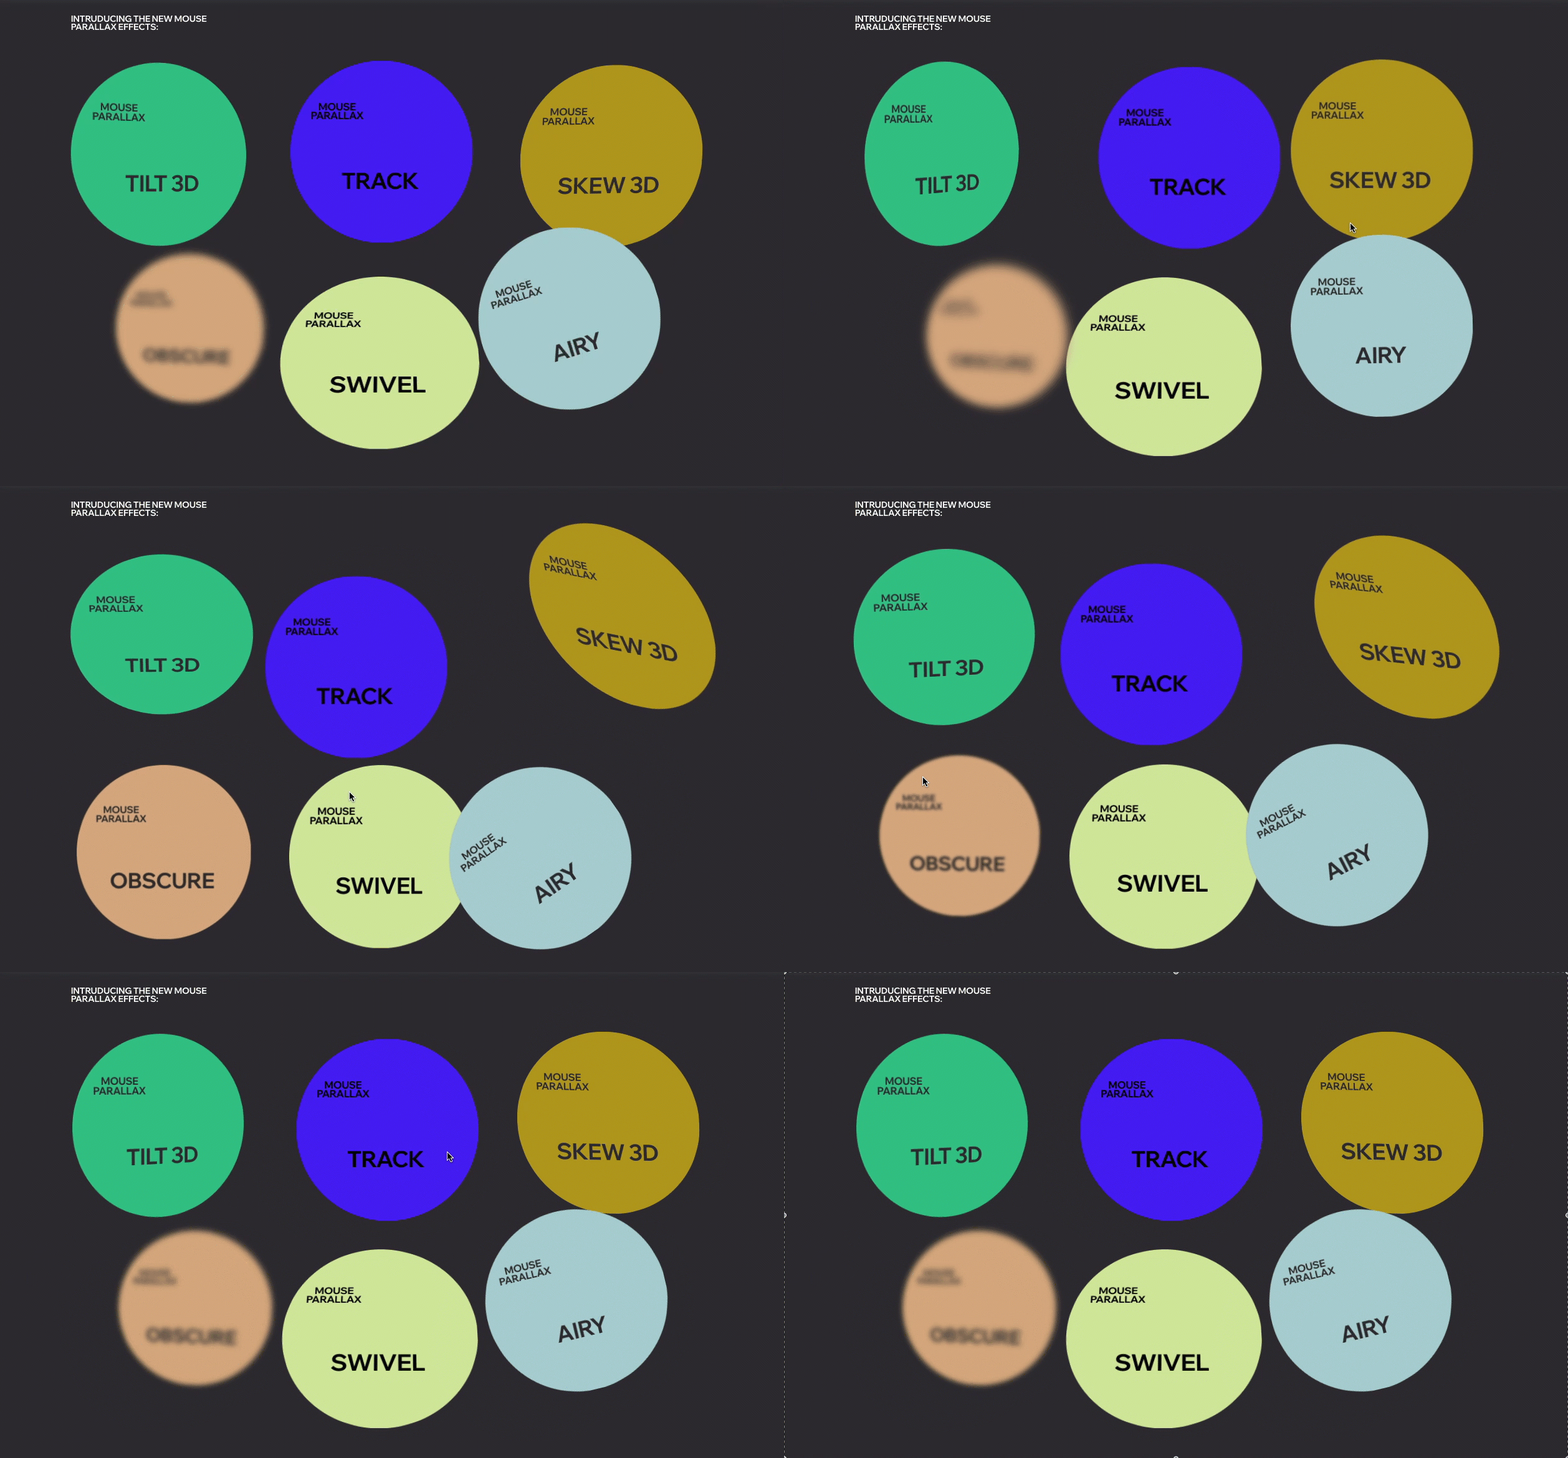
We offer many different effects that you can adjust to your client's site, like the ones you see below.
In this article, learn how to:
Note:
As these effects require a mouse cursor, they will not play on touchscreen devices (e.g. mobile phones, tablets etc.)
Adding a mouse effect to an element
Select the element you want to animate and open the Inspector panel to choose one of our mouse effects.
To add a mouse effect:
Select the relevant element.
Click the Open Inspector icon
 at the top right of the editor.

Click the Animations and Effects tab
 .
.Click Mouse Effects, then click + Add.
Select an effect from the collection.
(Optional) Click Adjust Animation at the bottom to customize settings like direction, distance and easing.

Customizing a mouse effect
After choosing a mouse effect, set it up to behave the way you want. Make the effect more subtle or noticeable by deciding on settings like the distance, direction, speed, easing and others.
Note:
The available customization options depend on the effect you choose.
To customize a mouse effect:
Select the relevant element.
Click the Open Inspector icon
at the top right of the editor.
Click the Animations and Effects tab
.Click the effect under Mouse Effects to edit it.
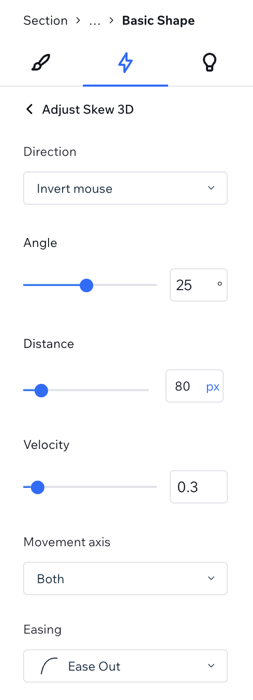
Click Adjust Animation to change its settings:
Direction: Decide whether or follow the mouseFollow mouse: Makes the element follow the mouse cursor movement.
Invert mouse: Makes the element move in the opposite direction of the mouse. For example, if the mouse moves up, the element moves down.
Distance: Decide how far the element can move (in px, %, vh or vw).
Velocity: Drag the slider to change the speed of the effect – the lower the number, the faster the effect.
Movement axis: Decide if the element moves horizontally, vertically or on both axes.
Easing: Choose how gradually the effect should ease in and/or out.
Perspective: Choose how far away the element is from the visitor's cursor. A lower value will result in a more intensive 3D effect than a higher value.
Tip:
Enable the Move mouse to preview toggle to see the effect directly on the canvas, without having to preview the site.
Removing a mouse effect
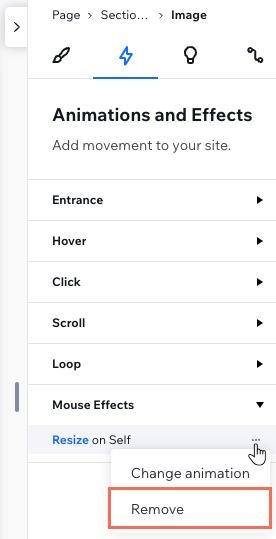
You can remove a mouse effect at any time from the Inspector panel.
To remove a mouse effect:
Select the relevant element.
Click the Open Inspector icon
at the top right of the editor.
Click the Animations and Effects tab
.Hover over the animation and click the More Actions icon
 .
.Click Remove.