top of page

wix studio

Adding and Setting Up Flexboxes

Use flexboxes to streamline the display of your site content. Flexboxes are layout tools that are made up of responsive containers, so they automatically adjust to your visitors' screen sizes.

Step 1 | Add a flexbox

Open the Add panel to select a flexbox preset and drag it onto your page. There are many designs to choose from according to the type of content you need to display (e.g. images only, images and text, etc.)

To add a flexbox:

  1. Click Add Elements  on the left side of the Editor.

  2. Click Layout Tools.

  3. Click Flexboxes.

  4. Drag and drop your chosen flexbox onto the page.
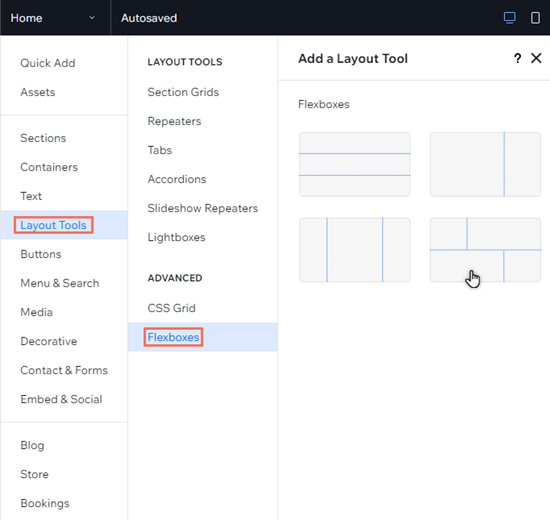
The Add elements panel in the studio editor. The cursor is hovering over a flexbox layout.

See how it works:

Drag the handles on your canvas to see how the content of the flexbox seamlessly reorganizes across breakpoints.

Step 2 | Add items to your flexbox

A flexbox is made up of several items that are responsive containers. You can change the number of items in a flexbox and it will automatically resize the items to fit the available space.

To add a new item, you can click Add Item or use the Manage Items panel in the Inspector.
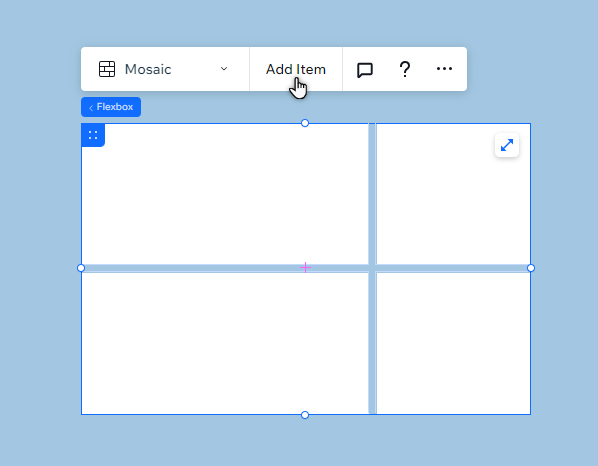
A blank flexbox in the Editor. The cursor is hovering over the Add items button.

Step 3 | Add elements to your flexbox

Choose what you want to display in your flexbox by adding adding elements to the items. You can hide or show elements on different breakpoints to create a unique experience for visitors, no matter the device.

To add elements to an item:

  1. Click Add Elements  on the left side of the Editor.

  2. Select the element type you want to add.

  3. Click your chosen element to add it to your page.

  4. Drag the element to the flexbox item, and drop it when you see Attach.
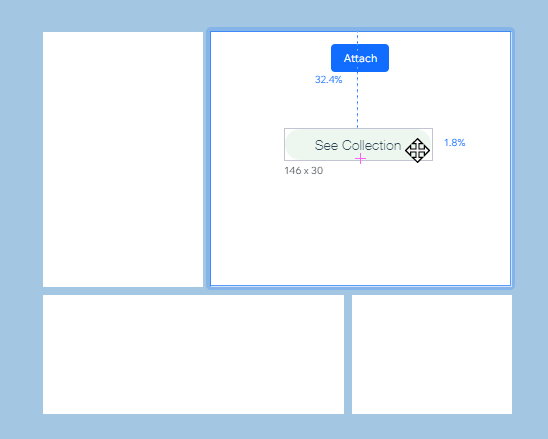
A button that has been dragged to a flexbox. The Attach message is displayed.

Need A Professional Website?
Contact Us 
Today!

Wix Retail POS: Using the Stripe Reader M2 Card Reader

Wix Retail POS: Using the BBPOS WisePad 3 Card Reader

Wix Retail POS: Selecting a Card Reader

Wix Retail POS: About Your HP Tablet

Wix Retail POS: Connecting Your POS Hardware

Wix Retail POS: About Wix POS for Your Brick and Mortar Business

Wix Mobile POS: Setting Up a Point of Sale with SumUp

Wix Mobile POS: Setting Up a Point of Sale with Square

Wix Restaurants POS: Selling Restaurant Items at a Mobile Point of Sale

Wix Pricing Plans POS: Selling Plans at a Mobile Point of Sale

Wix Events POS: Selling Event Tickets at a Mobile Point of Sale

Wix Bookings POS: Booking Services and Accepting Payments with the Wix App

Wix Bookings POS: Accepting Payment for Booked Services at a Mobile Point of Sale

Wix Stores POS: Managing Inventory for Mobile POS Sales

Wix Stores POS: Setting up Tax Rules for a Mobile Point of Sale

Wix Stores POS: Selling Products at a Mobile Point of Sale

Wix Mobile POS: Customizing Receipts

Wix Mobile POS: Selling Physical Gift Cards at a Mobile POS

Wix Mobile POS: Redeeming Virtual Gift Cards at a Mobile POS

Wix Mobile POS: Setting Up Receipt Printing

Wix Mobile POS: Collecting Tips

Wix Mobile POS: Understanding Invoices for Mobile POS Transactions

Wix Mobile POS: Setting Up Tap to Pay

Wix Mobile POS: Letting Staff Members Accept Payments

Wix Mobile POS: Charging Clients at a Point of Sale

Wix Mobile POS: Setting Up a Point of Sale

Wix Mobile POS: An Overview

Collecting the Colorado Retail Delivery Fee

Accessing the Avalara Dashboard

Including Tax in the Product Price

wix experts
Graphic2Traffic web design
©
bottom of page