


Managing your orders
Wix Stores: Saving and Charging Customers' Credit Cards
Having customers’ card details on file allows you to charge a customer without them needing to be present. While card-on-file transactions can make it easier to complete transactions in certain circumstances, you must remember to use this payment method correctly to avoid charging customers unexpectedly.
There are two ways to save a customer's credit or debit card. One is to let site members select that option during checkout. The other is to save a customer's card while you manually enter credit card details, which should happen only with customer consent. Once a card is saved, you can use it to collect payment for future orders, as long as you retain your customer's consent to do so.
You can charge clients' saved cards using the following payment providers:
Wix Payments, Evergreen Payments Northwest, Isracard, Stripe or Tranzila.
In this article, learn more about:
Saving cards during checkout
You can add a checkbox to the checkout page that allows customers to let your business save their card and charge it in future. Customers who have become site members will see this checkbox and can choose to opt in.
Tip:
This isn't the same as when a customer saves their cards in their personal My Wallet part of the Members Area.
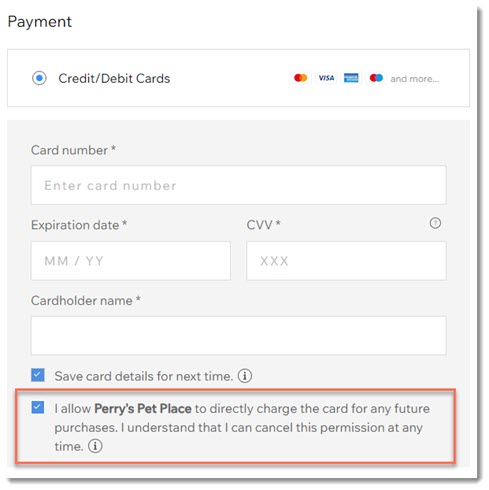
To display the checkbox to save a card on file:
Go to Settings in your site's dashboard.
Click Checkout.
Select Payments.
Click the Save customers' cards on file toggle to enable it.

Saving cards while manually entering card details
You can manually enter a customer's credit or debit card details to complete payment for an order. While doing this, you can optionally save a customer's card on file securely so you can use it for future orders, as long as you have their consent to do so.
Important:
Make sure you read this article to learn how to save cards responsibly.
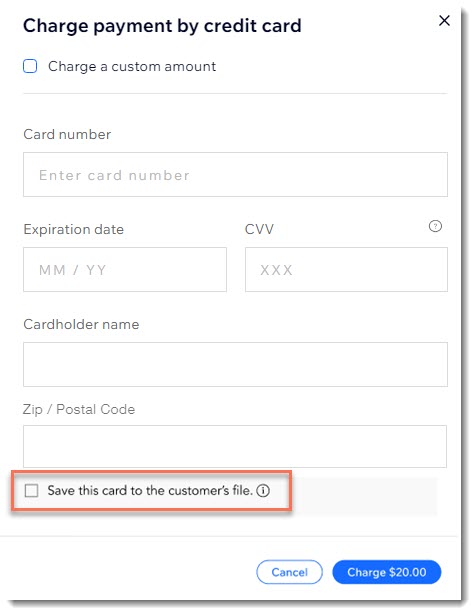
To manually save a customer's card details:
Go to Orders in your site's dashboard.
Select the relevant order.
Click the Collect Payment drop-down and select Charge card manually.
Enter the card details.
Select the Save this card to the customer's file checkbox.
Note: You'll see this checkbox only if your customer is a site member.Click Charge.
Send your customer an authorization form and save the signed form.
Important: We strongly recommend you send the form within 24 hours. Learn more about best practices for storing card details.
Charging a card on file
After a card has been saved on file, you can use it to complete payment for future orders, as long as you have your customer's consent to do so.
Important:
Your customer should be notified about the transaction and given as many details as possible. This is a requirement of card schemes such as Visa and Mastercard. Additionally, clear communication builds trust and helps the customer to recognize the payment. If they don’t recognize the payment, they may issue a chargeback.
To accept payment using a card on file:
Go to Orders in your site's dashboard.
Select the relevant order.
Click the Collect Payment drop-down and select Charge card manually.
Select an authorized saved card
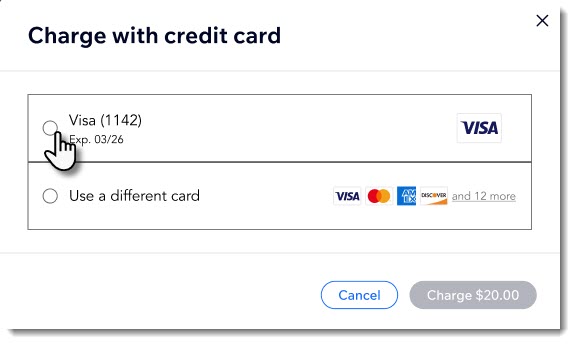
Click Charge.
FAQs
Click a question to learn more about saving credit cards.
What are the risks of card-on-file transactions?
While cards are stored securely, there's always the chance that hackers can find a way to access the online account and bill customers.
Additionally, as a merchant, you need to be careful to only bill your client for orders they approve of and know about.
How can I get authorization from my customer?
We've created a suggested authorization form. We recommend you use it as is, as it requests all the necessary information for authorization.
After your customer has signed the form, send them a copy of the signed form that they can keep for future reference.
Download the authorization form.
Why are the save card checkboxes not visible?
In order for your customer to see the checkbox at checkout or for you to see the checkbox while manually entering a customer's credit card, the customer need to have signed up to become a site member.