


Managing products and categories
Wix Stores: Displaying Product Categories
Important:
This article is about the new version of product categories. If you don't have the Active on your site toggle as in the image below, you have the original version. If so, click this link to learn how to add and display categories.
Your site structure plays a major role in customers' overall shopping experience. Choose a way to display categories that's both user friendly and good for SEO.
Before you begin:
Make sure the categories you want to display are active by going to the Categories tab in your site's dashboard, selecting the relevant categories, and checking that the Active on your site toggle is enabled for each one.

In this article, learn more about:
Displaying categories on the Category Page
The Category Page is your main store page. Customers can click any of the categories that appear in the category list to view products they're interested in.
Any active category you create automatically appears in the category list, but you can hide categories you don't want to display. You can also reorder the categories you show.
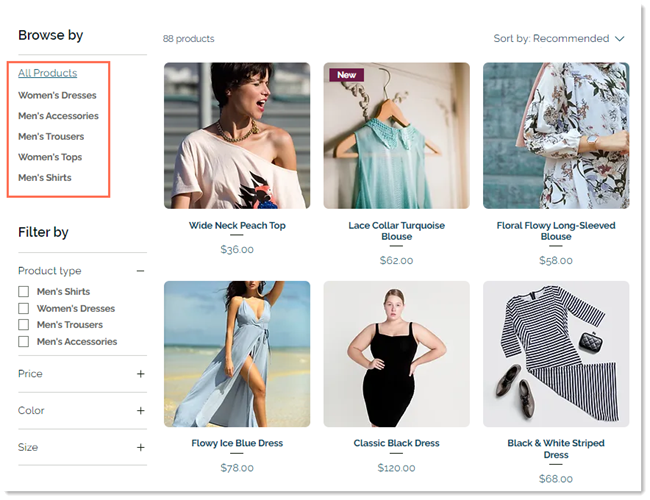
To choose what categories to display:
Wix Editor
Studio Editor
Click Pages & Menu
 on the left side of the editor.
Click Store Pages.
Click the Category page.
Select the Category Page in the editor.
Click Settings.
Select List.
Select what you want to hide:Hide the entire category list: Click the Show category list toggle to disable it.
Hide individual categories:Select Customize & reorder the list manually.
Deselect the checkbox next to the category you want to hide.
(Optional) Reorder categories by dragging the categories to the preferred order.
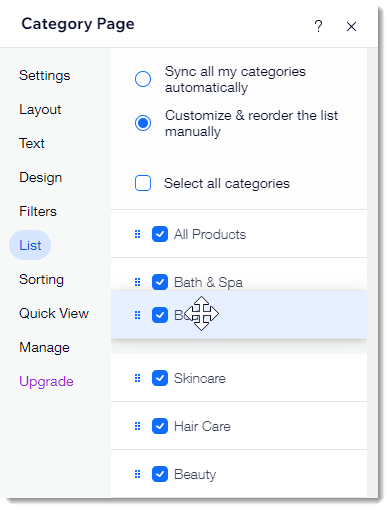
Important:
The category list is not displayed on mobile devices. We recommend adding categories to the site menu so customers viewing your site on mobile can access your categories.
Displaying categories in your site menu
Adding categories to your site's menu makes it easy for customers to navigate your site.
Important:
The category list doesn't appear on mobile devices, so this is the best way to give customers on mobile access to your store's categories.

You can add multiple categories to your menu and display them in submenus.

Tips:
Categories are added to the menu as links, and the link will open the URL of that category.
Displaying categories in your site menu boosts SEO for category pages.
To add categories to your menu:
Wix Editor
Studio Editor
Click Pages and Menu
 on the left side of the Editor.
Click Site Menu.
Click +Add Menu Item at the bottom.
Select Link.
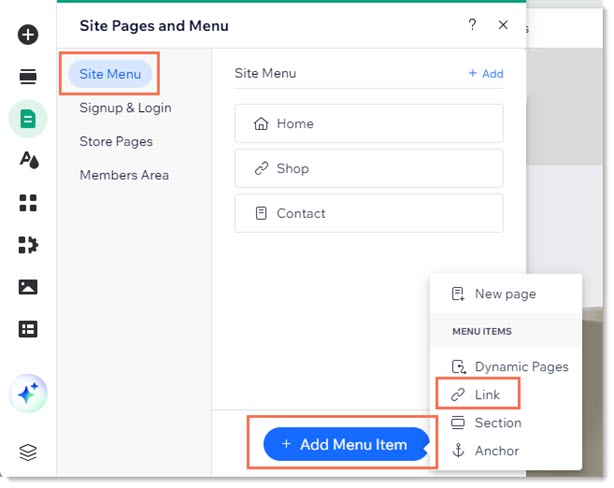
Select Page on the left.
Select Category Page from the Which Page? drop-down.
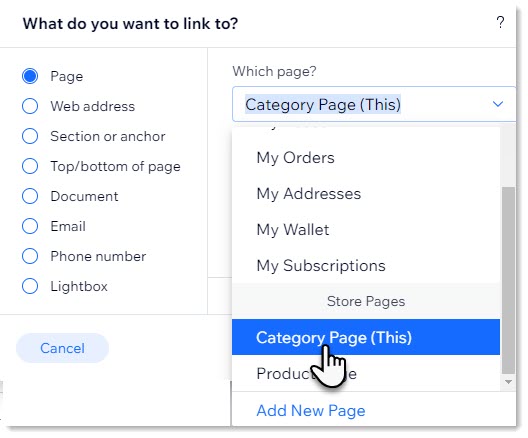
Select the category you want to display from the Which item? drop-down.
Click Done.
(Optional) Rename the category and click Done.
(Optional) Make the category you added into a subcategory:Click Pages and Menu
on the left side of the Editor.
Click Site Menu.
Drag the relevant menu items under and to the right of the relevant category.
Important:
When you build your menu using the instructions above, the menu appears both in desktop and mobile.
You can also create menus using Advanced Menus or Mega Menus. When you do, you need to create the menu separately on desktop and mobile.
Displaying categories using Product Galleries
You can display an active category on any site page, including one that has other content. This makes it easy for customers to purchase your products right after they're exposed to content about the products.
For example, you could create a site page explaining the benefits of your skincare products, add a Product Gallery to that page, and select the Skincare category to display there.
To display a category in a gallery:
Wix Editor
Studio Editor
Go to the relevant page in the Editor.
Click Add
 on the left side of the Editor
Click Store.
Drag the Product Gallery or Slider Gallery on to your page.
Select the gallery.
Click Choose Category.

Select the category you want to display.
FAQs
Click a question below to learn more about displaying product categories.
What happens when a category is inactive (disabled)?
When creating or editing a category, you can click the Active on your site toggle to make it inactive.

When you do, the category:
Doesn't appear in the category list on your Category Page
Can't be used to create custom filters
Can't be linked in site menus
Doesn't display in any Product Galleries
Doesn't show up in search engine results or site search
Doesn't have a functional URL
Note that an inactive category can, however, appear in:
Why aren't my categories displayed on mobile?
On desktop, if enabled, site visitors can access categories via the category list. This list does not, however, appear on mobile.

To give shoppers viewing your site on mobile access to your categories, we suggest displaying them in the site menu using the instructions above.
Tip: To display site categories on mobile but not on desktop, you can build your site menu using Advanced Menus and add them only on mobile. In the Studio Editor, you can create a specific menu and only show it on the mobile breakpoint.
How can I design the Category Page?
Customize the layout, colors, fonts and more to get the perfect look for your brand.
Tip: You only need to customize the Category Page once. Your selections apply to each category.