


Setting up Retail POS sales
Wix Retail POS: Allowing Customers to Leave Tips
Important:
This article is about Wix Retail POS tablet for brick & mortar businesses.
For info on using POS on a mobile device, see our help articles on mobile POS.
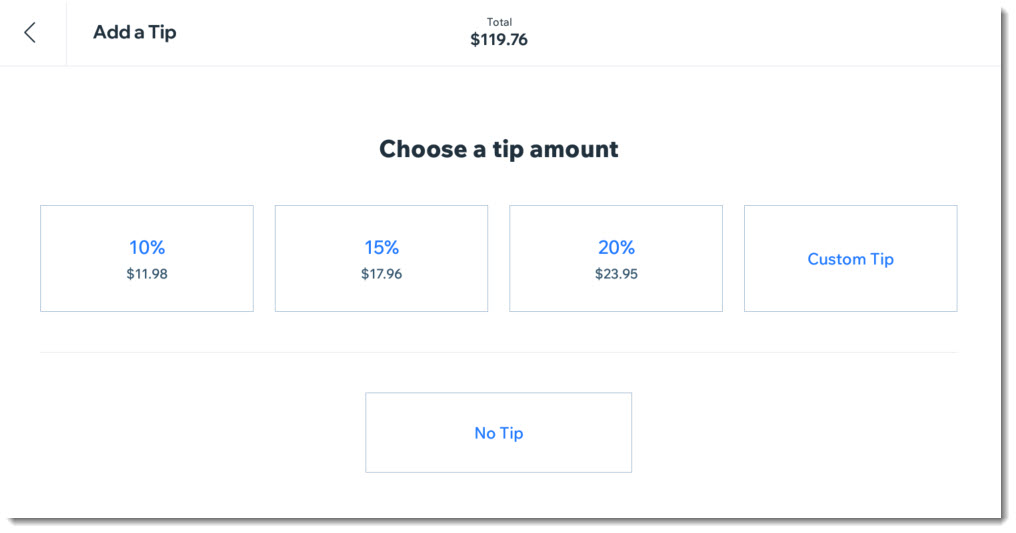
Give customers the option of leaving a tip while they're making a purchase. They can choose one of the preset tip percentages. If you enabled this option, they can enter a custom amount.
Enabling tipping
To start collecting tips, go to the Payments tab, enable tipping, and then customize it to suit your needs. When enabled, customers can choose between set amounts or no tip. You can also allow customers to enter a custom tip percentage.
To enable tipping:
Open the POS tablet.
Tap the Menu icon
 at the bottom left.
Tap the Settings tab.
Tap the Payment tab.
Click the Collect tips at checkout toggle.
(Optional) Update the default tip percentages.

(Optional) Click the Allow a custom tip amount toggle:Enabled: Customers can enter a tip percentage.
Disabled: Customer can only select one of the default tip percentages.
Collecting tips during checkout
Important:
Customers can add tips only when Card or Manual Card Entry are selected as payment methods for the sale.
By default, tips are attributed to the cashier processing the sale.
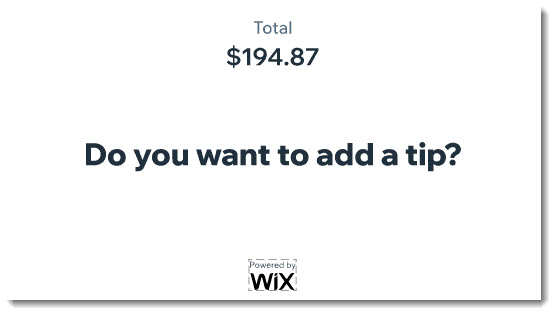
Once you have enabled tipping, the tip screen is part of the checkout flow.
After selecting a relevant payment method, the customer facing screen on the tablet displays a tip request. You can either rotate the screen so customers can choose a tip option or enter the tip yourself.
To collect tips during checkout:
Open the POS tablet.
Start processing the sale.
Select Card or Manual Card Entry as the payment method.
Allow a customer to select a tip option:
Let your customer enter a tip:Flip the screen so it faces your customer.
Allow the customer to make a tip selection.
Enter the tip yourself:Ask the customer if they want to add a tip and if so, what percentage.
Tap the customer's selection.
Complete the sale.
Attributing a sale and tip to another staff member
By default, when a customer leaves a tip during a sale, it goes to the team member who processed the sale. It is, however, possible to attribute the sale - and therefore also the tip - to another team member.
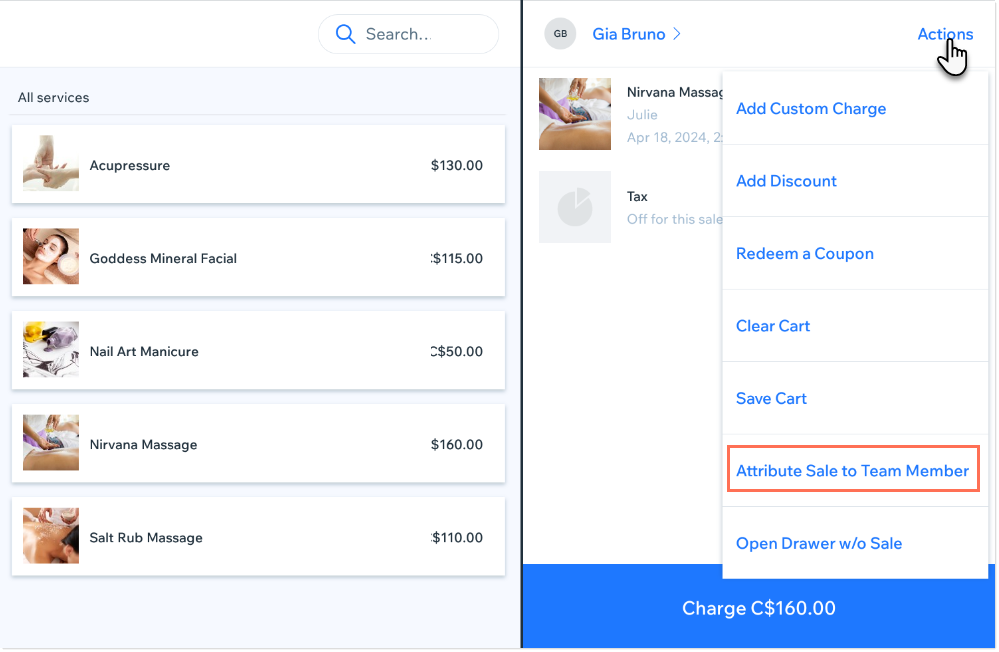
This can be especially convenient if the customer wants to leave a tip for the person who provided them with a service, such as a massage.
Before you begin:
Add staff members to your POS so they can be added to a sale.
To attribute a sale to a team member:
Open the POS tablet.
Start processing the sale.
Before you tap Charge, tap Actions at the top right.
Select Attribute Sale to Team Member.
Select the relevant team member.
Complete the sale.
Refunding an order containing a tip
To refund an order to which a tip was added, you need to enter the refund amount. It's not possible to select specific products to refund.
To refund an order containing a tip:
Open the POS tablet.
Tap Sales History on the bottom bar.
Tap the store order you want to refund.
Tap Actions at the top right.
Tap Issue Refund.
Tap Enter amount.
Enter the amount you want to refund, including cents.
Tap Next.
(Optional) Select a reason for the refund.
Tap Refund to complete the refund.
Note: This cannot be undone.(Optional) Manually update inventory amounts on desktop.
FAQs
Click a question below to learn more about tipping in Retail POS.
Does the tip appear in my customer's receipt?
Yes, the tip appears in the receipt, above the total amount.
How can I track how many tips have been collected?
To check how much you've collected in tips per team member or to view the total amount of money collected in tips, you can check your Tips Report.
To access the Tips Report:
Open the POS tablet.
Tap the Menu icon
 at the bottom left.
Tap Reports.
Tap Tips Report.