


Taking online orders
Wix Restaurants: Setting Up Events for Your Restaurant's Availability
Important:
This article is about the original Restaurants Orders app.
We've released a new online ordering app. Learn how to add and set up the new Wix Restaurants Orders (New) app.
You may have events coming up that affect your restaurant's availability to serve customers. You can add these events to your business hours, menu items, online orders (delivery and pickup), and discounts. For example, you can temporarily close your restaurant for a private event or add a holiday schedule for your online orders.
In this article, learn more about:
Adding events to your business hours
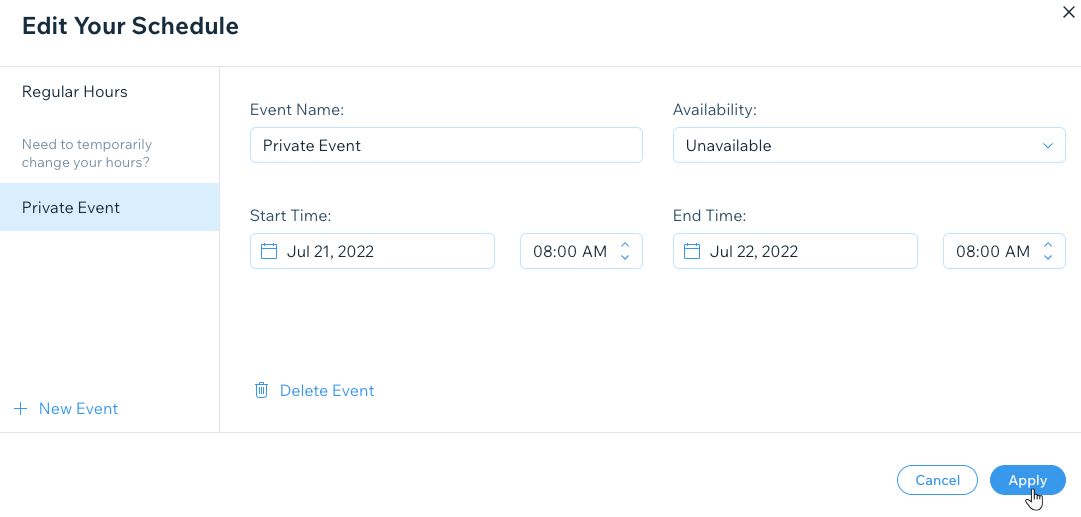
If you have a private event at your restaurant which affects your normal business hours, you can edit your schedule to reflect your unavailability during this event. If a customer tries to order from your restaurant, they'll be notified that you're currently closed.
To add an event that occurs during business hours:
Go to Business Info in your site's dashboard.
Scroll down to the Business Hours section and click Edit next to the hours.
Click + New Event.
Click the Event Name field and enter the name of the event.
Click the Availability drop-down and choose an option:Available: Your restaurant is available during the time you set for the event.
Unavailable: Your restaurant is not available during the time you set for the event.
Set the event's Start Time and End Time from the relevant fields.
Click Apply.
Click Save.
Adding events to your menu items
Add events to specific dishes, sections, or menus if they will be unavailable for online ordering.
For example, you might want to make some dishes available only for pickup and not delivery, or vice versa. Another way to use these events is to make specific dishes unavailable in case you've run out of certain ingredients.
To add an event to your menu items:
Go to Menus in your site's dashboard.
Navigate to the relevant menu, section, or dish.
Click Edit next to Online Ordering.
Click Edit under Availability.
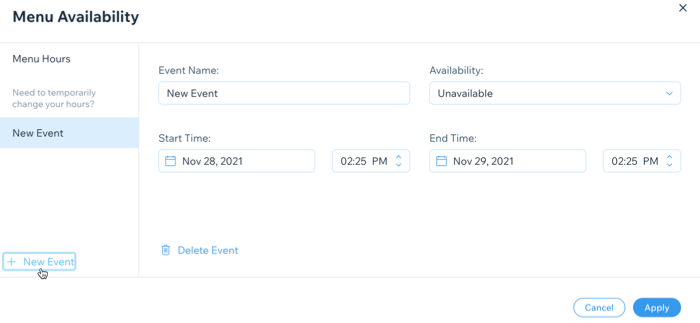
Click + New Event.
Click the Event Name field and enter the name of the event.
Click the Availability drop-down and choose an option:Available: Your restaurant is available during the time you set for the event.
Unavailable: Your restaurant is not available during the time you set for the event.
Set the event's Start Time and End Time from the relevant fields.
Click Apply.
Click Save.
Adding events to your online orders (delivery and pickup)
Certain events can affect your restaurant's availability to fulfill online orders. Add an event to your online orders to notify customers when you're unavailable to fulfill delivery or pickup orders.
To add an event to your online orders:
Go to Order Settings in your site's dashboard.
Choose what you want to do:
Add an event to your pickup hours
Click the Pickup tab.
Click Edit under Availability.
Click + New Event.
Click the Event Name field and enter the name of the event.
Click the Availability drop-down and choose an option:Available: Your restaurant is available during the time you set for the event.
Unavailable: Your restaurant is not available during the time you set for the event.
Set the event's Start Time and End Time from the relevant fields.
Click Apply.

Click Save.
Add an event to your delivery hours
Click the Delivery & Delivery Partners tab.
Hover over the delivery area you want to update and click Edit.
Click the Edit
 icon under Availability.
Click + New Event.
Click the Event Name field and enter the name of the event.
Click the Availability drop-down and choose an option:Available: Your restaurant is available during the time you set for the event.
Unavailable: Your restaurant is not available during the time you set for the event.
Set the event's Start Time and End Time from the relevant fields.
Click Apply.

Click Save.
Adding events to your discounts
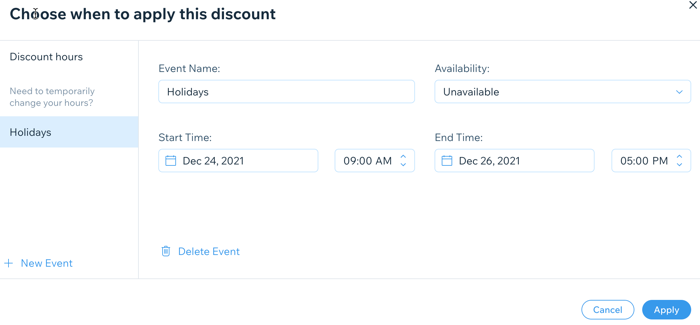
Add events that affect your discounts. For example, your restaurant has an ongoing seasonal discount but you don't want it to apply during Black Friday.
To add an event to discounts:
Go to Restaurant Discounts in your site's dashboard.
Hover over the discount you want to edit and click Edit.
Click Edit under Available.
Click the Event Name field and enter the name of the event.
Click the Availability drop-down and choose an option:Available: Your restaurant is available during the time you set for the event.
Unavailable: Your restaurant is not available during the time you set for the event.
Set the event's Start Time and End Time from the relevant fields.
Click Apply.
Click Save.