


Sending invoices & price quotes
Wix Price Quotes: Creating a Price Quote
Provide professional quotes for your products or services, outlining what the charges are, any applicable taxes and discounts, and any important notes or terms. To ensure seamless order management, you can choose to automatically generate invoices when price quotes are accepted.
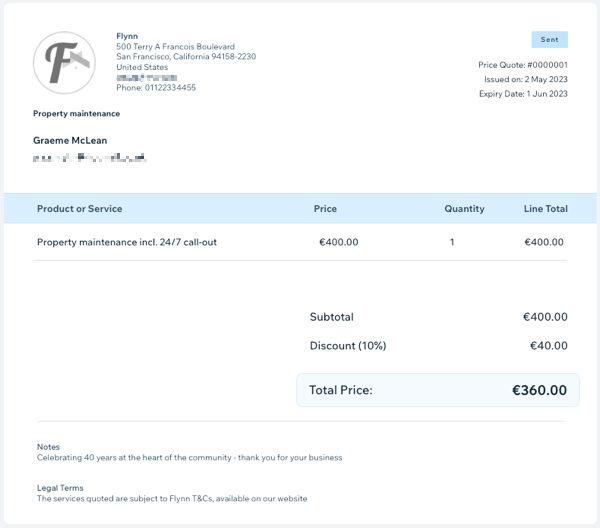
To create a price quote:
Go to Price Quotes in your site's dashboard.
Click + New Quote at the top right.
Provide or confirm your basic business info, as you want it to appear on your price quotes:Business Name: Enter the name of your business.
Business email address: Enter your business email address.
(Optional) Your logo: Upload your business logo.
Automatically create invoices for accepted price quotes: Enable this toggle to automatically convert price quotes into invoices.
Click Create Price Quote.
Enter the Quote Info for this price quote:Title: Enter a title to clearly summarize the reason for payment.
Customer: Click the drop-down to select a contact from your Contact List.
Expiration Date: Select the date this quote expires.
Payment Terms: Click the drop-down and select an option:Due on Receipt: Customers are required to pay once the product/service is received/complete.
Net + 15: Payment to be made within 15 days of product/service receipt/completion.
Net + 30: Payment to be made within 30 days of product/service receipt/completion.
Net + 60: Payment to be made within 60 days of product/service receipt/completion.
Enter the Quote Details (product/service details) for this invoice:Enter item here: Click the drop-down and select the relevant product or service.
Tip: Select + Add Item if you need to create a price quote for a new item. Then enter the details and click Save.
(Optional) Enter a description: Provide a description relating to the product/service.
Price: Enter the price per unit.
Quantity: Enter the quantity of the product or service.
(Optional) Tax 1 / Tax 2: Click the drop-downs to apply one or two tax rates.
Note: Click + Add Tax to create a new tax rate.
(Optional) Discount: Enter a figure next to Discount to apply a percentage discount to the total amount.
(Optional) Click + Add Line Item to add another product or service, then repeat these steps.
(Optional) Enter the Additional info details for this price quote:Notes: Enter any notes you'd like your customer to be aware of.
Terms: Enter any terms that apply to this price quote.
Choose to save or send your price quote:Save: Click Save as Draft at the top right to save the price quote to send at a later time.
Send: Click Preview & Share at the top right to first view a preview of your quote. Then click Send to review or edit the content of the email your customer will receive. Click Send again when you're ready to send the price quote.
Tip:
If you have Wix Chat installed on your site, a chatbox will appear on your quote. When your customer receives your quote, they can use the chatbox to discuss projects and services, and negotiate with you in realtime. Learn more about Wix Chat.