


Wix Mobile POS
Wix Mobile POS: Collecting Tips
Important:
This article is about Wix Mobile POS for mobile phones.
For info on Wix Retail POS for brick and mortar stores, click here.
Let clients who want to leave a tip do so right in your Mobile POS. You can display preset tip percentages or allow customers to decide on the tip.
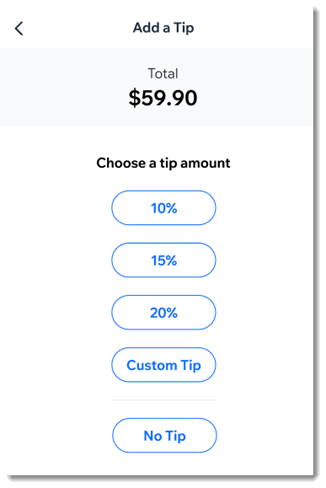
After you enable tipping, you'll see the option to add a tip as part of the checkout.
Notes:
To collect tips, Wix Payments must be your payment provider.
It's not possible to collect tips for cash payment or when processing split payments.
Tips are available with Wix Stores, Wix Booking, and Wix Restaurants Orders (New) .
To enable tipping:
Go to your site in the Wix app.
Tap Manage
 at the bottom.
Scroll down to the Get Paid section and tap Point of Sale.
Tap the More Actions icon
 at the top right.
Tap POS settings.
Note: If you don't have the POS settings option, see the note below.Select Tips.
Tap the Collect tips toggle to enable it.
(Optional) Change the preset tip percentages:Tap the tip option you want to update.
Enter a new percentage.
(Optional) Tap the Allow a custom tip amount toggle to enable it.
Tap Save.
Adding POS settings:
Normally, you should be able to access the POS Settings by clicking the More Actions icon  at the top right.
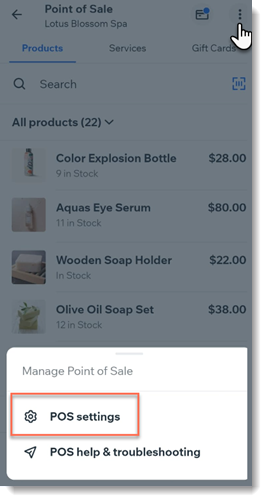
If the settings aren't displayed, you can access them by adding Wix Stores to your site.
Note: Make sure you hide store pages from your live site.