wix studio
Adding a Loop Animation
Create a sense of movement in your design with animations that loop continuously. You can add a loop animation to any element you want visitors to notice - some are more subtle and some are true attention grabbers.
Go to our Wix Studio Academy to check out additional Wix Studio webinars, tutorials, and courses.
In this article, learn more about:
Tip:
When adding an animation on the desktop breakpoint, it cascades down to the smaller breakpoints. However, you can set a different animation, or customize the same animation, per breakpoint.
Adding a loop animation
You can add a loop animation to specific elements and sections, or the site page as a whole.
To adding a loop animation
Select the relevant element.
Click the Open Inspector icon
 at the top right of the editor.

Click the Animations and Effects tab
 .
.Click + Add under Loop.
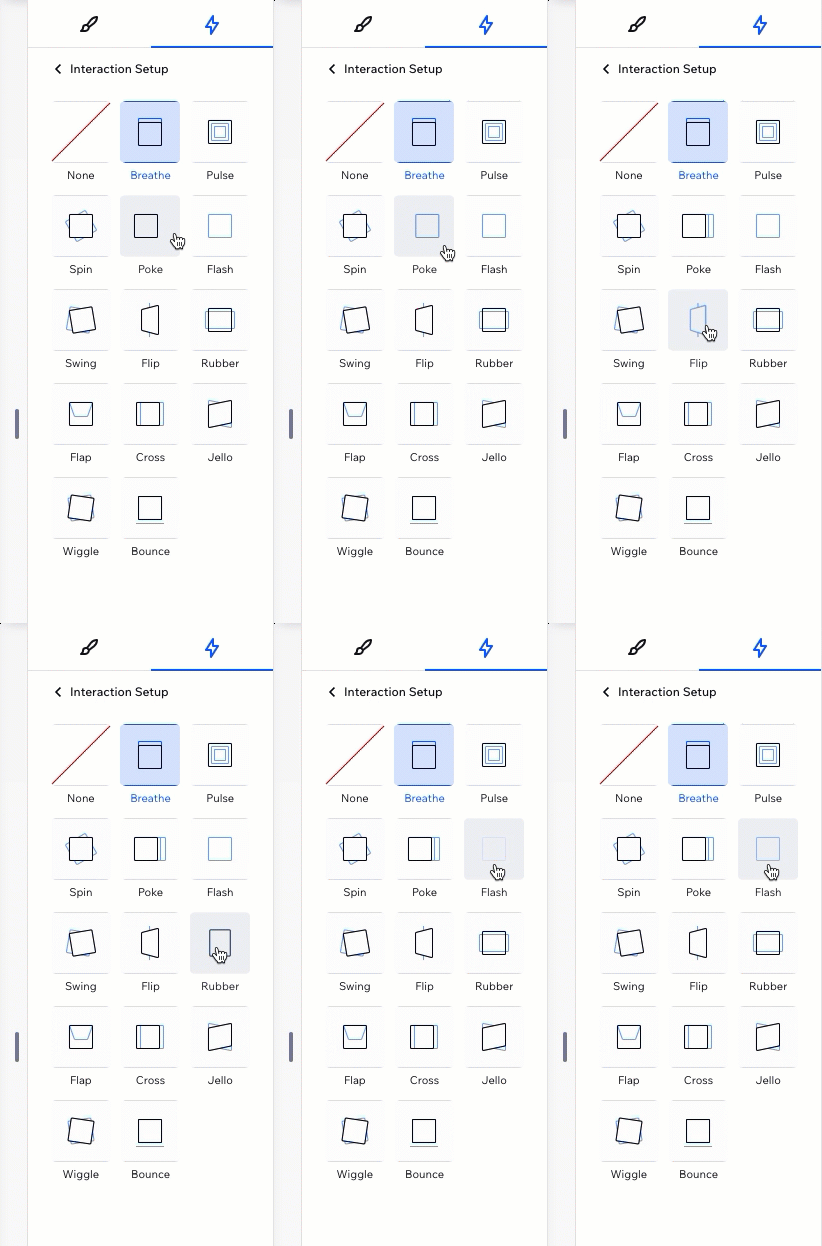
Select an animation from the list.
Tip: Hover over animations to see a preview of how they look.
Customizing a loop animation
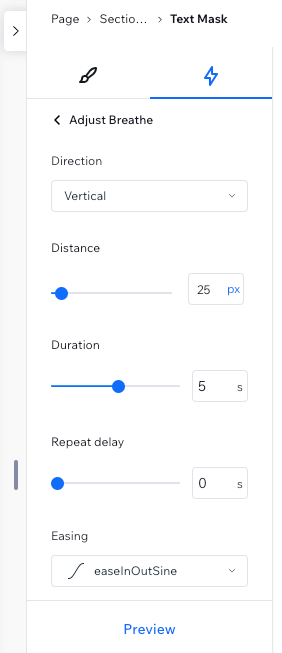
After choosing an animation, set it up to behave the way you want. Choose how long the animation lasts, set the intensity, add a delay in between repeats, and more.
To customize a loop animation:
Select the relevant element.
Click the Open Inspector icon
at the top right of the editor.
Click the Animations and Effects tab
.Click the animation you want to change.
Click Adjust Animation to change its settings:Direction: Choose the direction the animation should come from (e.g. from left, from above).
Intensity: Make this animation more subtle or aggressive.
Duration: Change the length of time of the animation.
Repeat Delay: Add a delay (in seconds) in between the infinite repeats of the animation.
Easing: Choose how gradually the animation should ease in and/or out.
Note:
The available settings depend on the animation you choose.
Removing a loop animation
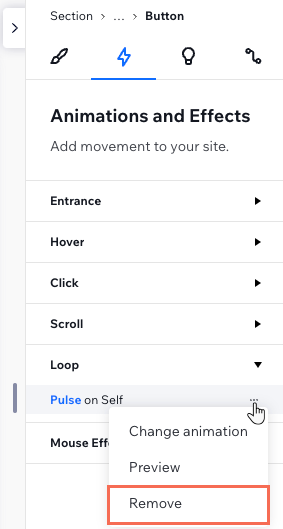
You can remove a loop animation at any time from the Inspector panel.
To remove a loop animation:
Select the relevant element.
Click the Open Inspector icon
at the top right of the editor.
Click the Animations and Effects tab
.Hover over the animation and click the More Actions icon
 .
.Click Remove.