


Wix Forms FAQ
Wix Forms: Managing Your Form Fields
Customize the fields in your site forms to make sure they work for your business, collecting the right information. Click on any form on your site to manage its fields.
Available types of form fields
Choose a range of customizable fields to craft the ultimate form with Wix Forms. Allow your visitors upload files, sign their submissions, subscribe to your content and more.
Important:
Premium form fields such as the file upload field and signature field are only available with select upgrades.
New Forms
Old Forms
Contact fields
These fields should be used to collect contact details. They will automatically be saved in your Contact List.
First name
Last name
Email
Phone
Birthday
Address
Multi-line address
Company name
Position
VAT ID
General fields
General fields include all the common types of fields you can add in Wix Forms such as text fields, number fields, link and more.
Short answer
Long answer
Number
Link
Star Rating
Choices
Choices fields are great for any selection the visitor has to make in your form.
Single choice
Multi choice
Dropdown
Tag picker
Checkbox
Date fields
Date fields allow visitors to select a specific date and / or time.
Date picker
Date
Date & Time
Time
Payments fields
Payments fields allow you to collect payment through the form.
Managing your site form fields
Head over to your editor to make craft your form, your way. Add new fields, edit existing fields and delete fields you no longer need to ensure you gather the most relevant information from visitors.
Note:
The order of fields in the submissions table is based on the order they appear in the site form. To reorder the fields, go to your editor and update the position of fields in the relevant form. Then publish your site.
To manage your site form fields:
New Forms
Old Forms
Click the site form in your editor.
Choose what you want to do:
Add a new field
Click Edit Form to open the form builder.
Click the Add
 icon on the left.
Click the type of field you want to add.
Edit a field
Click Edit Form to open the form builder.
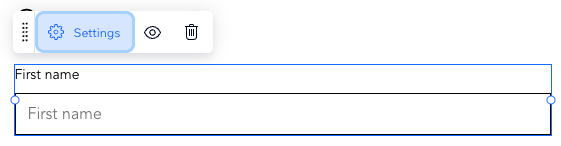
Click the field inside the form.
Click Settings.
Edit the settings of the field.
Note: The available settings depend on the field you've selected.
Change the design of a field
Click Settings.
Click Design.
Click Form Fields.
Use the available options to design your form fields.

Delete a field
Click Edit Form to open the form builder.
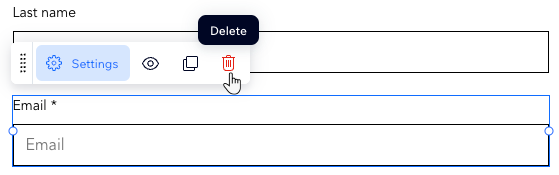
Click the field inside the form.
Click the Delete icon
 .
.
FAQs
Click a question below to learn more.
I would like to restore a deleted field, is this possible?
Yes. When deleting a field from a form with existing submissions, it moves to the Deleted Fields section.
From there, under the More Actions 

Can I choose which countries the phone field accepts numbers from?
Yes, you can change the accepted countries, the display of the country code and more.
Select the relevant form in your editor.
Click Edit Form to open the form builder.
Click the phone field on the form.
Click Settings.
Click Advanced.
Click Selected only.
Click Selected countries and edit the country list.

Can I change the design of individual form fields?
Yes. Customize your field opacity, font, font size and more.
Is it possible to create a form with multiple steps?
Absolutely. Multi-step forms help break down the information or questions in your form into easy-to-manage steps for site visitors to complete.