top of page

Creating your event

Wix Events: Creating an Event Schedule

Let participants know what's happening at your event by creating an event schedule. Schedules are ideal for conferences, festivals, and more.

Guests can view the first 2 schedule items on the events details page and click to see the whole schedule. You can also choose to display the schedule on a separate site page.
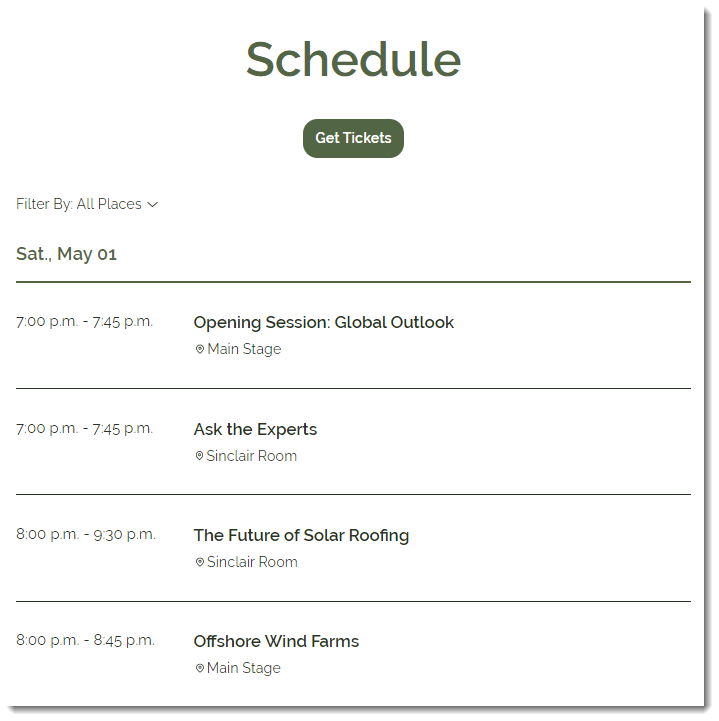
A screenshot of an event schedule.

Before you begin:

Create and save your event as a draft or published event.

To create an event schedule:

  1. Go to Events in your site's dashboard.

  2. Select the relevant draft or published event.
    Note: For recurring events, you can add a schedule to an individual occurrence of an event.

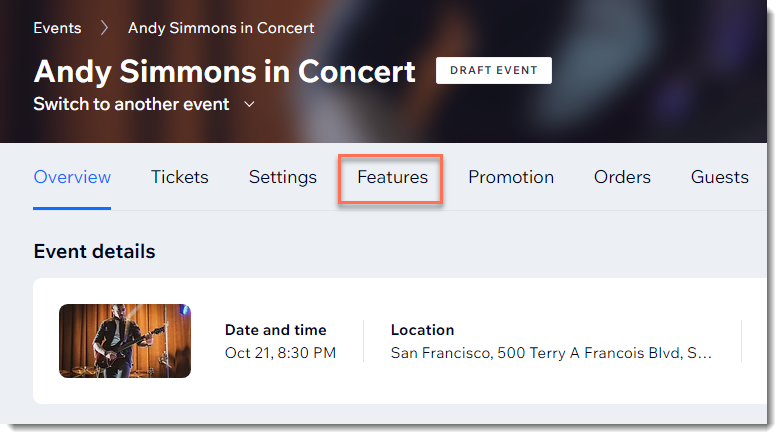
  3. Click the Features tab.

A screenshot of the features tab to add a schedule to the event.

  1. Click Schedule.

  2. Click Add Schedule Item.

  3. Add the details for the first schedule item:Enter the item name (e.g. Opening Session)
    Set the start and end dates and times.
    Note: The minimum time limit for a scheduled item is 10 minutes.
    Enter the location (e.g. Main Stage).
    (Optional) Enter a tag and press Enter on your keyboard.
    Note: Tags can be used to classify event sessions. For example, a renewable energy conference might create tags for  "Solar Energy", "Wind Energy", and "Electric Vehicles". Guests can filter the schedule to locate the content they're interested in. After you create a tag, apply it to other items of the same type.
    (Optional) Enter a description of the schedule item.
    Click Add.
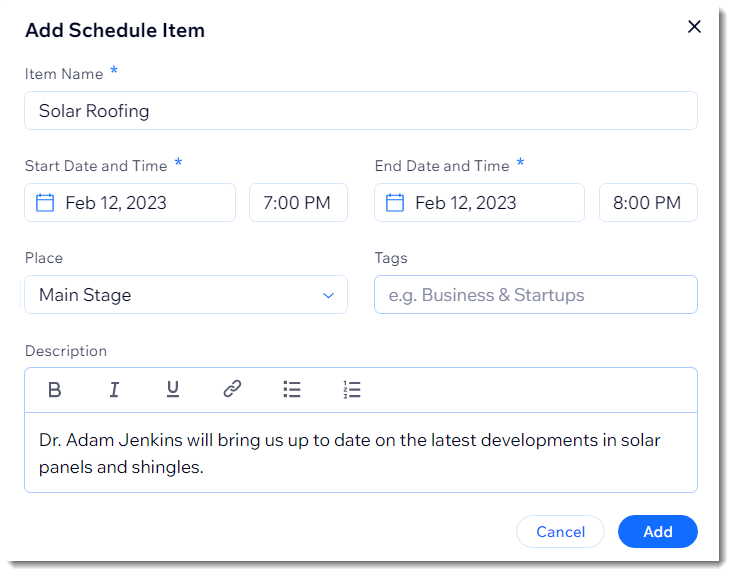
A screenshot of adding the schedule item details to the event.

  1. Repeat steps 5 and 6 to add additional items to the schedule.

  2. (Optional) Click the Enable Personal Agenda toggle enable it.  
    Note: When enabled, guests can mark the events they're interested in and then click View My Agenda to see their selections.
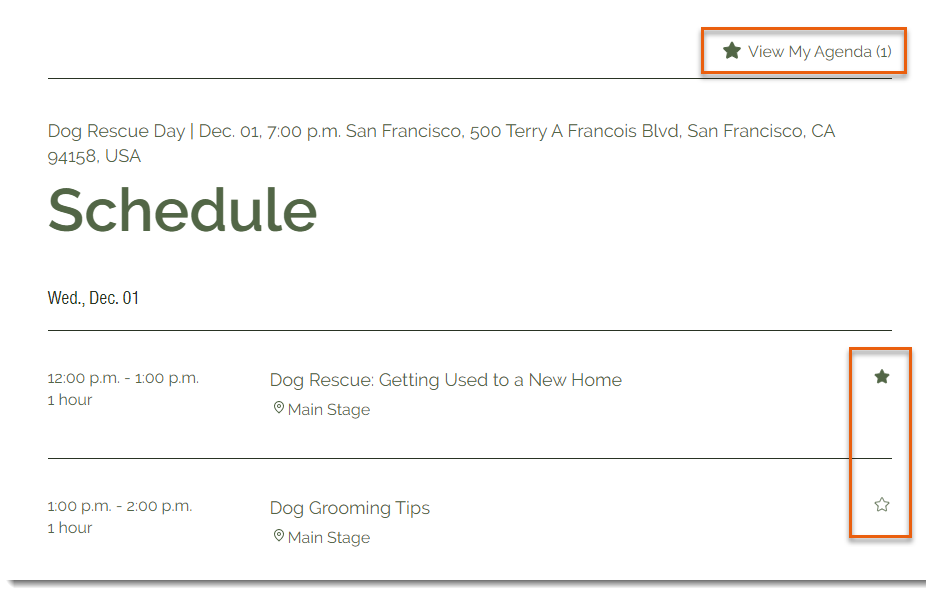
A screenshot of guests being able to mark their favorites items in the event schedule.

Need A Professional Website?
Contact Us 
Today!

Wix Stores: Setting Up Affiliate Marketing with the Goaffpro App

Wix Contacts: About Your Contact Panel

Wix Contacts: Using Pinned Actions in Your Contact Panel

Wix Contacts: Creating a Test Contact

Wix Contacts: Changing a Contact's Subscription Status

Wix Contacts: Adding and Managing Custom Contact Fields

Wix Contacts: Creating and Using Contact Labels

Wix Contacts: Creating a Segment

Wix Contacts: About Segments

Wix Contacts: Exporting Your Contacts

Wix Contacts: Troubleshooting Contact Importing Issues

Wix Contacts: Importing Contacts by Uploading a CSV File

Wix Contacts: Importing Contacts from a Gmail Account

Wix Contacts: Managing Your Contact List

Wix Contacts: Manually Adding a Contact

Wix Contacts: An Overview

Wix Forms: Creating a Coupon

Wix Forms: Setting Up Tax on Your Form

Wix Forms: The Difference between the New and Old Wix Forms

Wix Forms: Viewing Form Submissions from Your Dynamic Pages

Wix Forms: Managing Your Forms from the Dashboard

Wix Forms: Choosing an Address Field

Wix Forms: Adding and Setting Up a Donation Form

Wix Forms: Adding Submission Limits to Your Forms

Wix Forms: Adding and Managing Rules

Wix Forms: Upgrading Wix Forms

Wix Forms: Adding and Setting Up a Multi-Step Form

Wix Forms: Adding Payments to a Site Form

Wix Forms: Enabling Double Opt-In for Subscribers

Wix Forms: Adding and Setting Up a Subscribe Form

wix experts
Graphic2Traffic web design
©
bottom of page