


Creating your event
Wix Events: Adding Rich Media Content to an Event
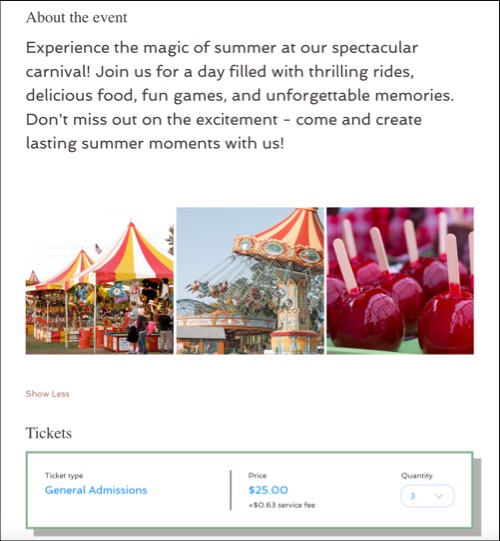
Make your Event Details Page stand out with a variety of rich media options—what you include is up to you. Start with an AI-refined event description for clarity, then boost your page further by adding galleries, videos, and files to capture attention.
Additionally, connect your social media accounts, like Instagram and TikTok, to introduce interactive content that keeps guests engaged.
To add rich media:
Go to Events in your site's dashboard.
Access the relevant event:
New event: Create a new event.Click + Add Event.
Select a type of event (this can't be changed after you click Create Draft):Ticketed Event: Sell tickets for your event. This can include both paid and free tickets.
RSVP Event: Guests to register for the event without purchasing tickets.
Existing events: Edit an existing event.Click Manage next to the relevant existing event.
Click Edit Details under the Event details section.
Scroll down to About the event (optional) and use the available options:
Create a description with AI
Use the AI tool If you're undecided how to describe an event. A "Content AI" prompt will appear where you can describe the text you want or tweak what you've already written.
Click Create with AI.
(In the pop-up) Type what you want AI to create or refine and press Enter / Return on your keyboard.
Choose the relevant option:Insert: Adds text to the 'About the event (optional)' section.
Rephrase: Improves the text for clarity or style.
Click the More Actions icon for additional options (e.g. copying the text, adjusting the tone to professional or casual.).

Add an image
Upload images that visually represent your event.
Click Add Image.
(In the Media Manager) Select an image and click Add to Page.
Customize your image using a variety of options:Size
 / Alignment
  : Adjust the size and positioning of the image.
Link to a web address or section : Make the image clickable and direct users to a specific webpage or a part of your post.
Settings : Add a caption for context, provide alt text for accessibility, enable or disable image downloads, and mark as a spoiler to blur content until clicked.

Add a gallery
Adding a gallery lets you showcase a collection of photos, enriching your event with an appealing display.
Click Add Gallery.
(In the Media Manager) Select the images for your gallery and click Add to Page.
Tip: You can hold the Ctrl / Command key on your keyboard to select multiple images.Manage your media with a range of options:Add media
 : Click Manage Media to add more images.
Edit an image: Click Manage Media and select the relevant image. Then click Edit and adjust what you want (e.g. add a caption for context and provide alt text for accessibility).
Customize the layout:Click Manage Media.
Click the Layout tab.
Choose a gallery layout, set image orientation, and adjust the spacing between images.
Settings:Click Manage Media.
Click the Settings tab.
Click the toggle(s) to enable or disable image downloads and mark images as spoilers.
Size / Alignment : Adjust the size and positioning of the gallery.

Add a video
Adding a video offers an engaging way to share event details and provide a dynamic preview of what guests can expect.
Click Add Video.
Choose where to add the video from:Embed: Paste a URL from YouTube, Vimeo or Facebook.
Upload: Upload a video from your computer or device.
(Optional) Adjust the video settings:Size
/ Alignment : Adjust the size and positioning of the image.
Settings: Click the toggle(s) to enable or disable video download and mark video as spoilers. Then click Save.

Add a file
Click Add File to attach files that guests might find useful, such as event schedules, brochures, or additional information.
Link to a post / video on social media
Add links to Instagram posts, TikTok videos, or X (Twitter) posts to boost your event page with compelling social media content.
Click the relevant social media icon at the bottom (e.g. the TikTok
 icon).
Enter the link to the relevant post or video.
Click Embed.
