Creating Your Services
Wix Bookings: Offering Services at Multiple Locations
Offer your services at multiple business locations to provide your clients and staff more choices and flexibility. You can create appointments and classes that occur at more than one location or create separate services for each branch.
Important:
For services that require resources, make sure you add the relevant resource types, and their amount, to each of your locations to ensure a smooth experience for your clients and staff. Learn more about adding resources to your services at different locations.
Notes:
When clients book services, the emails go to the email address connected to the default business location.
Your dashboard's time zone doesn't change if you have multiple locations. Only the time zone for your default location appears on your site.
In this article, learn more about:
Adding business locations to your site
As your business expands, add new locations to the Business Info section of your site. Keep your clients in the loop with easy access to the updated location details. They can then select the most convenient location to book their services.
To add business locations to your site:
Go to Business Info in your site's dashboard.
Scroll down to the Location and contact info section.
If you have not already done so, enter the details of your first location:Enter your business address.
(Optional) Enter a Location name, for example, 'Our newest location'.
(Optional) Enter an Address description, for example, "Enter from the side door beside the elevators".
Enter contact info relevant for this location.
Note: Your default location will be set to your default time zone. For additional locations select a new time zone from the Time zone drop-down. Learn more about displaying times zones.
Click Save.
Click Add New Location.
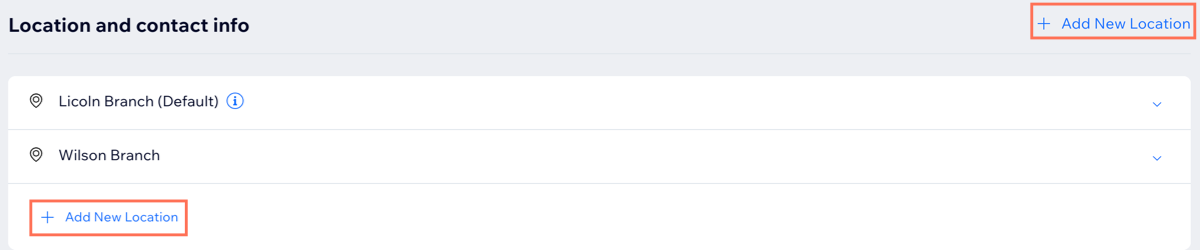
Enter the details of your new location.
Repeat steps 3 - 5 to create any additional locations.
Click Save.
Changing staff members' available locations
Set your staff up at multiple locations to offer more convenient options to your clients. Once you have set up the staff availability, you can create or edit appointments for all your locations. Learn about additional factors that can affect appointment availability.
Before you begin:
Make sure to set your default work hours.
To change staff members' available locations:
Go to Staff in your site's dashboard.
Hover over the staff member you want to update and click Edit.
Scroll down and click the Edit icon
 next to the relevant day of the week.
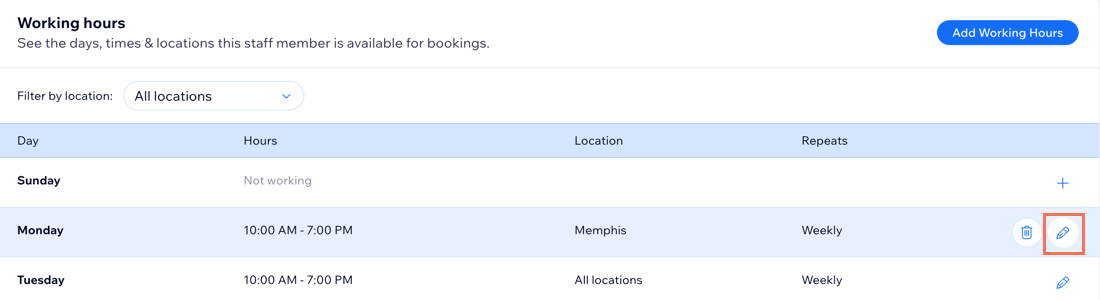
Click the Location drop-down and select the relevant location where your staff member works on that day.
Click Save.
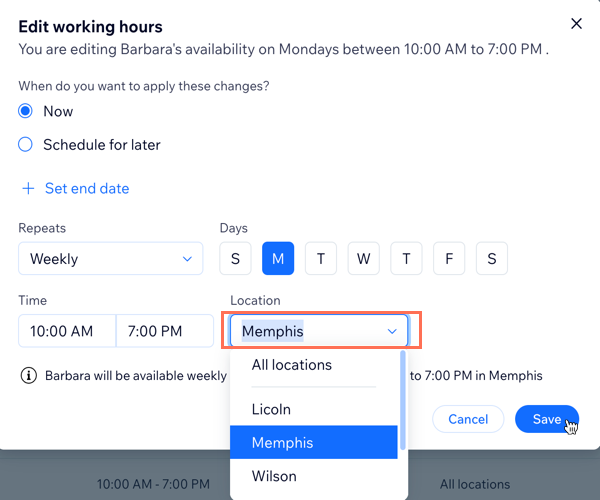
(Optional) Repeat steps 4-6 to select the relevant locations for each of the staff member's working days.
(Optional) Repeat the steps above for all staff members who work from multiple locations.
Adding more locations to an appointment or class
As your business grows, you may want to add more locations to your existing services. This is a great way to win new clients and offer more convenience to your existing clients.
To add more locations to an appointment or class:
Go to Booking Services in your site's dashboard.
Click an existing appointment or class to edit it.
Click Edit under Location.
Click Business Location.
Select the relevant business addresses from the Choose locations drop-down.
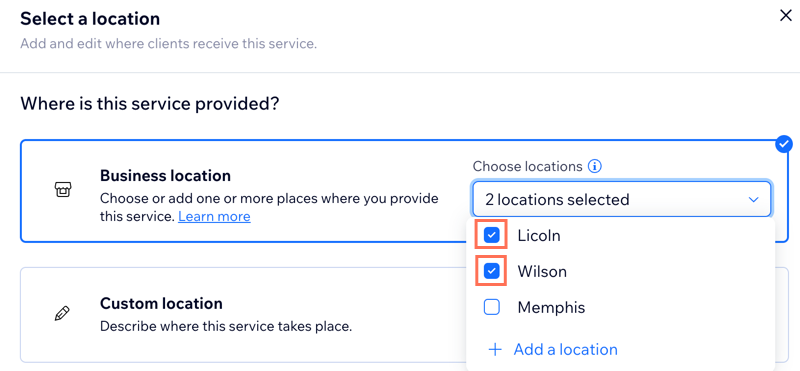
Click Save.
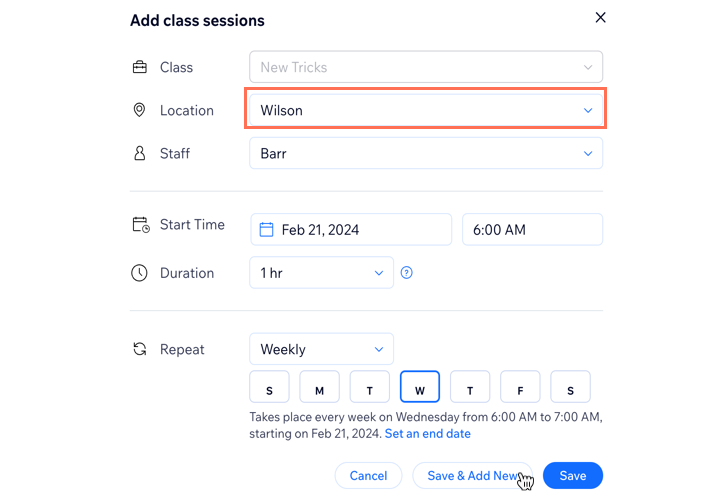
(Optional) Schedule recurring classes at multiple locations by scrolling down to the Schedule section.Add Sessions (click Save & Continue if prompted).
Add the required session details, including the location.
(Optional) Click + Save & Add New to schedule additional sessions.
Click Save.
Tip:
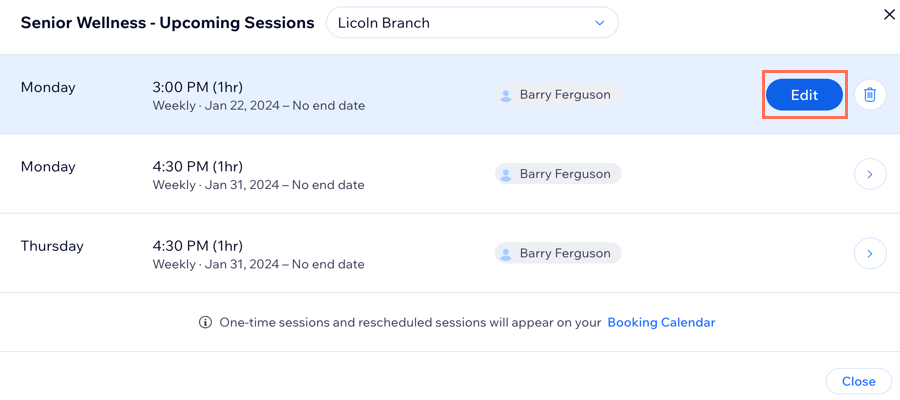
Click Edit schedule under the Schedule section to edit class details.
Add a one-time session through your Booking calendar.
Offering courses at multiple locations
You can create a course and offer it any one of your locations. You cannot create a single course service to be held at multiple locations.
To offer a course at multiple locations, start by creating the course at one location. Then, duplicate the course and set it at a different location. A single course service cannot have sessions in more than one location
To offer a course at multiple locations:
Go to Booking Services in your site's dashboard.
Click an existing course to edit it.
Click Edit next to Location in the Locations section.
Choose where you want the course to take place:Business location: Select one of your business addresses.
Custom Location: Add a location other than one of your business addresses. For example, an Online session.
Click Save.
Click the More Actions icon
 next to the course you created above in the Booking Services tab.
Click Duplicate.
Hover over the class you duplicated and click Edit.

Click Edit next to Location in the Locations section.
Choose where you want the second course to take place:Business location: Select one of your business addresses.
Custom Location: Choose a location other than one of your business addresses.
(Optional) Repeat steps 6 -10 above as necessary, depending on the number of locations you want to include in the course.
Note: Your clients will have to sign up for each course session at each location.
Click Save.
Displaying services by location
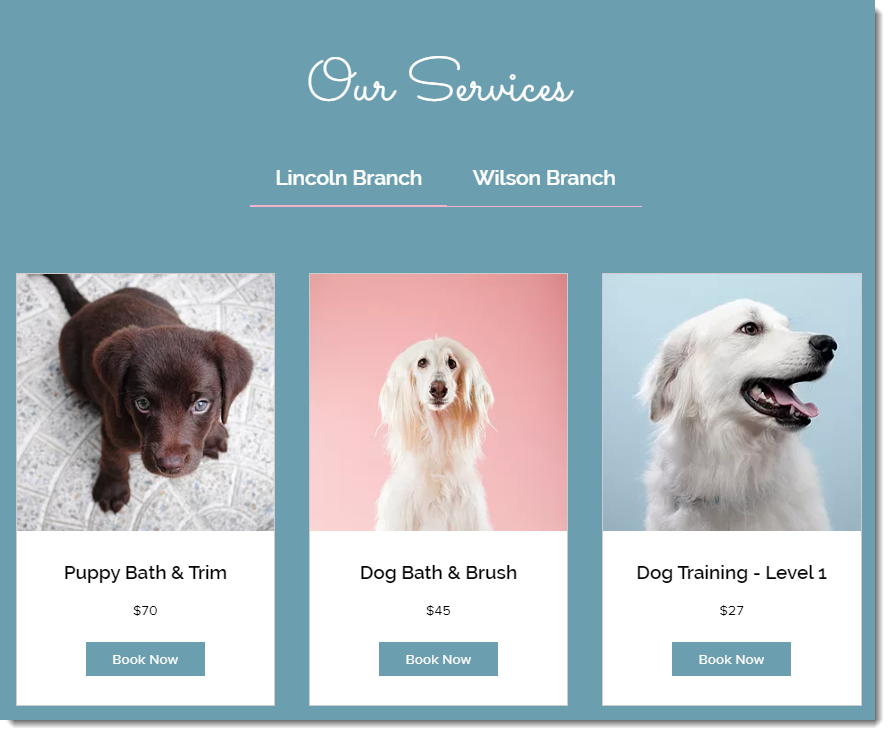
If you choose to include tabs on your Service List, you can display your services by location, instead of by service category.
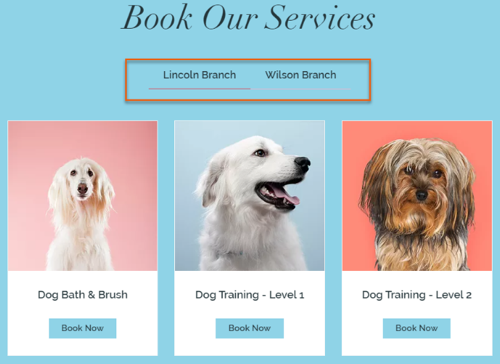
To display services by location:
Wix Editor
Studio Editor
Go to your Book Online page:Click Pages & Menu
 on the left side of the editor.
Click Bookings Pages.
Click the Book Online page.
Click the Book Online element on your page.
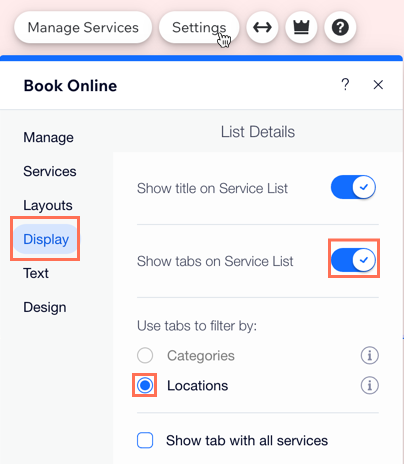
Click Settings.
Click the Display tab.
Enable the Show title on Service List toggle if you want to include the title (e.g. "Our Services").
Enable the Show tabs on Service List toggle to add the tabs showing your different locations.
Select Locations under Use tabs to filter by.
Removing a business location from your site
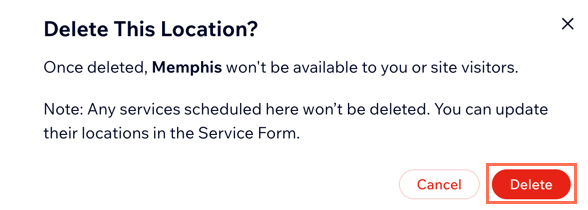
If you stop offering a service at a location, you can remove it from your site. Any scheduled services at the deleted location won't be affected; so make sure to update the new location or cancel the service from your calendar. Alternatively, you can update all the relevant services from Booking Services on your site's dashboard.
Note:
You can't delete your default location. However, you can make another location the default, then delete the original default location.
To remove a business location from your site:
Go to Business Info in your site's dashboard.
Scroll down to the Location and contact info section.
Click the More Actions icon
next to the location you want to delete.Click Delete.
Click Delete to confirm.