


Customizing Wix Bookings pages
Wix Bookings: Adding and Setting Up the Next Availability Widget
The Next Availability widget helps streamline the booking process for your clients. With this widget, you can display the next available time slot for a specific service directly on your website. Clients can then book appointments without having to search through a calendar or contact you directly.
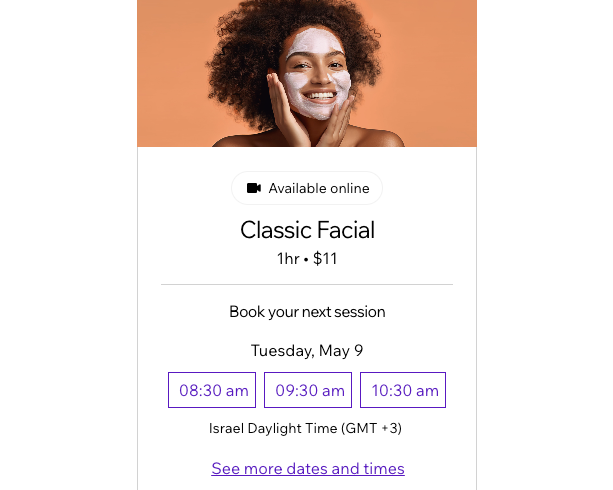
Step 1 | Add the Next Availability widget to your site
The Next Availability widget allows you to display any of your most in-demand services on any page on your site.
Wix Editor
Studio Editor
Click Add Elements
 on the left side of the editor.
Click Bookings.
Click Next Availability.
Drag the widget onto your page.
Step 2 | Choose which service to display
Now choose which service you want to display in the widget and at what location. You can add other Next Availability widgets, with different services, on various pages on your site.
Tips:
You can add as many widgets as you like to your pages. For example, you can add a widget for each of your services on different pages of your site.
To change the image you display for your service on the Next Availability widget, update the image on the relevant service page in Booking Services in your site's dashboard.
To choose which service to display:
Wix Editor
Studio Editor
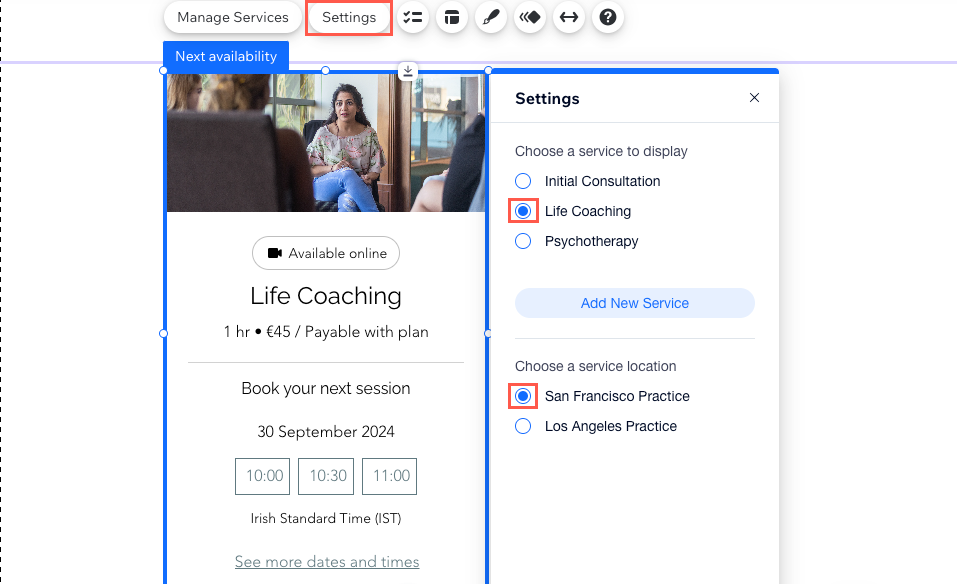
Click the Next Availability widget in your editor.
Click Settings.
Select the service you want to display.
Select the service location.
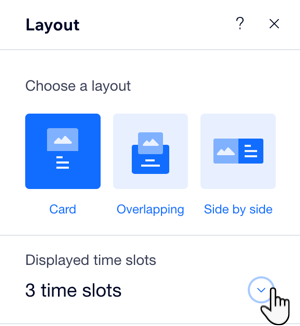
Click the Layout icon
 on the Next Availability widget.
Click to select the relevant layout for the widget.
Click the Displayed time slots drop-down and choose the number of slots you want to show on the widget.
Step 3 | Design the text that appears on the widget
You can now design the text that appears throughout the Next Availability widget. This is a great way to make the widget fit your style and branding. Click on any piece of text in the widget to edit the design.
Note:
Most of the text content that appears on the widget is taken directly from the service page itself. If you want to edit the text content on the widget, you can do so from the service creation form.
To design the text that appears on the widget:
Wix Editor
Studio Editor
Click the Next Availability widget in your editor.
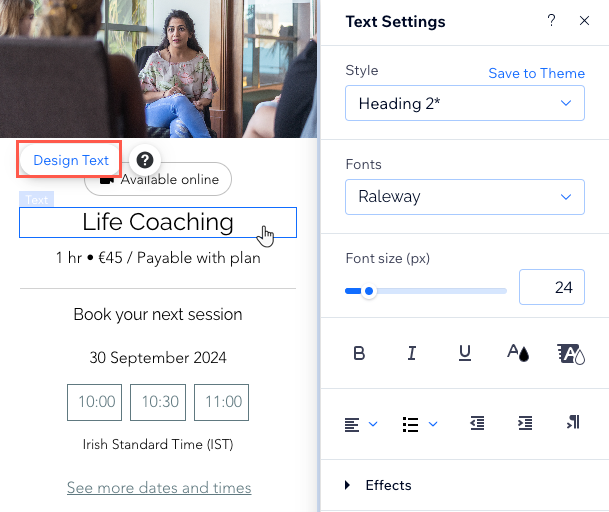
Click any piece of text to customize the design.
Click Design Text.
Use the available options to adjust the style, fonts, font size, formatting and more.
FAQs
Click a question below to learn more about the Next Availability widget.
Two staff members offer the service I want to display, can my clients choose the staff member?
The Next Availability widget displays services based on availability only, so clients can book the next free slot for their favorite service. However, they cannot choose the staff member. They can include a request in the booking form for the service, but you will need to assign the staff member manually.
The service I want to display offers different price options, how do clients choose the relevant rate?
If you offer services with different price options, your clients choose the relevant rate at checkout, after they select the slot they want to book in the widget.