Managing your staff
Wix Bookings: Adding and Setting up the Connecteam Integration
Integrate your Booking Calendar with Connecteam to manage employee schedules, timesheets, and payroll. This two-way integration updates changes in bookings and employee availability automatically on both platforms. New appointments in Wix sync to your Connecteam schedule.
Changes in Connecteam, such as time off, unavailable slots, and shift changes, appear in Wix as blocked time, preventing clients from booking with unavailable staff. Updates sync automatically, streamlining your business and letting you focus on your clients.
Important:
For more information, please visit the Connecteam help center or contact Connecteam support 24/7 through your Connecteam dashboard.
Make sure to upgrade your site so you can accept online bookings.
Step 1 | Sync Connecteam with your Booking Calendar
Log in to your Connecteam account to begin the integration process.
I don't have a Connecteam account
If you do not already have a Connecteam account, you can add it to your site from the Wix App Market.
To add Connecteam to your site and sign up for an account:
Go to the Wix App Market in your site's dashboard.
Search for the Connecteam app in the search bar.
Click Add to Site.
Click Get started now.
Enter your details and click Let's Go.
Follow the on-screen instructions to complete setup and then start from Step 2 below.
To sync Connecteam with your Booking Calendar:
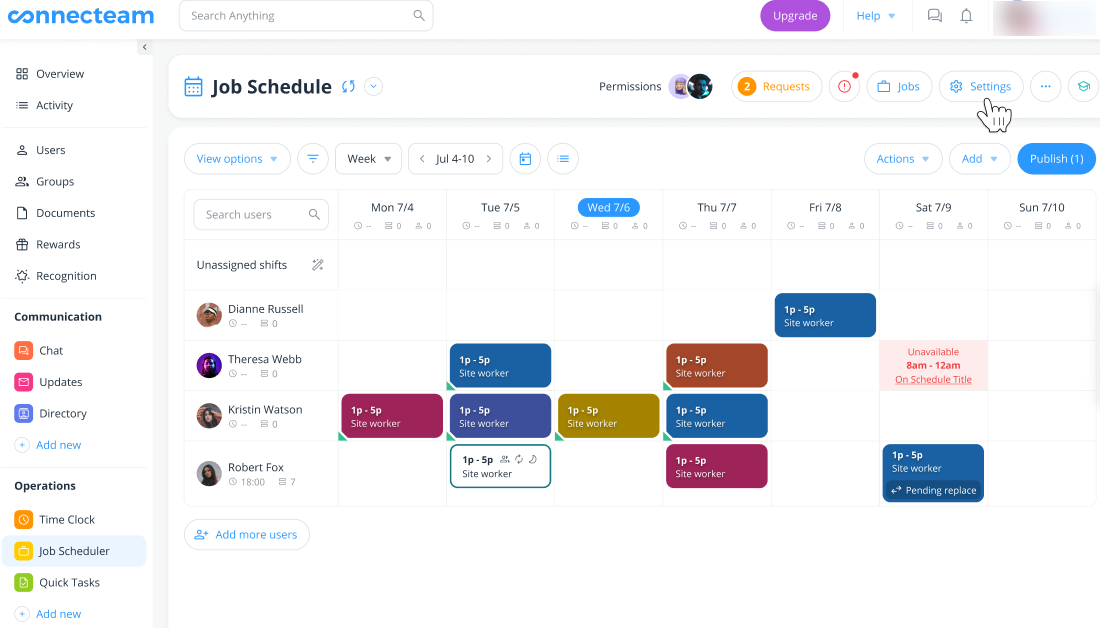
Go to your Job Schedule.
Click Integrations.
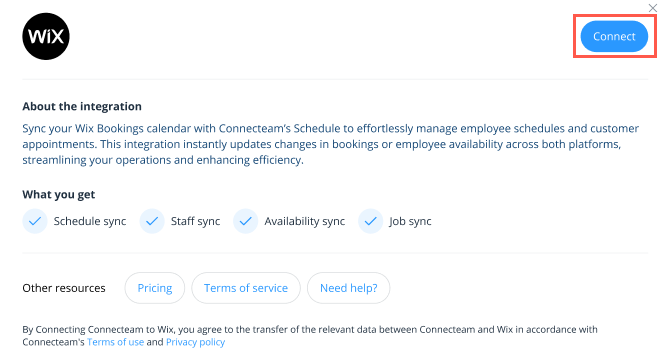
Click Connect next to Get Booked with Wix Bookings.
Click Connect to confirm.
Choose the relevant Wix site you want to connect (if you have more than one site).
Click Add to Site in the Wix App Market.
Click Continue to complete the integration setup.
Step 2 | Match your Wix Bookings staff with Connecteam
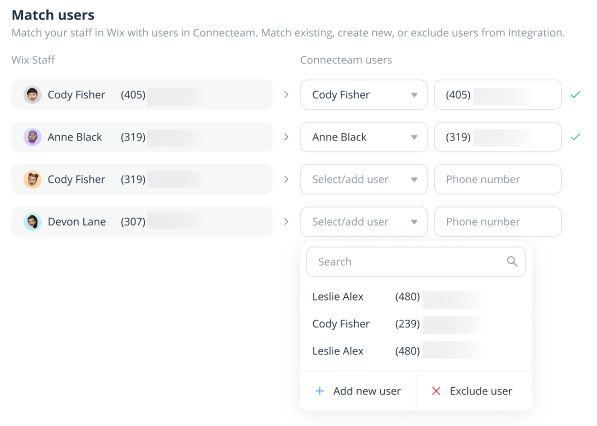
Now that you have started the connection, you can match your Wix staff members and Connecteam users on the Connecteam platform. You can match existing, create new, or even exclude certain members of staff from the integration. Your Wix staff members appear automatically, so you just need to confirm their details are correct as Connecteam users.
Note:
A valid phone number is required for each staff member.
To match your staff with Connecteam:
Click the drop-downs next to the relevant staff members under Connecteam users to update the names.
In the field next to the Connecteam username, make sure the assigned phone number is correct.
Repeat steps 1-2 for all staff members.
(Optional) Click Add new user and enter their details for any new staff members that join your business in future.
(Optional) Click Exclude user if you do not want certain staff members to be available on Connecteam.
Click Continue.
Step 3 | Match your Wix Bookings services with your Connecteam jobs
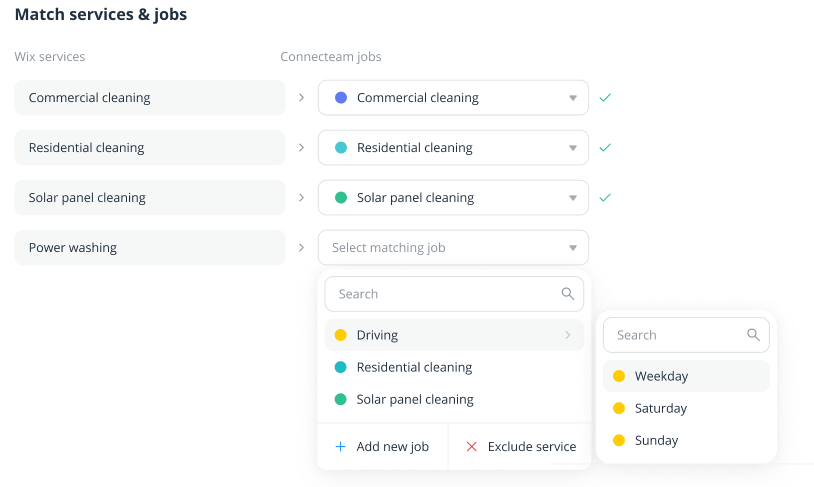
Now you'll need to match your Wix Bookings services with their corresponding Connecteam jobs.
To match your services and jobs in Connecteam:
Select the relevant option that matches with each of your Wix Bookings services from the Connecteam jobs drop-downs.Select the relevant days of the week if you offer services/jobs on a limited basis.
(Optional) Click Add new job and enter their details for any new services you plan to offer at your business in the future.
(Optional) Click Exclude service if you do not want certain services to be available on Connecteam.
Click Continue.
Step 4 | Manage your shift settings
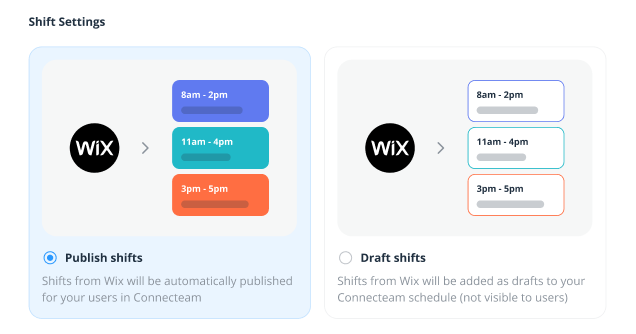
Lastly, choose to automatically publish shifts from Wix or add them as drafts in your Connecteam schedule.
To manage your shifts:
Select Publish shifts or Draft shifts.
Click Continue.
Click Done.