New Automation Builder
The New Automation Builder: Using the Property Picker
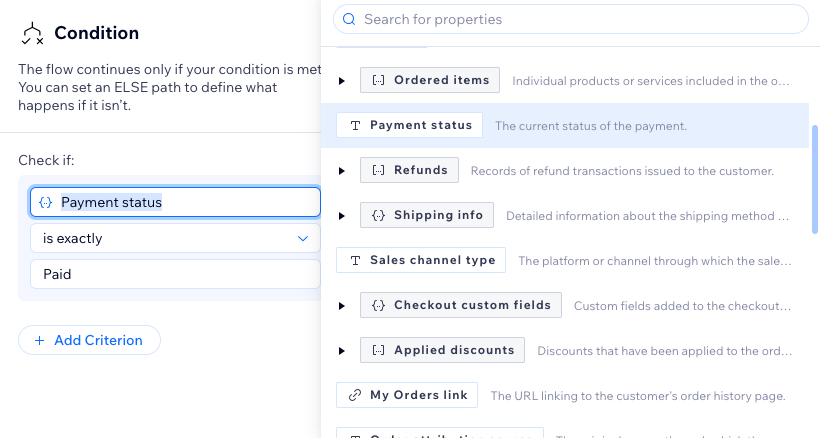
The property picker is a popover in the new automation builder that allows you to add more complex logic to your automations. It shows all schema properties in an organized view, including the property type, description, and examples of how to use it in an automation. Data appears as a nestable list based on its source (the trigger or action name).
Use the property picker to create more complex and personalized automation flows with dynamic variables. Start by choosing a property, then decide how the condition behaves using 'if/else' logic before continuing to build your automation.
The available data types
In the table below view each data type available in the property picker, along with a description and a use case for incorporating it into your automation.
Type
Description
Use case
String (Text)
Represents alphanumeric characters and symbols.
Personalize an email template by including a dynamic text property for a member's name (e.g., "Dear [Member Name]").
Number
Represents numerical values.
Set a condition based on the order total amount to trigger a discount if the total exceeds $100 (e.g., 'Order total' is greater than '$100').
Date & Time
Represents dates and times.
Send an SMS with the time of an appointment entered as a dynamic field (e.g., "Your appointment is at [Appointment Time]").
Boolean (True/False)
Represents true or false values.
Set a condition to check if an order is paid, only triggering a confirmation email if 'Is order paid' equals TRUE (e.g., 'Is order paid' equals 'TRUE').
Enum
Represents a set of predefined values.
Set a condition based on payment status with the values 'Pending,' 'Completed,' and 'Failed,' only triggering an action if the status equals 'Completed'.
Object
Represents entities such as users, products, or orders.
Set a condition based on object properties, which can be any data type (e.g., 'Item quantity' is greater than 5).
Array (List)
Represents a dynamic list of items from a specific data type.
Set a condition based on an array containing products from an order. The condition checks if the order includes shoes or dresses (e.g., 'Line items' include any of 'Shoes' or 'Dress').
The property picker components
From the property picker, view all available information and data up to the current step in your automation. This includes your chosen trigger (e.g., Order placed). It you added an action before the condition (e.g., Add a coupon), the property picker shows data from both the trigger and the action.
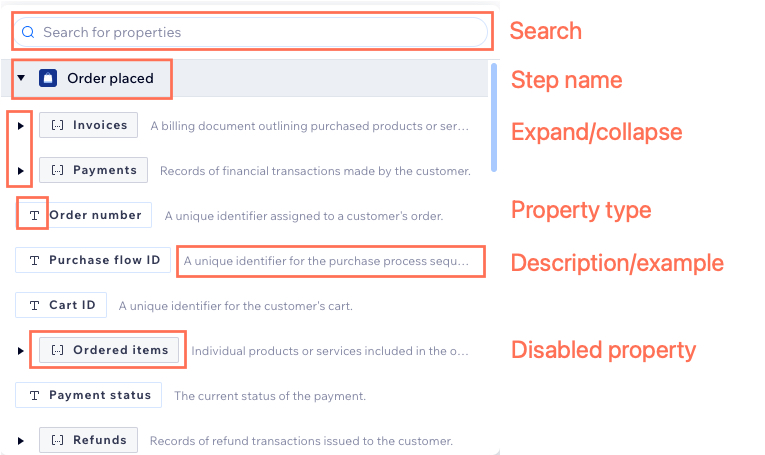
The property picker components are:
Search: Use the search bar to filter the list based on the text you enter.
Step name: Data organization matches the automation setup, with each step's available data appearing in the property picker.
Expand/collapse: Expand or collapse nestable steps and items.
Property type: Each type is displayed with a corresponding icon (e.g., text icon for text).
Description/example: View a description and/or example of the property, which changes based on the use case.
Disabled property: Unselectable properties marked with a grey badge.
Building a condition with the property picker
To build a complete condition, you need to choose three components:
The property (selected from the property picker).
The relevant logic/operator (e.g., text, number, date).
The resulting output the condition should check.
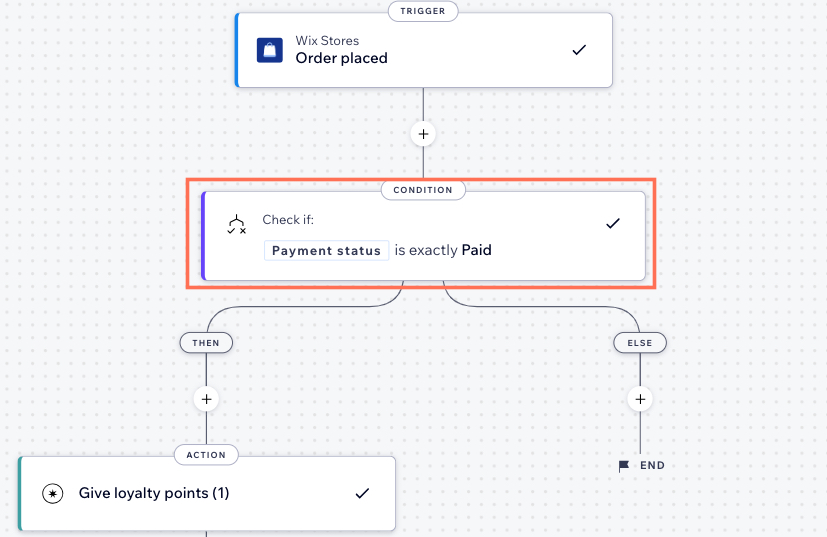
In the below example, we'll use the property picker to set up the condition: check if an order's payment status is equal to 'Paid' before continuing with the automation.
To build a condition with the property picker:
Click the Condition step.
Click the Select a property field to open the property picker.
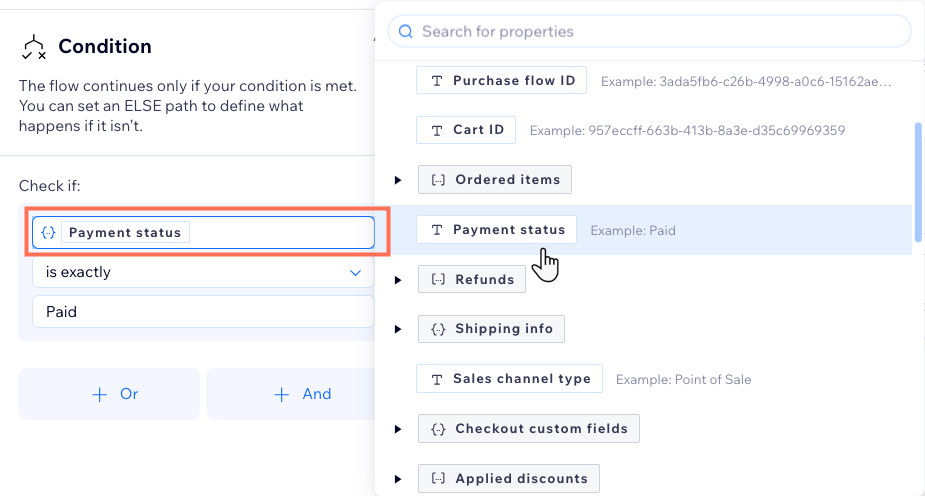
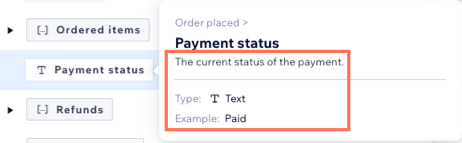
Choose the property you want the condition to check from the nestable list. For our example, we want the condition to check Payment status.
Tip:
Hover over a property to see additional information such as the property type and an example of how to use it in your automation.
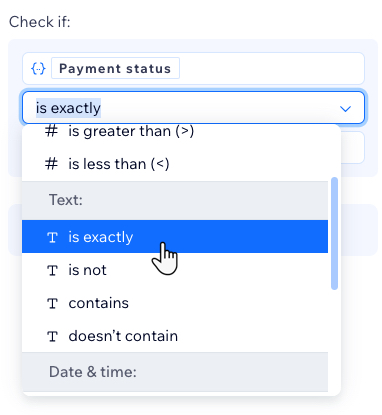
Click the Select logic dropdown and choose the logic from the available data types. For our example, we want to choose the type Text is exactly.
Finally, choose the resulting output the condition should check. For our example, we want the condition to check that the text is exactly the word Paid so we enter the word 'Paid' into the text field.
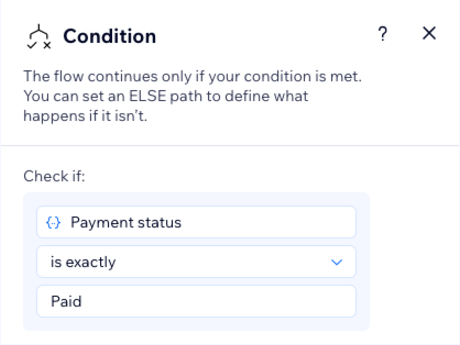
Click Apply to save the condition.
Continue with the rest of the automation flow including choosing an action. In our example, we added an action 'Give Loyalty Points'.
Now, when an order is placed, the condition checks if the payment status is 'Paid' before continuing with the flow.