


Setting up Online Programs
Online Programs: Adding Quizzes and Surveys Throughout Your Program
Add a quiz or survey at any point in your program to keep participants engaged. You can customize each question to see how effective your content is. For example, gather participants' feedback using an open-ended question, or have them select their answer from a list.
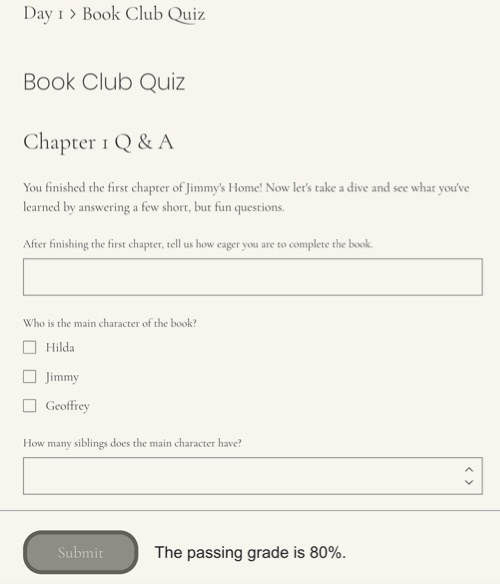
Step 1 | Add a new quiz or survey
Add a quiz or survey at any point throughout your program. You can add your questions at the end of each day, after participants complete steps on a specific day, or add them to select days.
To add a quiz or survey:
Go to Online Programs in your site's dashboard.
Click the relevant program.
Scroll down to the Content / Schedule.
Click + Add.
Select Add Quiz.

Tip:
Want to create a quiz without the hassle? Click Create with AI to let artificial intelligence craft your quiz for you. You can then customize and edit the questions and answers to fit your exact needs.
Step 2 | Enter the basic information
Give your quiz / survey a name to describe it. This information lets participants know what kind of content to expect before they start. Then, assign the quiz / survey to the relevant place in your program so it appears right on time.
To add the basic info:
Enter a title under Name of your quiz or survey.
Choose the relevant place for your quiz / survey to appear:Scheduled program: Select the desired date from the Date drop-down.
 Self-paced program: Select the desired section from the Section drop-down.

Step 3 | Build your quiz or survey
After filling in the basic details of your quiz / survey, it's time to build it from scratch. Add an informative title, descriptive text and the questions you want. You can choose from different types of questions (e.g. open ended, multiple choice) to meet your needs.
To build your quiz / survey:
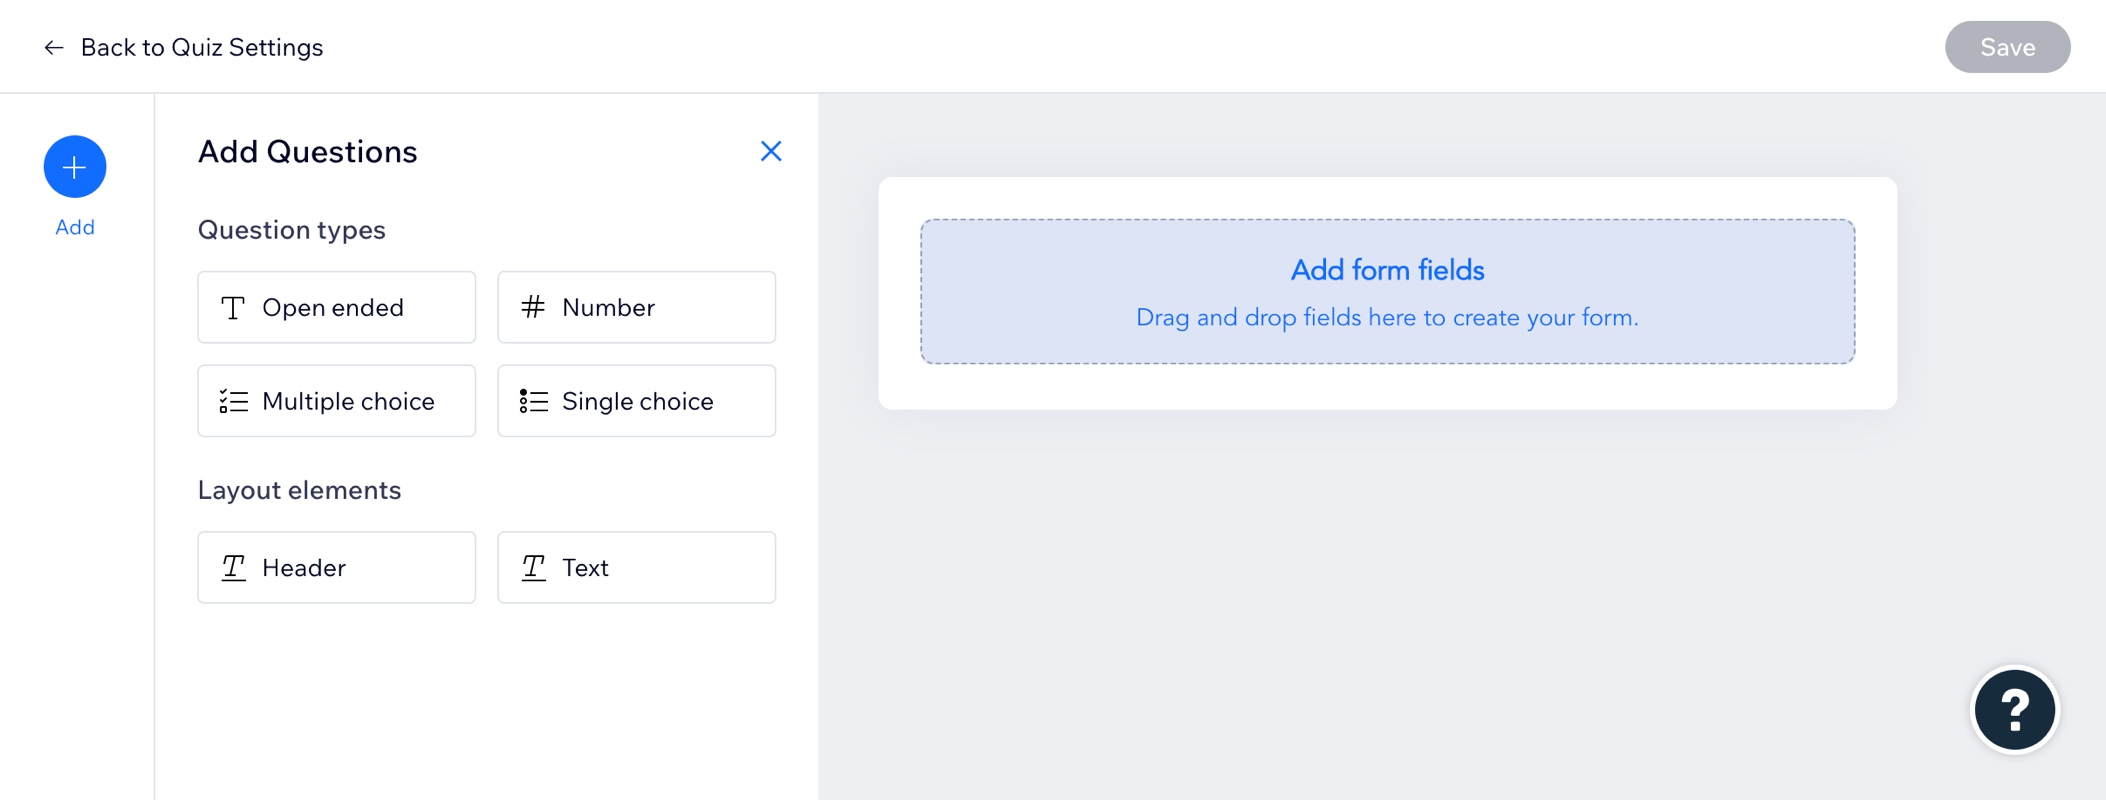
Click + Add Questions.
Choose what you want to add to your quiz / survey:
Header / Text
Use headings to organize your quiz / survey. You can also use text elements to add more information, or describe anything you want on the page.
To add a header element:
Click Header under Layout elements.
Click the new header you just added.
Click Edit text.
Enter your title.
(Optional) Use the formatting toolbar to style your title (e.g. alignment, bold, spacing, etc.)
To add a text element:
Click Text under Layout elements.
Click the new text box you just added.
Click Edit text.
Enter your text.
(Optional) Use the formatting toolbar to style your text (e.g. alignment, bold, spacing, etc.)

Open-ended
Your participants type what they want in order to answer the question.
Click Open ended under Question Type.
Click the question you just added.
Click Settings.
Type your question under Question.
(Optional) Enable the Set a correct answer toggle to display the correct answer and show participants your feedback.
(Optional) Enable the Add text toggle to display additional information such as hints or tips.
Number
Participants answer the question by typing a number.
Click Number under Question Type.
Click the question you just added.
Click Settings.
Type your question under Question.
(Optional) Enable the Set a correct answer toggle to display the correct answer and show participants your feedback.
(Optional) Enable the Add text toggle to display additional information such as hints or tips.
Multiple choice
Participants can select multiple options from a list of answers.
Click Multiple choice under Question Type.
Click the question you just added.
Click Settings.
Type your question under Question.
Enter the desired options under Answers.
Tip: Drag the options to re-arrange their order.(Optional) Enable the Set a correct answer toggle to display the correct answer and show participants your feedback.
(Optional) Enable the Add text toggle to display additional information such as hints or tips.
Single choice
Participants select only one option from a list of answers.
Click Single choice under Question Type.
Click the question you just added.
Click Settings.
Type your question under Question.
Add the desired options under Answers.
Tip: Drag the options to re-arrange their order.(Optional) Enable the Set a correct answer toggle to display the correct answer and show participants your feedback.
(Optional) Enable the Add text toggle to display additional information such as hints or tips.
3. Repeat step 2 to add more questions or elements.
4. Click Save.
Tips:
Move elements around the page using drag and drop.
You can change the design of this page by customizing your site theme's colors and text. This automatically adjusts the look of your quiz / survey.
Step 4 | (Optional) Add a pass grade to your quiz or survey
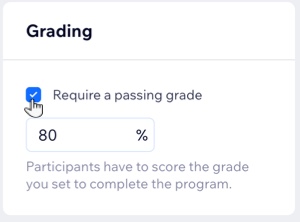
After saving your new quiz / survey, create an incentive for your participants by adding a passing grade. Only when people achieve the grade, they can continue the program.
Important:
If participants do not meet the passing grade, they are not able to complete the program.
To add a passing grade:
Select the Require a passing grade checkbox under Grading.
Enter the score you want participants to achieve.
Click Save.
FAQ's
Click a question below to learn more. about quizzes and surveys in Online Programs.
Can I see my participants' answers to the quiz / survey questions?
Yes. You can view their answers to see what participants are learning from each step.
Can I edit the questions and answers in my quiz / survey?
Yes. You can go back at any time and make changes to your questions and answers.
Can I add a quiz to my program using the Wix app and AI?
Yes. In the Wix app, you can get help from AI to create a quiz to self-paced programs.
Go to your site in the Wix app.
Tap Manage
 at the bottom.
Tap Online Programs.
Tap the relevant program.
Tap Content.
Tap the relevant Section.
Tap + Add Step.
Tap Quiz by AI.

Answer the AI's questions in the chat.
Tap Navigate to view your quiz.
Review your quiz.
Set the grading:Tap Set next to Grading.
Tap the Grading toggle.
Set the passing grade percentage.
Tap Done.
Tap Save.
(Optional) Edit your quiz questions in your site's dashboard.