


Shared Gallery
Managing Permissions in the Shared Gallery App
With the Shared Gallery app, you and members of your community can share photos and videos. You can customize your gallery's permissions so that each person who interacts with your site has the right level of access to your gallery.
Set who can download media, upload media, create and manage albums, and manage your gallery. You can also create your own custom roles with their own sets of permissions.
In this article, learn how to:
Setting permissions for downloading media
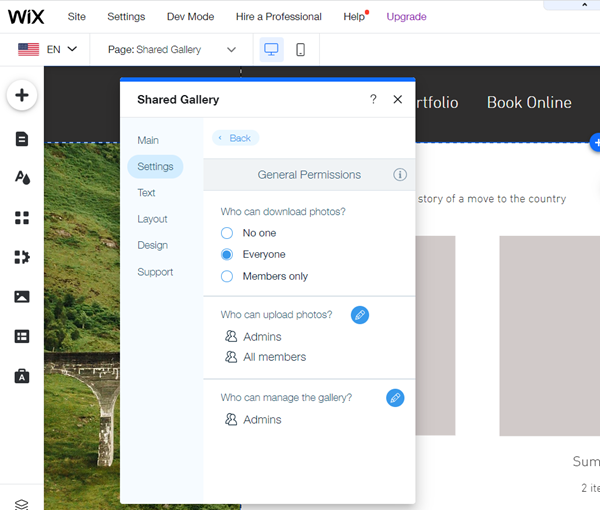
You can set permissions for who can download photos and videos from your Gallery in the Settings panel in your Editor.
To set download permissions:
Select the Shared Gallery app in your Editor.
Click Settings.
Click the Settings tab.
Click Set Gallery Permissions.
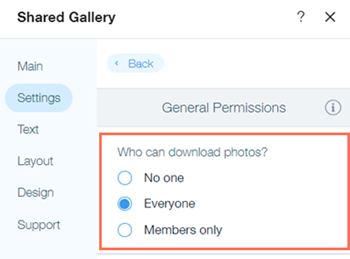
Choose who can download media:No one: Downloading media from your shared gallery is not possible.
Everyone: Everyone who visits your shared gallery can download media.
Members only: Just site members can download media from your shared gallery. This is the default setting.
Setting permissions for uploading photos
You can set permissions for who can upload photos and videos from your Gallery in the Settings panel in your Editor.
To set upload permissions:
Select the Shared Gallery app in your Editor.
Click Settings.
Click the Settings tab.
Click Set Permissions.
Click the Edit icon
 next to Who can upload photos?.
Select or deselect All Members to set whether or not your site members can upload media.
Note: By default, your members can upload media.
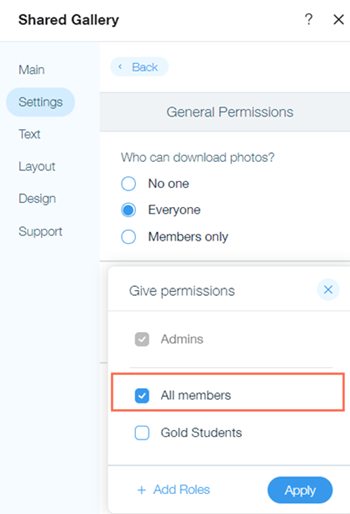
Select any other groups that you want to have upload permissions, or click + Add Roles to add your own custom role.
Click Apply.
Note:
By default, Admins of your gallery can always upload media.
Setting permissions for managing your gallery
You can set permissions for who can manage your Gallery in the Settings panel in your Editor. When you give someone permission to manage the gallery, they can upload, edit, delete their own media and that of other members.
Select the Shared Gallery app in your Editor.
Click Settings.
Click the Settings tab.
Click Set Permissions.
Click the Edit icon
next to Who can manage the gallery?.Select or deselect All Members to set whether or not your site members can manage your gallery. Note: By default, your members cannot manage your gallery.
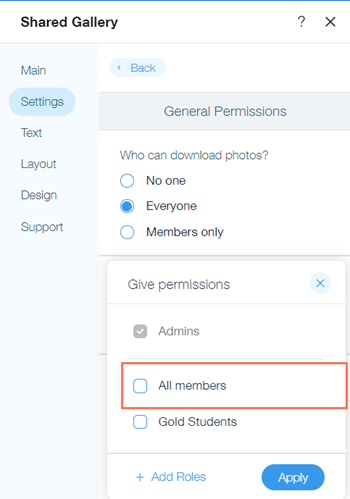
Select any other groups that you want to have manage permissions, or click + Add Roles to add your own custom role.
Click Apply.
Note:
By default, Admins can always upload, edit, and delete their own media and that of other members.
Creating custom roles
You can create new customs roles to allow only some site members to perform actions. For example, you can create an "Instructor" role and assign it only to members who are instructors to let them manage your gallery.
To create a custom role:
Select the Shared Gallery app in your Editor.
Click Settings.
Click the Settings tab.
Click the Edit icon
 next to either Who can upload photos? or Who can manage the gallery?.
Click +Add Roles.
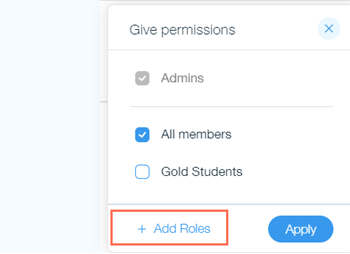
Click +New Role.
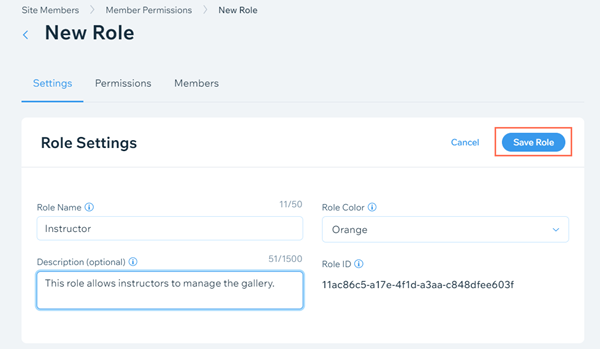
Enter a name in the Role Name field.
Select a role color from the Role Color drop-down list.
(Optional) Enter a short description of the role (not visible to members).
Click Save Role.
Click the Permissions tab.
Set the pages that members with this role have access to under Role Permissions.
Click Save.
Click the Members tab.
Click +Add Members.
Select the checkbox next to the relevant members.
Click Add.
Go back to the Shared Gallery Settings panel.
Select the checkbox next to the role to assign permission to that role.
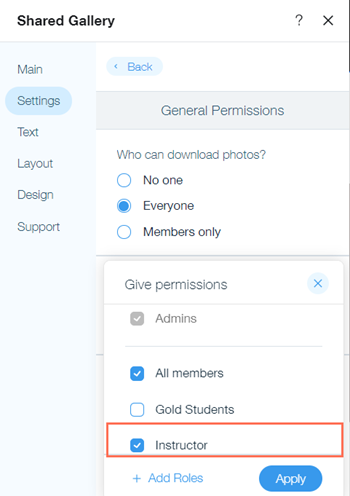
Click Apply.