


Adding videos & channels
Wix Video: Creating a Channel
Organize your video library by grouping different types of video content (e.g. music videos, vlogs) into separate channels. Channels allow your viewers to better navigate your videos. You can also monetize your videos by linking a pricing plan to a channel.
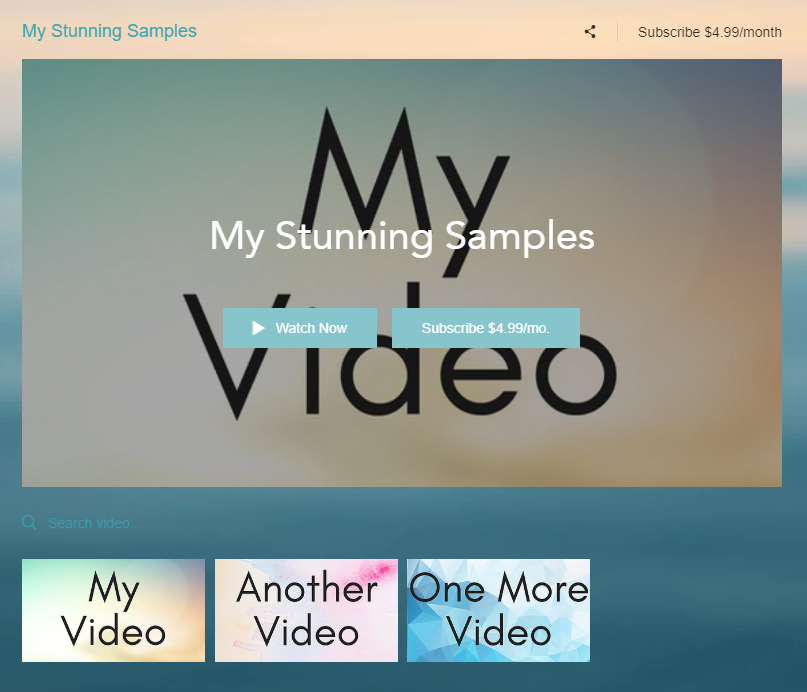
Step 1 | Create a channel
Start by creating a channel from the video library.
To create a channel:
Go to Video Library in your site’s dashboard.
Click the Channels tab on the left.
Click New Channel on the top right corner.
Select Channel from the drop-down. This opens the new channel's customization page.

Step 2 | Edit the channel's information
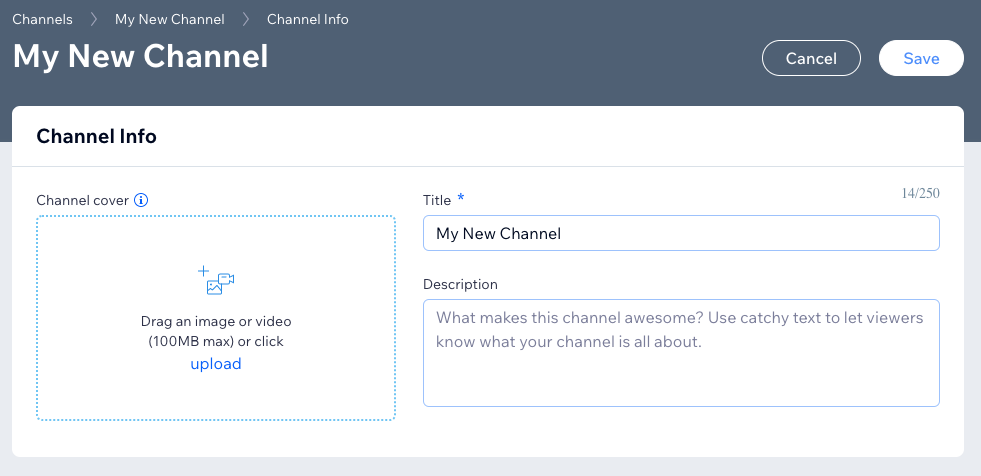
You can customize and update your channel's information to control what visitors see, including adding a description or a cover image.
To edit your channel's information:
Click Edit next to Channel Info.
Enter information for the following categories:Title: Enter the channel's name.
Description: You can add a short description, which appears in the channel info.
Note: Make sure you also enable Show channel info in the channel settings.
Channel cover: Click upload to add a video or image as your channel cover.
Note: A video or .gif can be up to 100 MB, and plays in the background without audio. They do not play when you are in your site Editor. A cover video does not play in mobile view.
Channel Pricing: Allow your viewers to watch your content for free or charge them to watch.Free: Select the Free checkbox to allow viewers access all content on this channel for free.
Pricing Plan: Select the Pricing Plan checkbox to let viewers with a pricing plan tied to this specific channel get unlimited access to videos in this channel.Click Add Plan. Learn more about adding a pricing plan to your video channel.
(Optional) Disable purchase or rent of single videos in this channel: When this option is checked, viewers need to purchase a plan before they can watch any video in the channel.
Click Save.
Step 3 | Add videos to your channel
Once you have added and edited your channel, you can start to add videos to it.
To add videos to your channel:
Go to Video Library in your site’s dashboard.
Click the Channels tab on the left.
Click Add Videos and select your media source. Repeat for each video you want to appear in your channel.
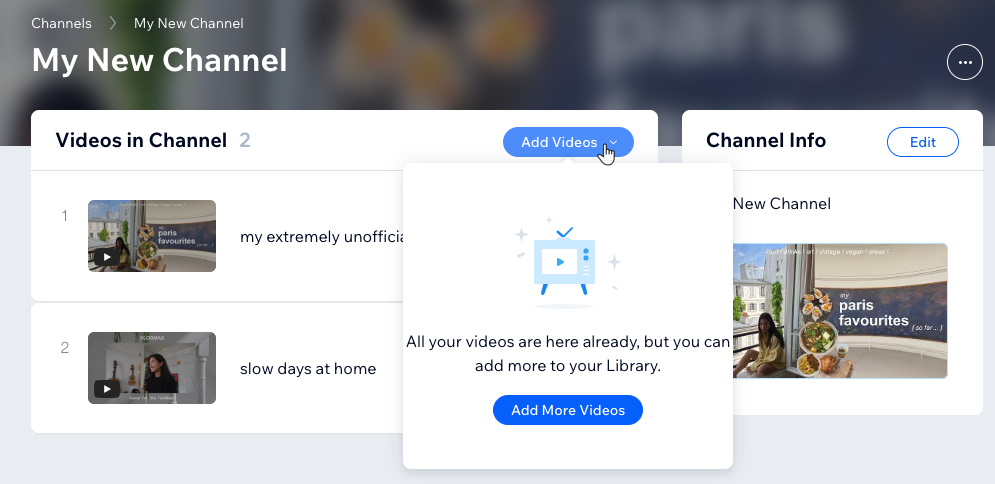
(Optional) After your videos are uploaded, you can reorder them by clicking the Reorder
 icon and dragging it to your preferred slot.
Step 4 | Display your channel on your site
Once you've created your channel, you can display it on your site for your visitors to see.
To display your channel on your site:
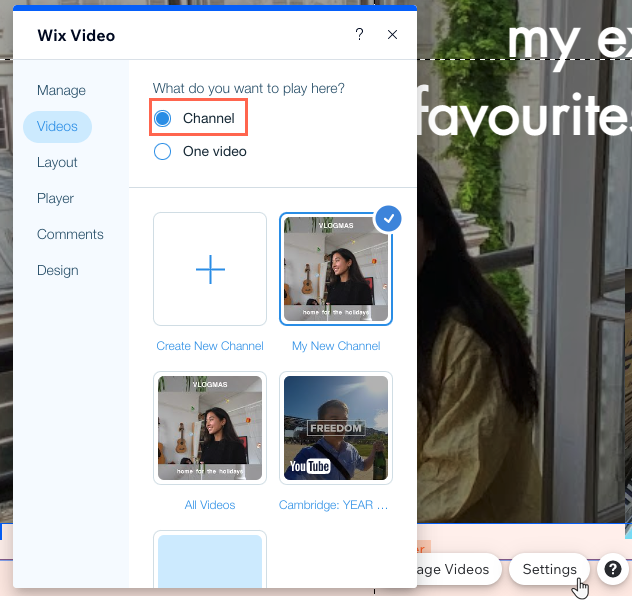
Click the Wix Video app in your editor.
Click the Settings button.
Click the Videos tab.
Select Channel under the What do you want to play here? field.
Select the channel you wish to display on your site. A checkmark appears in the top right corner of your chosen channel.
Want to monetize your channel?
Turn your video content into income with Wix Pricing Plans.
FAQs
Click a question below to learn more about creating and adding a video channel to your site.
How many videos can I have in my channels?
For optimum performance, you need to limit the amount of videos to 50 per channel. If you have more than 50 videos in a channel, the channel will not function properly.
How many channels can I display on my site at one time?
You can only display one channel on your site at a time.
Why is there no channel cover image displaying on my video player?
You need to add at least one video to your channel for the cover image to display on the video player. If you haven't added any videos, a "Coming Soon" message will display.
What is the maximum size for videos I can upload to a channel?
Videos have a maximum support size of 100MB.