top of page

Changing your Wix Video settings

Wix Video: Allowing Others to Embed Your Video on their Site

Allow your visitors to embed your video on their site or blog using HTML code. It's a great way to show your content to the world!

Important:

  • This option is only available for videos you have uploaded, not videos added from Facebook, Vimeo or YouTube.

  • This option is only available after upgrading to a Premium Plan or for Premium accounts.

To set up the embedding option:

  1. Go to Video Library in your site's dashboard.

  2. Hover over the relevant video and click the Edit icon .

  3. Scroll down to Embed Options.

  4. Click the toggle to enable embedding.

  5. Select the information you wish to display.

Note:

You can add a custom logo to the embedded video, and choose when it appears. The recommended format for your logo is a transparent PNG file, 254 x 152 px.
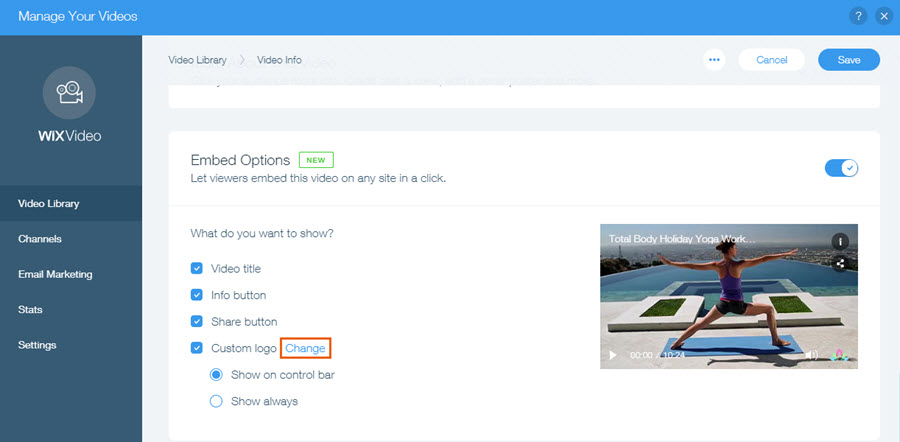
The Change option highlighted next to Custom logo.

After setting up the embed option, visitors watching a video on your site can click the share icon and then access the embed code.
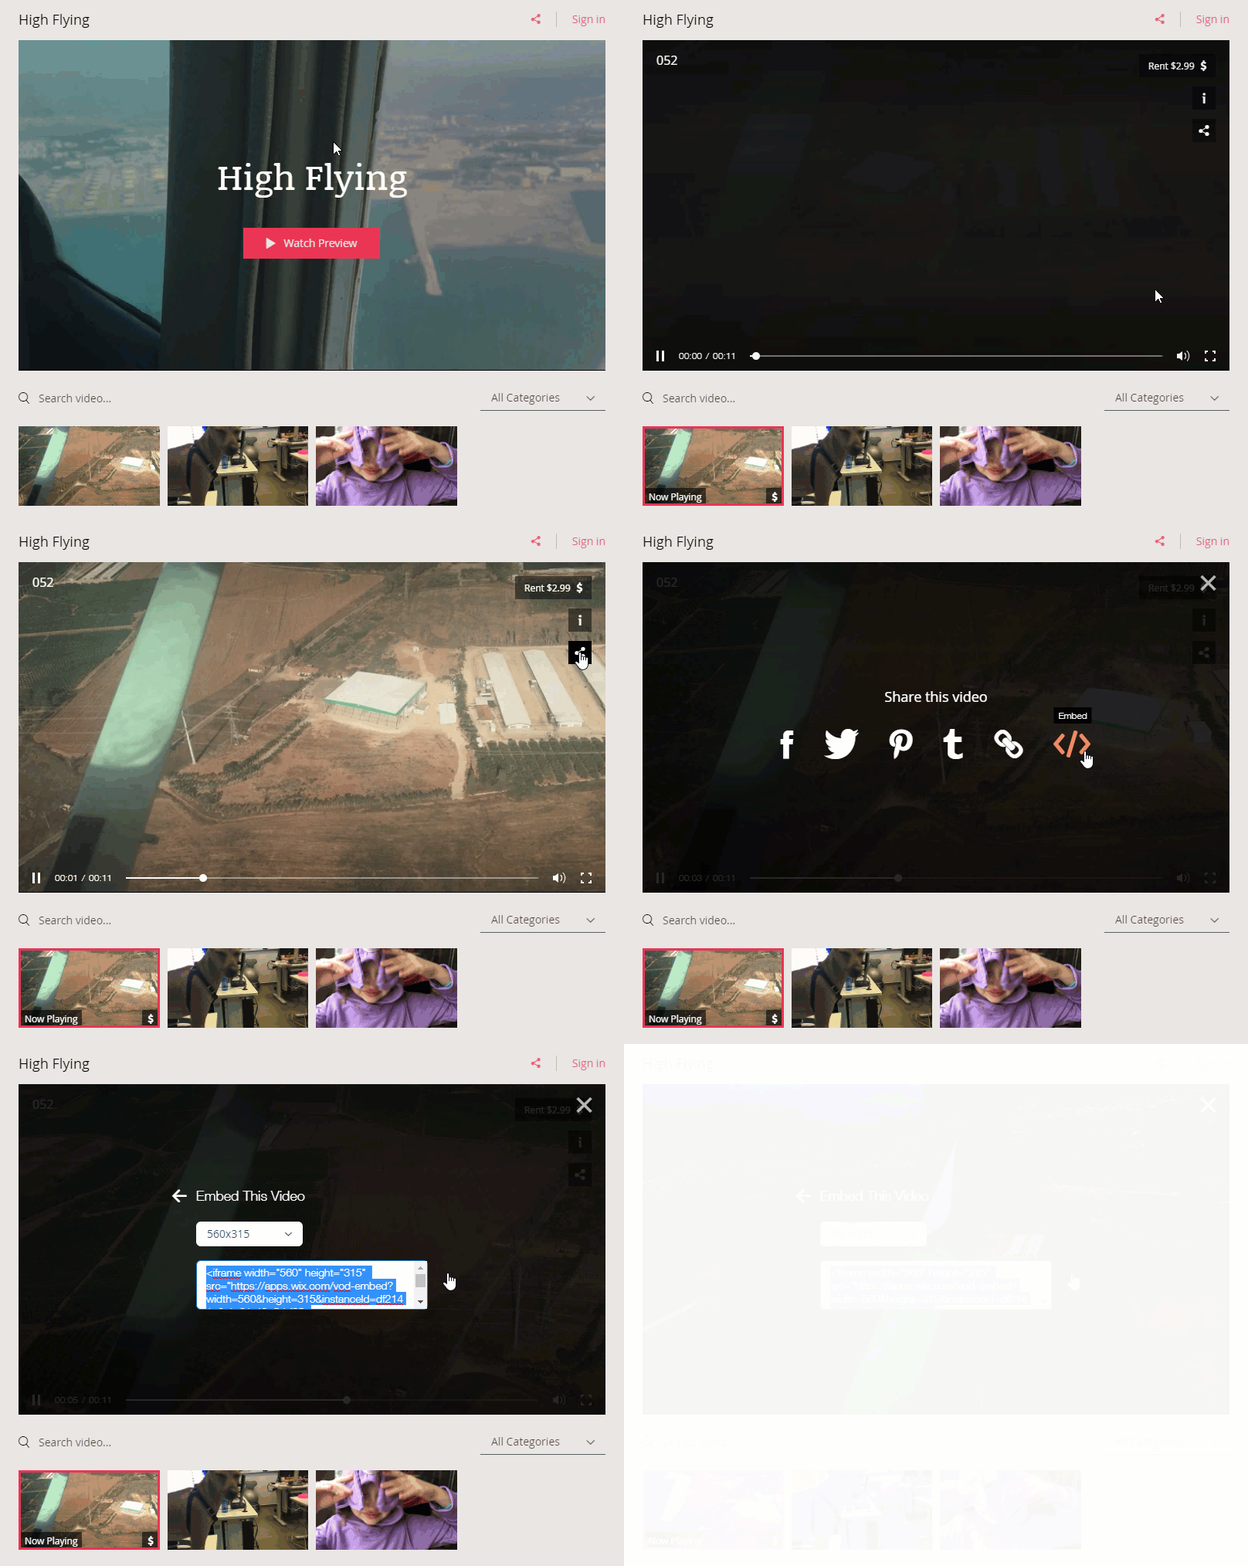
The share and embed buttons being clicked on a video.

Important information about embedded videos

  • When your visitor embeds the video, all the relevant information, including title, cover, action cards, and price appear in the embedded video.

  • If your video is set to allow renting or streaming, viewers will be directed to your Wix site to complete the purchase.

  • Any changes you make to the video's information on your site also appears on the embedded video. However, changes made to the settings, such as changes in fonts and design after embedding the video do not appear in the embedded video.

Embedded videos in mobile friendly view

  • The size of embedded videos in mobile friendly view should be manually adjusted in the html code.
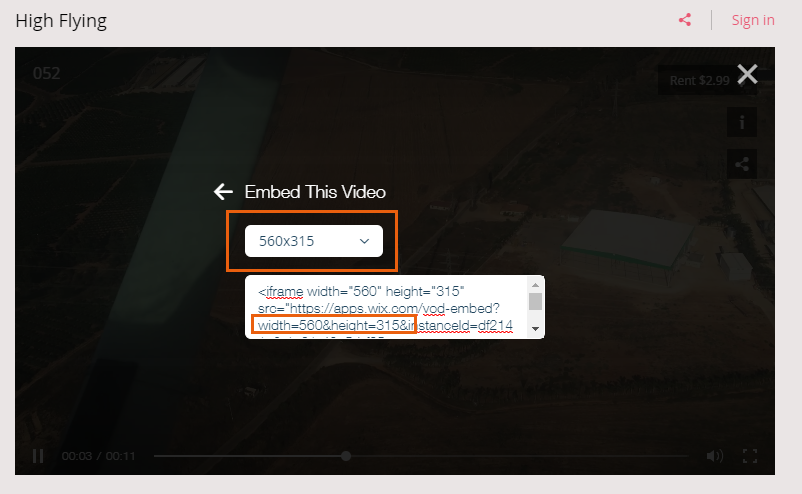
The size indicators highlighted in a video's HTML code.

Need A Professional Website?
Contact Us 
Today!

Wix Automations: Adding and Sending a Coupon

Wix Automations: Sending Automated Emails to Contacts After Form Submissions

Wix Automations: Customizing Automated Emails

Wix Automations: Creating a New Automation

Wix Automations: An Overview

The New Automation Builder: Understanding Email Types

The New Automation Builder: Creating a Multi-Action Automation

The New Automation Builder: Sending Data via Webhook

The New Automation Builder: Adding and Sending a Coupon

The New Automation Builder: Troubleshooting Wix Automations

The New Automation Builder: Understanding Conditions Operators

The New Automation Builder: Setting Up a 'Scheduled Time' Trigger

The New Automation Builder: Sending Data to Google Sheets

The New Automation Builder: Using the Property Picker

The New Automation Builder: Viewing and Managing Automations Installed for You

The New Automation Builder: Customizing Automated Emails

The New Automation Builder: Managing Your Automations

The New Automation Builder: Creating an Automation

The New Automation Builder: Overview

Microsoft Office 365 Mailbox Limits

Resetting the Password for Additional Office 365 Mailboxes

Resetting Your Admin Password for Your Office 365 Mailbox

Accessing Your Microsoft Office 365 Mailbox Through Your Wix Account

Accessing Your Microsoft Office 365 Mailbox Through Your Wix Account

Accessing the Microsoft Office 365 Admin Center

Activating Your Microsoft Office 365 Mailbox Purchased from Wix

Google Workspace: Troubleshooting Login Issues

Google Workspace: FAQs

Google Workspace: Contacting Google Support

Google Workspace Error Message: "You do not have access to Email"

wix experts
Graphic2Traffic web design
©
bottom of page