
New Automation Builder
The New Automation Builder: Managing Your Automations
This article refers to the new automation builder that is currently being released. If you're not seeing this version, read our article about the previous version of the automation builder.
Automations allow you to streamline your work processes and save time on manual tasks. View and manage all of your automations from the Automations page in your site's dashboard. You can edit, duplicate and rename existing automations and deactivate those you don't need.
Viewing all of your automations
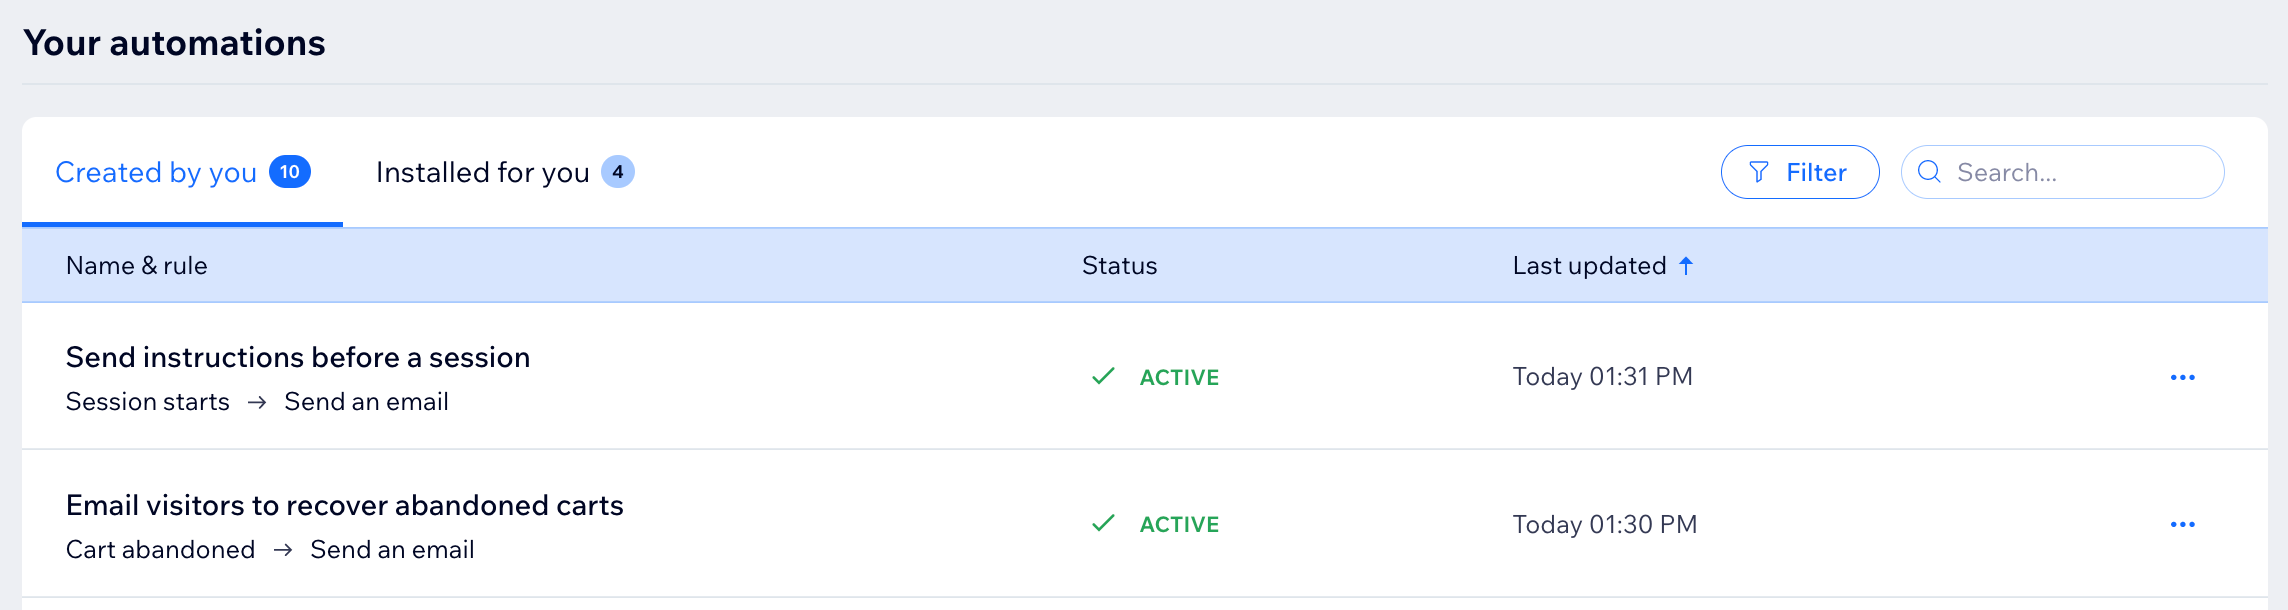
You'll find a full record of all of your active and inactive automations (across all apps) on your Automations page. From here, you can see the number of times your automations have been triggered, edit or duplicate automations, and more.
On your Automations page, you'll see your automations listed in 2 tabs: 'Created by you' and 'Installed for you'.
To view your automations:
Go to Automations in your site's dashboard.
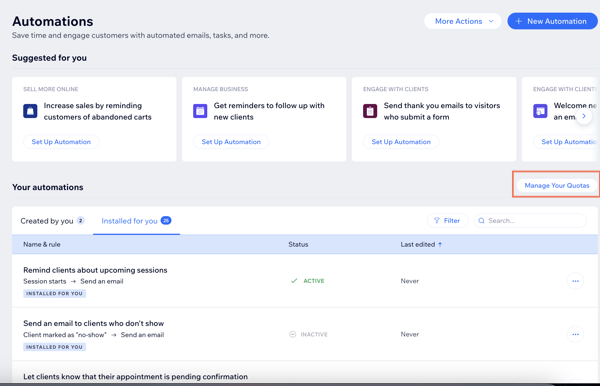
Scroll down to the Your automations section to view all of your automations across 2 tabs:Created by you: Active and inactive automations you've created here or directly through an app.
Installed for you: Active and inactive automations created automatically when you've installed apps.
(Optional) Click an automation to view its automation summary, the last trigger date and the total times triggered.
Tip:
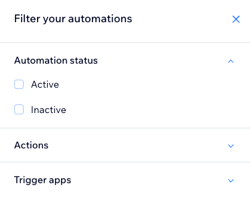
Click Filters to view only active or inactive automations, or those with specific triggers or actions.
Editing, duplicating or renaming an automation
Edit automations so they're working for your business, or rename them so you and your site collaborators can identify them at a glance.
Save time by duplicating an existing automation and then making any edits needed. For example, you can use the same email campaign design to respond to different triggers.
To edit, duplicate or rename an automation:
Go to Automations in your site's dashboard.
Scroll down to the Your automations section.
Hover over the relevant automation and click the More Actions icon
 .
.Choose what you want to do:
Edit an automation
Click Edit.
Edit the automation as necessary.
When you're finished editing, click Save.
Learn more about setting up each part of an automation.
Notes:
Editing the timing of an automation can affect 'pending' actions. "Pending" actions have been triggered but haven't yet taken place (the delay has been set after a certain period of time).
If you edit an automation, the changes only apply to new activations. Automations triggered before the changes were made will still run with the settings previously defined.
Duplicate an automation
Click Duplicate.
Edit the relevant details within your duplicated automation.
Note: Don't forget to update your duplicated automation's name, or it will remain 'Copy of...'.When ready, click Activate.
Rename an automation
Click Rename.
Edit the automation's name.
Click Save.
Deactivating or deleting an automation
Deactivate or delete automations you no longer require. Deactivating an automation will make it inactive, ready to be activated again in future. Deleting an automation will remove it from your page and you won't be able to restore it.
To deactivate or delete an automation:
Go to Automations in your site's dashboard.
Scroll down to the Your automations section.
Hover over the relevant email automation and click the More Actions icon
.Choose what you want to do:
Deactivate an automation
Deactivating an automation will stop it running without deleting it. You can reactivate at any time.
Click the toggle to deactivate an active automation.

Notes:
If you deactivate an automation, any ongoing runs stop and any pending actions are cancelled.
Trigger data isn't collected when an automation is inactive. The automation won't run retroactively when reactivated.
For example, an automation that sends "thank you" emails following purchases is deactivated on Monday. Joe makes a purchase on Tuesday. The automation is reactivated on Wednesday. Joe won't receive a "thank you" email because the automation couldn't collect the trigger data on the day of Joe's purchase.
Delete an automation
Click Delete.
Click Delete in the pop-up to confirm.
Notes:
If you wish to use an automation in the future, consider deactivating it rather than deleting it.
'Installed for you' automations cannot be deleted but often can be deactivated.
If you delete an automation, any ongoing runs stop and any pending actions are cancelled.
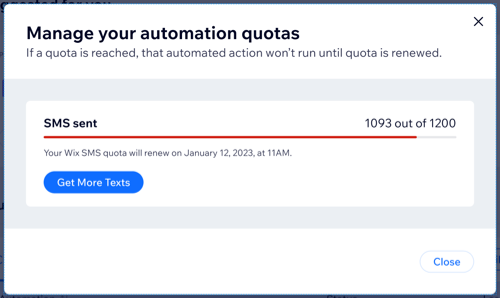
Viewing your quotas
Some automation actions are subject to quotas. For example, an automation with the action "Send an email" uses emails from your site's email marketing plan. View your quotas from your Automations page so you can easily see when your quotas are running low and you might need to upgrade.
To view your quotas:
Go to Automations in your site's dashboard.
Click Manage Your Quotas.
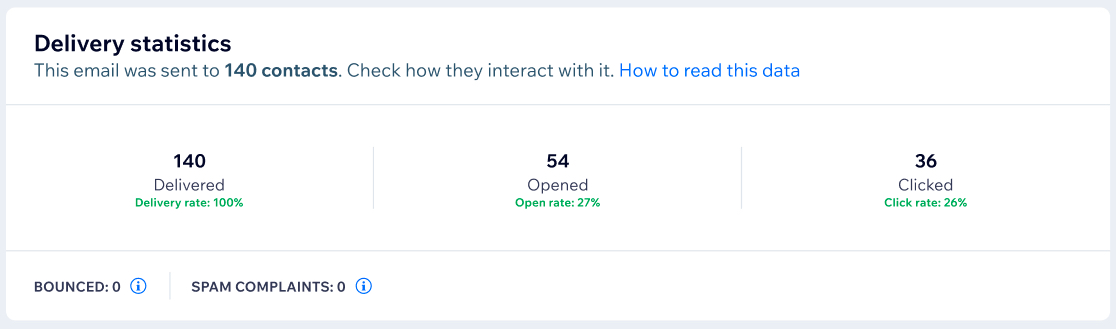
Viewing your email automation statistics
Automations with "Send email" as the action will give you access to email marketing statistics. You'll be able to see detailed information for each email you're sending, including delivery rate, which links were clicked, and more. You'll also be able to see a list of the recipients who opened the email.
Statistics for all automations:
For all automations, you can view the last triggered date and the total times triggered. Click the relevant automation on your Automations page to display the summary panel.
To view your email automation statistics:
Go to Automations in your site's dashboard.
Scroll down to the Your automations section.
Hover over the relevant email automation and click the More Actions icon
.Click View email stats to view your email marketing statistics.
Note:
Your email statistics are made up of unique recipients. If an email is triggered for the same contact more than once, it counts as only one email.
FAQs
Click the questions below to learn more:
What is an automation that was 'Installed for you'?
As you build your site and install apps on it, some apps include complimentary automations that are important for the proper functioning of these apps. Some automations are installed on your site upon the app’s installation, and some are installed upon specific events.
Learn more about automations that were installed for you.
Are there suggested automations?
Yes. You'll see Wix's suggested automations when you start to create a new automation. These are specific to your business type and the apps you've added to your site. They are listed by business benefit to help you choose: "Sell more online", "Engage with clients", and more.
Start the process of creating an automation to view the automations recommended for your site.