


Setting up shipping & fulfillment
Wix Stores: Setting Up Store Pickup as a Delivery Option
Important:
We're in the process of rolling out new shipping settings. If you have a Create Region button instead of Add Region, then you have the new version. Learn how to set up shipping using the new settings.
Allow customers to pick up their orders right from your store, warehouse, or home. You can offer pickup as the only delivery option or set it up in addition to shipping and local delivery.

Tips:
You can also print a packing slip for pickup orders.
You can also set up delivery to pickup points (available in some regions).
Step 1 | Create or select a region
To start, create the region the pickup rule applies to. If you already created the region, just select it and move on to step 2. Note that a region can be made of one or more countries. Alternatively, it can be made of one or more regions within a country.
Important:
If there is no rule for a region, customers from that region cannot make store purchases.
To create or select a region:
Go to Shipping in your site's dashboard.
Select an option:Edit a default rule: Click the region you want to set up.
 Create a new rule:Click Add Region.
Click +Add destination, start typing a country name and select it.
(Optional) Select specific region(s) within a country (Not all countries have local regions):Click Edit next to the region number.
 Deselect the checkboxes next to the regions or states you don't want the rule to apply to and click Done.

(Optional) Click the title (e.g. Region 2) and rename it (e.g. England & Scotland).

Click Save or move directly on to the next step.

Tip:
At this point, you can add any shipping or local delivery rules you need before setting up store pickup.
Step 2 | Set up store pickup
Now that you have a region (e.g. the US) and set up any other delivery options your provide (e.g. $5 flat rate delivery in the US), you can go ahead and set up a pickup option from one or more locations (e.g. your warehouse in Chicago).
To create a pickup option:
Go to Shipping in your site's dashboard.
Select the relevant region.
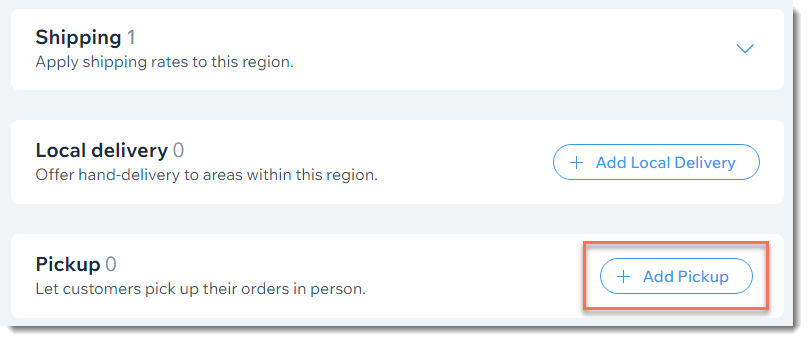
Click + Add Pickup.
Enter a Pickup name.
Tip: The name you enter appears in the order summaries on the cart and checkout pages.

Enter the address customers should go to pick up their order.
(Optional) Enter a time in the When will order be ready for pickup field (e.g. Up to 24 hours).
Enter instructions for your customers in the Pickup Instructions field.
Tip: The info appears in the Checkout Page, Thank You Page, and order confirmation email.Click Add Location.
(Optional) Click Add Another Location and follow steps 4 - 8 to add an additional pickup address.
FAQs
I only offer pickup. How can I remove the default shipping rule?
Wix Stores comes with a free shipping rule for your own region. Any new regions you add also come with a free shipping rule.
If you offer only store pickup (or pickup and local delivery), you can remove the shipping option.
To remove shipping rules from a region:
Go to Shipping in your site's dashboard.
Select the relevant region.
Click Remove next to the shipping rule.
Tip: To save your changes, you must add another delivery options, such as pickup.
How do I let customers know their order is ready for pickup?
When the order is ready, let customers know they can come pick it up.
In the Orders tab, go to the relevant order and then click Send Pickup Ready Email.

Your customer receives an email informing them that the item is ready along with the address and pickup instructions.

Can I hide a store pickup option from customers?
Yes. If you do not want to offer any or all of your pickup locations, you can hide them from your site. To hide a pickup location, click the More Actions icon  next to the relevant location and select Hide from checkout.
