


Managing store inventory
Wix Stores: Setting How You Manage Inventory for a Product
With Wix Stores, you can manage your inventory in 2 ways:
Track your inventory: Track how many of a specific product you have in stock (e.g. 12 Cherry Posters in stock). When you make a sale, the inventory amount is automatically updated.
In stock / out of stock: Manually assign products an "In Stock" or "Out of Stock" status. When you run out of a product, you can manually change the status to "Out of Stock".
In this article, learn how to:
Setting how you manage inventory
Control how you want to manage inventory for each item. Select a product and enter the current inventory number for that product, or mark it as "In Stock" or "Out of Stock".
Note:
To learn how to set inventory for product options, click here.
To set how you manage your inventory:
Go to Store Products in your site's dashboard.
Select the relevant product or click New Product to add a new one.
Scroll down to the Inventory & Shipping section.
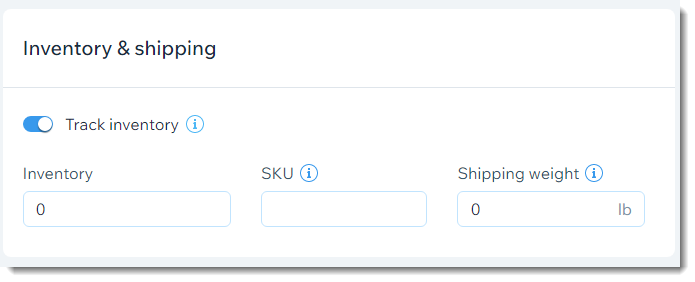
Select an option:
Track inventoryClick the Track Inventory toggle to enable it.
Enter the amount of the product in the Inventory field.
(Optional) Enter an SKU.
Tip: You can enter SKUs by scanning barcodes using the Wix app on your mobile device. Learn how
(Optional) Enter a weight.
Tip: Used for shipping by weight.
Do not track inventory:Click the Track Inventory toggle to disable it.
From the Status drop-down, select In stock or Out of stock.
(Optional) Enter an SKU.
Tip: You can enter SKUs by scanning barcodes using the Wix app on your mobile device. Learn how
(Optional) Enter a weight.
Tip: Used for shipping by weight.
Click Save.
Notes:
After setting up inventory in the Store Products tab, you can update inventory, when necessary, in the Inventory tab.
Inventory for orders of 300 items or more need to be updated manually.
Set what triggers the automatic inventory update. Learn more
Restocking products that were pre-ordered
If you enabled pre-order for a product, customers can buy that product even when it's out of stock. When they do so, your inventory (if you're tracking specific amounts) goes into negative numbers. This negative number indicates how many pre-orders you have for the product.
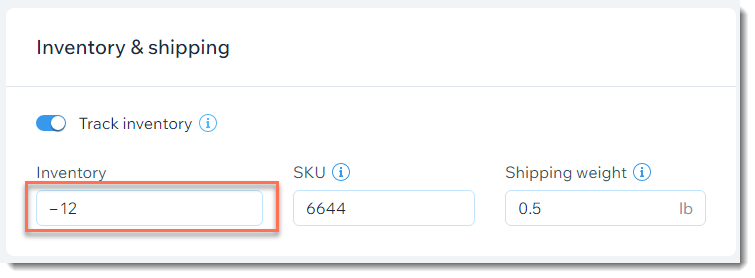
When you get new stock and update the stock levels, you need to take into consideration the products that are pre-ordered.
For example, if you have 12 pre-orders, your stock level is -12. If you get 50 units in, you need to updated your stock level to 38 (50 -12 = 38), rather than updating it to 50.
To update inventory for a pre-ordered product:
Go to the Products in your site's dashboard.
Select the relevant product.
Scroll down to the Inventory and shipping section.
Calculate how much inventory you need to add (amount of new units minus the number of pre-orders).
Update the inventory level.
Displaying inventory indications on your site
Let your customers know when an item is out of stock or running low.
Out of stock messages
When the inventory for an item is zero, or an item is manually marked as "Out of Stock", an indication appears in the Product Gallery and in the Product Page.

You can customize these "Out of stock" messages.
Tip:
You can set up back-in-stock notifications. This way, when an item is out of stock, customers have the option to request email notification letting them know when the item is available. Learn more
Low stock indications
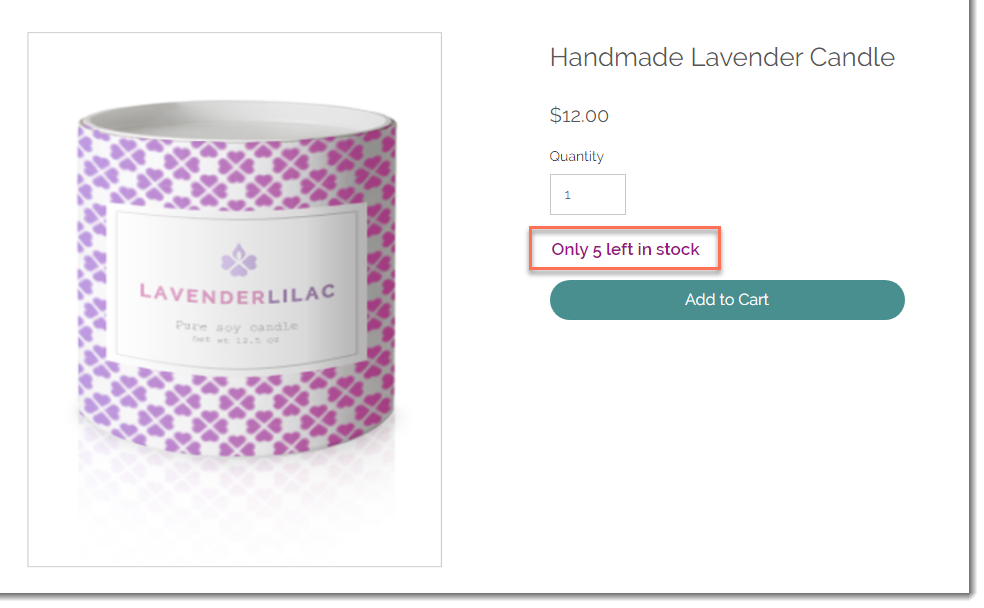
Encourage shoppers to purchase products that will soon be out of stock by adding a low stock message on the Product Page. Once your inventory for a specific item dips below 10, the message automatically appears.
Wix Editor
Studio Editor
Go to your Product page:Click Pages & Menu
 on the left side of the editor.
Click Store Pages.
Click Product Page.
Click the Product Page element on your page.
Click Settings.
Click the Settings tab.
Select the checkbox next to Low stock message to enable it.
Note:
This feature is relevant for products for which you track specific inventory amounts.