


Managing products and categories
Wix Stores: Managing Product Ribbons
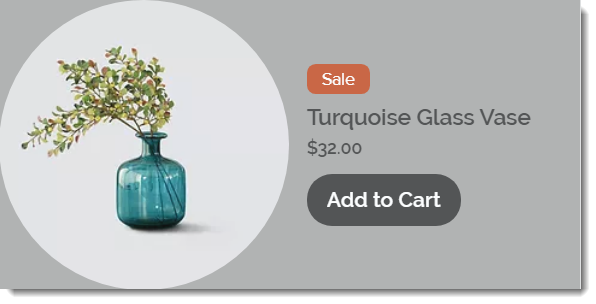
Draw attention to products you want to promote by adding a ribbon.
To make managing ribbons easier, you can apply the same ribbon to multiple products. You can then edit the ribbon text (e.g. change "New" to "Just In!") or remove the ribbon from many products at once.
In this article, learn how to:
Creating a new ribbon
You can create a new ribbon by selecting a product and entering the ribbon text. Next time you go to create or update a product, you can select the ribbon you already created.
To create a new ribbon:
Go to Store Products in your site's dashboard.
Select an existing product or click New Product to add a new one.
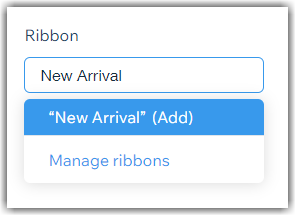
Enter the ribbon text (e.g. New Arrival) in the Ribbon field.
Click Save to save the product.
Note:
If ribbons you create don't appear on your site, make sure you haven't hidden ribbons.
Applying ribbons you created to other products
After you created a ribbon, it can be selected to apply it to other products.

To apply the ribbon:
Go to Store Products in your site's dashboard.
Select an existing product or click New Product to add a new one.
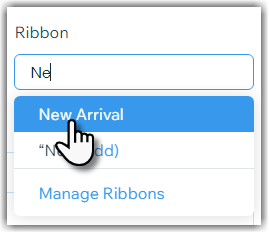
Start entering the ribbon text and select the ribbon from the list.
Click Save to save the product.
Editing ribbon text
If you've applied a ribbon to multiple products, you can change the ribbon text for all products at once.
To edit ribbon text:
Go to Store Products in your site's dashboard.
Select an existing product.
Enter any letter in the Ribbon field and select Manage ribbons.
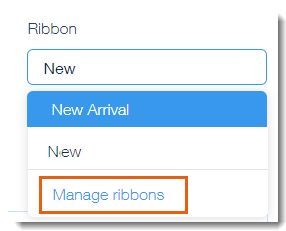
Edit the ribbon text.
Note: Changes affect all products with the ribbon.Click Save.
Click Save to save the product.
Tip:
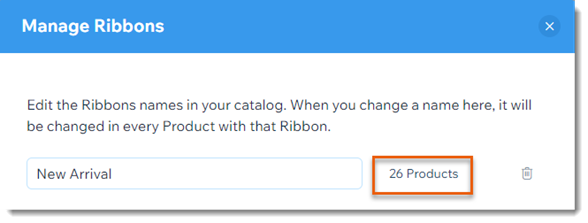
In the Manage Ribbons window, you can see how many products have the ribbon.
Customizing the ribbon layout and design
To get started, decide where you want to place the ribbon. Next, you can choose the ribbon's shape, colors, and font to get the perfect design.
To customize the design:
Click to select the Product Gallery in your editor.
Click the Settings icon
 .
.Click the Layout tab.
Scroll down and click Ribbon Layout.
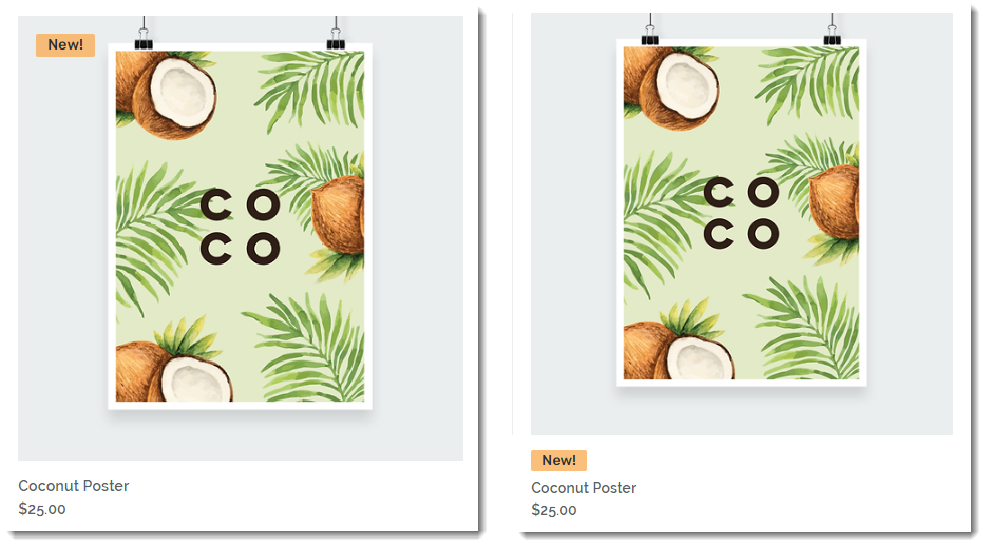
Choose where you want to place the ribbon:On Image: Ribbon appears on top of the image. Drag the sliders to position the ribbon.
Product Info: Ribbon appears above the product price.
Design the ribbon:Click the Design tab.
Scroll down and select Ribbons.
Customize the ribbon using the available options.
Deleting a ribbon
You can remove a ribbon from a single product or from all the products it was applied to. For example, if you added a "Spring Sale" ribbon to 25 products, you can delete that ribbon to remove it from the 25 products at once.
To delete a ribbon:
Go to Store Products in your site's dashboard.
Select an existing product.
Choose what you want to do next:
Remove a ribbon from a single product
Click the ribbon field and erase the ribbon name.
Click Save to save the product.
Remove a ribbon from all products
Enter any letter in the Ribbon field and select Manage ribbons.

Click the Delete icon
 next to the relevant ribbon to remove it from all products.

Click Save.
Click Save to save the product.
Updating ribbons for multiple products at once
You can add a new ribbon to products, remove a ribbon from products, or update the text of a ribbon that already appears on multiple products.
To make ribbon changes to multiple products:
Go to Store Products in your site's dashboard.
Select the products whose ribbons you want to update:All products: Select the checkbox at the top left.
Individual products: Select the checkboxes next to the relevant products.
Category: Click Filter and select 1 or more categories.
Click More Actions.

Select Edit ribbon.
Choose what you want to do next:
Apply an existing ribbon
Note: If the products you selected already have a ribbon, a new ribbon will replace it.
Select a ribbon from the list.
Click Save.

Create a new ribbon
Note: If the products you selected already have a ribbon, a new ribbon will replace it.
Click + New Ribbon.
Enter the ribbon name.
Click the Checkmark icon
 .
.Click Save.
Edit the text of an existing ribbon
When you edit the text of an existing ribbon, it updates for all the products it's applied to. For example, if a ribbon with the text "New" is applied to 50 products, and you select 10 products and then edit the text to "New Arrival", the ribbon text updates for all 50 products - not just the 10 you selected.
Enter the new ribbon name.
Click the Checkmark icon
.Click Save.

Remove a ribbon
You can delete a ribbon by clicking the Delete icon  next to the relevant ribbon.
Important: When you delete a ribbon, it is removed from every product.

To remove a ribbon from some products:
Currently, it is not possible to remove a ribbon from some products but not others, unless you remove them one at a time.
As a workaround, you can add a new ribbon to the relevant products, then delete the new ribbon. This removes the previous ribbon from those products only.
For example, you have 50 products with the "New" ribbon. You want to remove the ribbon from 10 of them. Select the 10 products, add a brand new ribbon (you can give it any name) to those 10 products, then delete the new ribbon you just created.
Tip:
Learn more about making changes to multiple products at once.
Hiding ribbons from your live site
You can hide all ribbons from appearing in Product Galleries or in the Category Page.
Note:
If you've hidden ribbons, new ribbons you create won't appear. Remember to unhide them in your editor if you want to display them.
To hide ribbons:
Go to your editor.
Select the relevant element.
Hide ribbons in the selected element:
Category Page:Click Settings.
Click the Settings tab.
Deselect the checkbox next to Ribbons.
Product Gallery:Click the Settings Icon .
.
Click the Settings tab.
Deselect the checkbox next to Ribbons.