


Setting up payment and checkout
Wix Stores: Letting Customers Pay in Installments
Boost sales by offering customers the freedom to pay in installments.
Pay-in-installment payment providers
A variety of payment providers let your customers pay in installments but send you the total amount of the sale right away.
These payment providers include those listed below. For the most up-to-date information, click here.
Affirm (United States)
Afterpay (Australia, Canada, New Zealand, United States)
Atome (Hong Kong, Indonesia, Singapore, Malaysia, Philippines, Taiwan, Thailand, Vietnam)
Cashfree Payments (India)
Clearpay (United Kingdom)
Klarna (Australia, Austria, Belgium, Canada, Czech Republic, Denmark, Finland, France, Germany, Greece, Ireland, Italy, Netherlands, New Zealand, Norway, Poland, Portugal, Spain, Sweden, Switzerland, United Kingdom, United States)
Laybuy (Australia, New Zealand, United Kingdom)
Meshulam (Israel)
MONEI (Andorra, Spain)
PayPal (Available in over 200 countries)
Tip: You can add a PayPal 'Pay Later' button to your Wix Store checkoutPaidy (through Komoju) (Japan)
Payflex (South Africa)
PayItMonthly (United Kingdom)
PayU India (India)
Sezzle (Canada, Germany, United States)
Sipay (Turkey)
Splitit (Austria, Canada, Denmark, France, Germany, Italy, Netherlands, Poland, Portugal, South Korea, Spain, Sweden, Turkey, UK, USA)
Notes:
These payment providers can only be added if your business is located in a region the provider services.
Only customers in relevant regions can use the provider to pay in installments.
After you add the payment provider to your site, customers see your installment options in the product page.
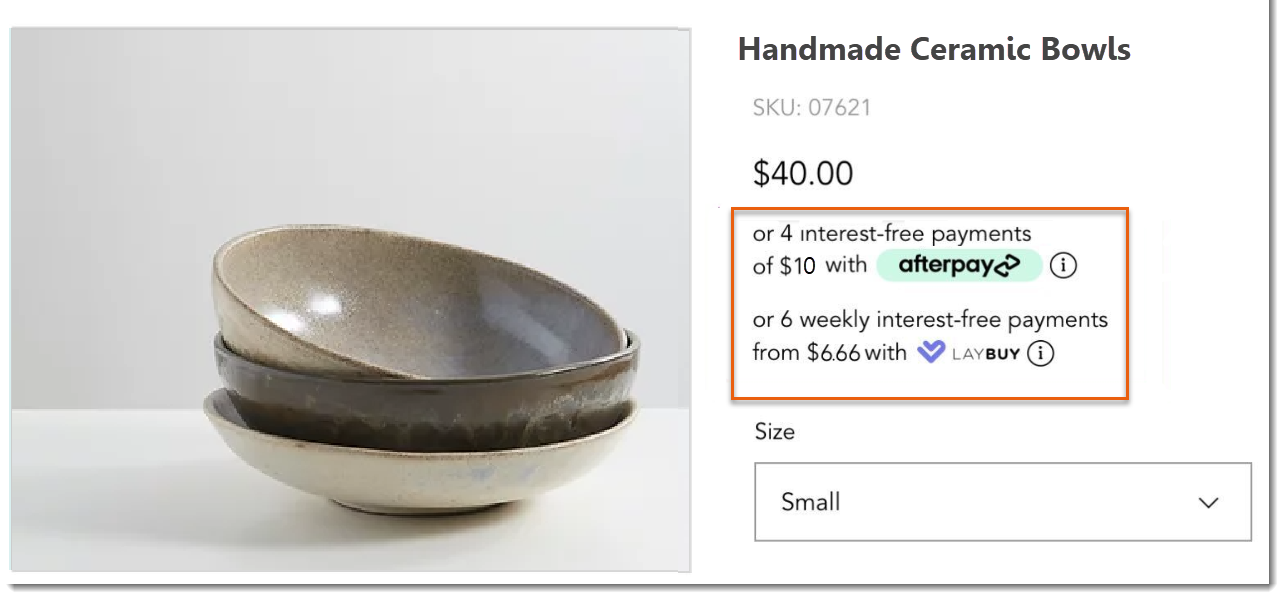
During checkout, customers can select one of the options. They are then prompted to log in to their accounts or create a new one and complete the purchase.
To get started, add one of the available options and select the light or dark display mode.
Wix Editor
Studio Editor
Connect one or more of the relevant payment providers.
Note: For instructions, click any of the links in the table above.Go to your Product page:Click Pages & Menu
 on the left side of the editor.
Click Store Pages.
Click Product Page.
Click the Product Page element on your page.
Click Settings.
Click the Design tab.
Click Product Details.
Select the Light or Dark display mode.

Installments via credit / debit cards
A number of credit / debit card providers allow your customers to pay in installments. You may receive payment when the customer pays an installment to the credit card company. In other words, if your customer pays in 4 installments, you may receive payments for the order in 4 installments.
Terms vary by provider, so contact your credit / debit card provider for more detailed information.
Installments via PayPal
PayPal offers customers in some regions the option of paying in Installments. The number of payments and the conditions vary by region.
When you connect PayPal as a payment provider, they automatically display the payment options that are available for each customer. Learn more