top of page

Setting up shipping & fulfillment

Wix Stores: Integrating with Envia

Important:

To print shipping labels, you must first enter your business's address in the Business Info page. Learn how

Envia is a third-party app that integrates with Wix Stores so you can create domestic and international shipping labels with reliable couriers - all at a great price.
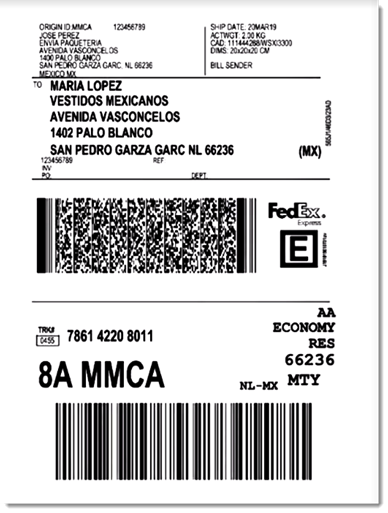
Sample shipping label created through Envia

Choose from a wide variety of shipping carriers, including:

  • FedEx

  • DHL

  • iVoy

  • Redpack

  • UPS

  • Sendex

  • Carssa

  • Paquete Express

  • 99 Minutos

  • Quiken

Notes:

  • Envia is currently available for stores located in the US, Mexico, Colombia, Spain, Brazil, Argentina, Chile, Guatemala, Canada, India, and Australia.

  • Envia is free to use. You pay only for the shipping labels you purchase.

  • You can connect one Wix store to one Envia account.

To integrate with Envia:

  1. Click here to access the app.

  2. Click Add to Site.

  3. Click Agree & Add.

  4. Click Continue.

  5. Enter your email address and click Continue.
    Note: You will be logged into your existing account or a new one will be created.

  6. For new accounts: Fill in the required information and click Continue.

  7. Select an address from the Saved addresses drop-down or complete the fields to add a new one.
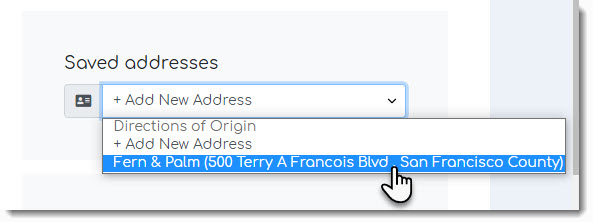
Screenshot of the address list drop-down in the Envia dashboard

  1. Click See Orders.

After integration, new Wix store orders appear in the Envia dashboard every time you make a sale. In the Envia dashboard you can manage your shipments, printing labels and track orders.

When a shipping label is created, the order in your Wix dashboard is updated so that the order status changes to "Fulfilled" and the tracking number is added.

To learn more, check out the Envia help center.

Need A Professional Website?
Contact Us 
Today!

Wix Automations: Adding and Sending a Coupon

Wix Automations: Sending Automated Emails to Contacts After Form Submissions

Wix Automations: Customizing Automated Emails

Wix Automations: Creating a New Automation

Wix Automations: An Overview

The New Automation Builder: Understanding Email Types

The New Automation Builder: Creating a Multi-Action Automation

The New Automation Builder: Sending Data via Webhook

The New Automation Builder: Adding and Sending a Coupon

The New Automation Builder: Troubleshooting Wix Automations

The New Automation Builder: Understanding Conditions Operators

The New Automation Builder: Setting Up a 'Scheduled Time' Trigger

The New Automation Builder: Sending Data to Google Sheets

The New Automation Builder: Using the Property Picker

The New Automation Builder: Viewing and Managing Automations Installed for You

The New Automation Builder: Customizing Automated Emails

The New Automation Builder: Managing Your Automations

The New Automation Builder: Creating an Automation

The New Automation Builder: Overview

Microsoft Office 365 Mailbox Limits

Resetting the Password for Additional Office 365 Mailboxes

Resetting Your Admin Password for Your Office 365 Mailbox

Accessing Your Microsoft Office 365 Mailbox Through Your Wix Account

Accessing Your Microsoft Office 365 Mailbox Through Your Wix Account

Accessing the Microsoft Office 365 Admin Center

Activating Your Microsoft Office 365 Mailbox Purchased from Wix

Google Workspace: Troubleshooting Login Issues

Google Workspace: FAQs

Google Workspace: Contacting Google Support

Google Workspace Error Message: "You do not have access to Email"

wix experts
Graphic2Traffic web design
©
bottom of page