


Managing products and categories
Wix Stores: Applying Sale Prices to Store Products
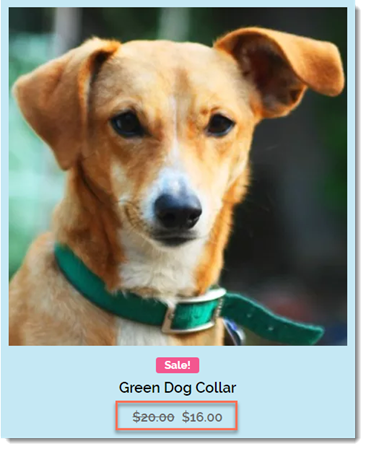
You can add a sale price to any of your products. When you do, the original price appears crossed out, next to the discounted price.
In this article, learn more about:
Tips:
You can make sure customers notice sale items by adding a ribbon.
You can also reduce prices by creating coupons or automatic discounts.
Managing sale prices for a single product
There are 3 ways you can add a sale price to a single product. You can add a percentage discount (e.g. 20% off), reduce the price by a set amount (e.g. $10 off), or you can enter the price that you want the product to be sold at.
To add a sale to a single product:
Go to Products in your site's dashboard.
Select an existing product or click +New Product to add a new one.
Scroll down to the Pricing section.
Enable the On sale toggle.
Select an option:Percentage discount: Enter the percentage and click the Percent icon
 .
.
Amount discount (e.g. $20 off): Enter the discount amount and click the Amount icon .
.
Sale price: Enter the price the product is sold at directly in the Sale price field.

Click Save.
Removing the discount:
To end the sale and return to the regular price, click the On sale toggle to disable it.
Managing percentage discounts for multiple products at once
When creating discounts for multiple products at once, you can only create a percentage discount (e.g. 20% off).
To add a discount to multiple products:
Go to Products in your site's dashboard.
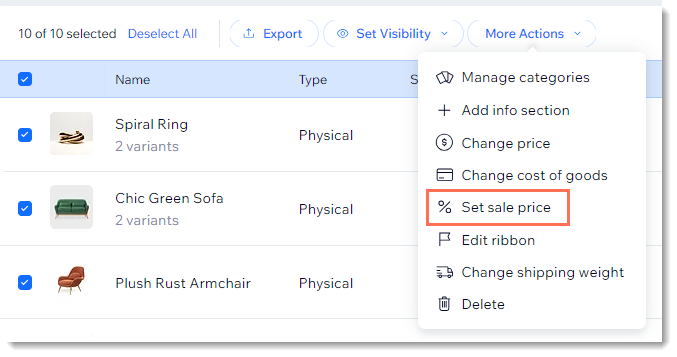
Select the checkboxes next to the relevant products, or select the top checkbox.
Tip: To apply a discount to a category, you can filter products by category and then select all.Click More Actions.
Select Set sale price.
Enter the discount percentage.
Click Apply.
To remove the discount:
Select the relevant products, follow the steps above, and enter a 0% discount.
What's next?
Let customers know about your sale through an email marketing newsletter.
