
Setting up shipping & fulfillment
Wix Stores: A Guide to Setting Up Shipping, Delivery, and Pickup
Important:
We're in the process of rolling out new shipping settings. If you have a Create Region button instead of Add Region, then you have the new version. Learn how to set up shipping using the new settings.
Setting up shipping, delivery, and pickup can be a complicated aspect of creating an online store. This article will walk you through the setup process from selecting shipping regions to choosing shipping, delivery, and pickup rules that suit the types of products you sell, and more.
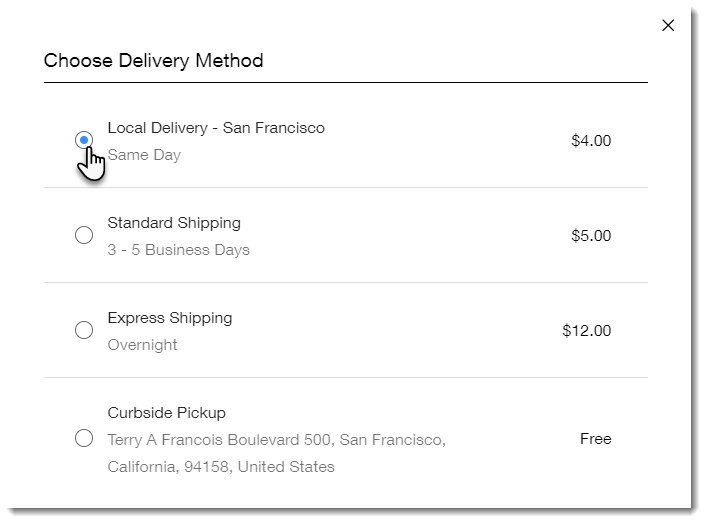
After your rules are in place, your customers will be able to select how they want to receive their order.
Before you begin:
If you're new to eCommerce, make sure to check how much it actually costs to ship your products to different regions.
If you set up shipping and tax options in a merchant account in the past (for example in PayPal), remove these settings before setting up shipping in Wix.
Step 1 | Set up your regions
Wix Stores comes with two regions already added: One for your own country (the "Domestic" region), and one for the rest of the world (the "International" region). Both offer free shipping by default.
From this starting point, you can decide which countries (or regions within countries) you want to ship to.

To set up your regions:
Go to the Shipping & fulfillment settings in your site's dashboard.
Choose which regions you want to ship to, following the instructions below:
Ship / deliver / offer pickup only to your own country
Click the Rest of the World toggle to disable it.
You should be left with one active shipping rule for your country. If the domestic rule is not set to your country, click Edit Shipping Rule to make changes.

Tip: To see how to edit a shipping rule, check the FAQs at the bottom of the article.
Ship / deliver / offer pickup only to one or more states or provinces
Click the Rest of the World toggle to disable it.
Note: You should be left with one active shipping rule for your country. If the domestic rule is not set to your country, click Edit Shipping Rule to make changes.Click the All states / provinces checkbox to deselect it.

Select the checkboxes next to the regions you want to ship to (e.g. California and Oregon).
Click Done.
Click Save.
Ship to a few countries with the same rate for all
To create the same shipping rate for a few countries, create a region made up of those countries. You can then manage settings for these countries as a group. In the GIF below, a region is set up for the Sweden, Denmark, and Norway.
Select an option:Edit a rule: Click Edit Shipping Rule next to a shipping rule you want to expand (e.g. If you have a rule for the US and you want to create a rule for the US and Canada).
Create a new rule: Click Add Region.
Start typing the name of the first country and select it from the list.
Click +Add Destination and start typing the name of another country and select it from the list. Repeat for as many countries as needed.

(Optional) Exclude some states / provinces from a country:Click Edit next to the country.
 Click the All states checkbox to deselect it.
 Select the state(s) / province(s) you want to ship to.
Click Done.
Click Save.
(Optional) Click the Rest of the World toggle to disable it.
Ship to a few countries with different rates
You can ship to different countries and decide on the rate that fits each country in particular.
Tip:
Disable the Rest of the World toggle so customers don't see shipping options for countries that aren't included in your regions.
Edit an existing country's shipping rule:Click Edit Shipping Rule next to your country (in this example, the US).
 Set the shipping rate.
Note: Details on how to do this are explained later in the article.
Click Save.
Create a new region for a single country:Click Add Region.
 Click +Add Destination.
Start typing the name of another country (e.g. Canada) and select it from the list.
Set shipping rules for this country.
Click Save.
Create a region made up of more than one country:Click Add Region.
Click +Add Destination.
Start typing the name of another country (e.g Mexico) and select it from the list.
Click +Add Destination as many times as you need to add more countries to this region group (e.g. to add Guatemala).
Set shipping rules for this region (e.g. a region made up of Mexico and Guatemala)
(Optional) Rename the region.
 Click Save.
Ship worldwide
To ship worldwide, create as many specific shipping rules as you need (or none at all). Then, make sure the International (Rest of the World) toggle is enabled.
In the example below, a merchant from the US has set up free shipping to the US, Mexico, and Canada.
Then, they created a region for countries that are relatively close with a $5 flat shipping rate (to 7 Central American countries).
Lastly, the international (Rest of the World) region for is enabled, with a flat rate of $10.

Note:
Can't find the shipping region that you need? Please contact us and let us know which region is missing.
Important:
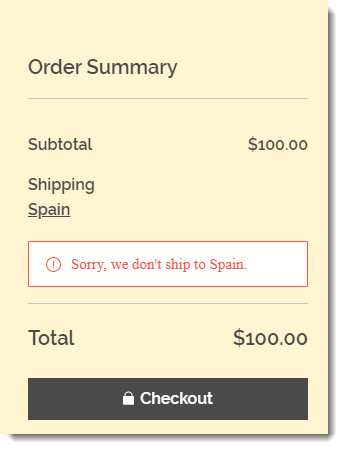
To sell in a region, there must be a shipping rule that applies. For example, if you don't have a shipping rule that covers Spain, Spanish customers are not able to check out.
Step 2 | (Optional) Set up a single shipping option
Now you should have one or more regions set up. By default, regions offer free shipping. From here you can set the shipping rates you want to charge.
To start, select one region and choose the shipping rule that work best for that region, taking into consideration the type of products you sell.
Tips:
For each region you must select one type of shipping. (e.g. flat rate)
Different regions can have different types of shipping (e.g. free shipping in your own country and a rate by price rule for another country).
In a region, you can offer customers more than one option using the same type of shipping (e.g. Standard shipping at $5 and Express shipping at $8.). More on that in step 3 below.
To set up a single shipping option:
Go to the Shipping & fulfillment settings in your site's dashboard
Click Edit Shipping Rule.

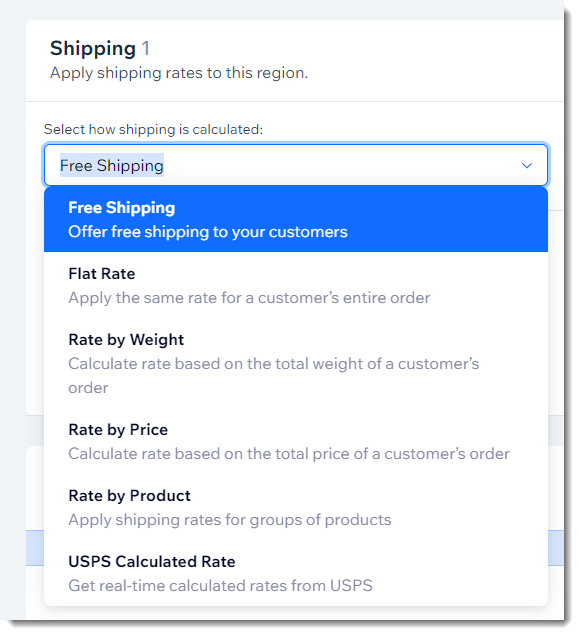
Select a rule from the drop-down:
Free shipping
There is no shipping charge. Offering free shipping (at least locally) can be a selling point for customers. It also simplifies shipping for you and your customer. You can either absorb the shipping cost or add it onto your product prices.
Flat Rate
You charge the same shipping rate for all purchases. Suitable for stores that sell products of similar weight and price (e.g. a store that sells only t-shirts).
Rate by Weight
You charge different shipping rates for purchases of different weights (e.g. product that weigh 0 - 1 pound pay $5 in shipping and product that weigh over 1 pound pay $10). Rate by Weight is suitable for stores that sell products with significant weight differences. (e.g. jewelry and coats).
Rate by Price
You charge different shipping rates for purchases of different prices. One example of how to use this is to offer reduced shipping rates for orders above a certain price (e.g. $5 shipping for orders above $50). Learn more
Rate by Product
Organize your products into groups. (e.g. breakable products and unbreakable products). Then, set up different shipping rules for each group - so you can charge when it actually costs you to ship. Learn more
Tip:
This option can be helpful if you sell dropshipping products (e.g. create a group for dropshipping products and another for your own products with different shipping rates for each).
USPS Calculated Rate
Real time shipping calculation allows you to display approximate, dynamically-calculated shipping rates based on the weight and dimensions of the order, and on the shipping cost to and from addresses. Customers see this real-time shipping estimate during checkout.
This feature is currently available in the US. Learn more about USPS calculated real-time rates.
Notes:
You can set up local delivery and pickup as well as additional shipping options (e.g. Priority Shipping) later.
For specific information on how to set up a type of rule (e.g. Rate by Weight), click the "Learn more" link above next to the rule you want to set up.

Additional options:
After creating a shipping rule, you can select either of these options.
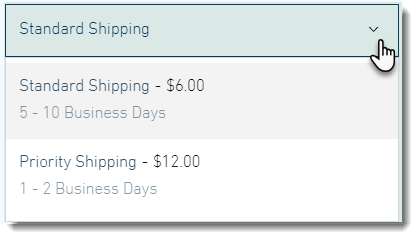
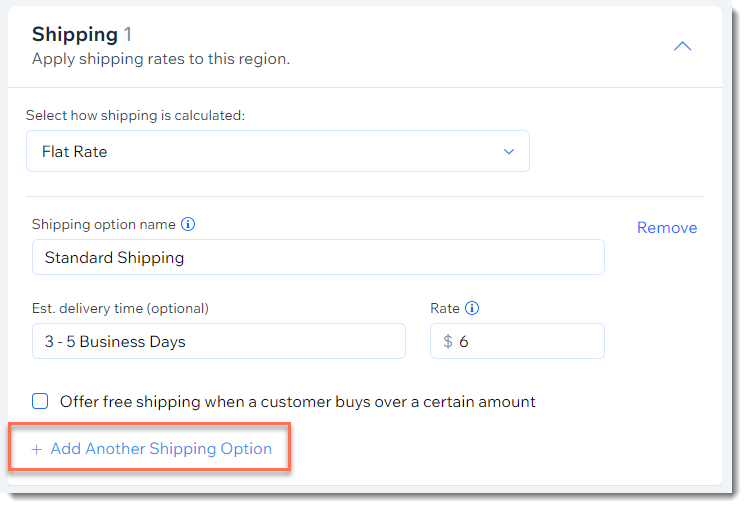
Step 3 | (Optional) Offer customers more than one shipping option
You can give customers the option of faster shipping for a higher shipping rate. Customers select the shipping option they prefer in the Cart (if you enabled the cart shipping display) or on the Checkout Page.
To offer additional shipping options:
You can creating an additional options by clicking +Add Another Shipping Option.
Go to the Shipping & fulfillment settings in your site's dashboard
Click Edit Shipping Rule.

Select a rule from the drop-down.
Set up the rule you selected (e.g. $6 Standard Shipping).
Click Add Another Shipping Option.
Step 4 | (Optional) Offer a Local Delivery Option
Use the local delivery option to offer hand-delivery in your region. To set it up, select a region, click +Add Local Delivery, and define the delivery area.
Choose whether you want to delivery within a specific time frame (e.g. 1-2 business days) or let customers select which day they prefer to receive the order.
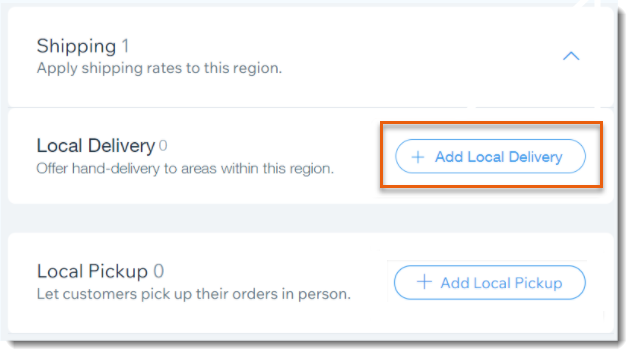
Step 5 | (Optional) Offer Local Pickup
Let local customers pick up orders in person from one or more of your physical locations (e.g. your store, warehouse, etc.). To set it up, click Local Pickup.

Step 6 | (Optional) Create Additional Shipping Options via Third-Party Apps
In addition to the variety of shipping, delivery, and pickup options you can create through Wix, you can add third-party shipping apps to your site and use them to expand your shipping options.
FAQs
How do I change the location of an existing shipping region?
After you select the region, click to delete the destination and add another one (or more).

Can I combine a few countries into one region?
Yes. Click +Add Destination to add each country or part of a country to a shipping region. When you're done, don't forget to rename the region so you can easily identify it.

Can I set up shipping to US military addresses?
Yes, you can set up shipping to addresses associated with American Army, Air Force, or Navy installations in the Americas, Europe, or the Pacific.
When you set up shipping to the US, these military addresses are automatically included.

Do I need to set up shipping if I only sell digital products?
No. If all of your products are digital, there's no need for you to set up shipping.
What happens if a customer tries to buy from me but I don't ship to their region?
If you've enabled the delivery rate display in the cart, customers who enter their region get a message that you do not deliver to their area.

If they progress to checkout, they get a similar message after they add their shipping address.
Tip: If you only ship to a limited region, such as just to your own country, it's a good idea to avoid customer frustration by mentioning this on your site.
Can I display an estimate of delivery options and costs in the Cart Page?
Yes. Customers can get a preview of your shipping, local delivery, and pickup options if you enable the Delivery rates in the Cart Page.
To enable:
Click Pages
 on the left side of the Editor.
Click Store Pages.
Click the Cart page.
Click Settings.
Click the Settings tab.
Select the Delivery rates checkbox.

How can I collect tax on shipping costs?
Go to the Tax page in your site's dashboard, select a region, and then select the Tax on shipping checkbox.

Can I set up delivery to pickup points near my customers?
Yes, delivery to pickup points is available in some location via third-party apps. Learn more about shipping orders to pickup points.
How can I test the shipping rules I set up?
If your site is live, you can test what your customers see.
Cart Page: If delivery rates in the cart were enabled, enter your region to see delivery estimates.
Checkout Page: Enter an address to see delivery rates.
Tip: If your site isn't live, you can still preview store checkout.