top of page

Managing your Store in Retail POS

Wix Retail POS: Creating Product Categories

Important:

  • This article is about Wix Retail POS tablet for brick & mortar businesses.

  • For info on using POS on a mobile device, click here.

Using product categories, you can organize your store products to help you locate them more quickly at your point of sale.

Note:

Product categories were previously called product collections.

All your products are automatically added to the "All Products" category. You can also add products to other categories so that they appear in more than one category. For example, if you have a pet shop, you can create a "Dog" category and a "Cat" category, that contain dog and cat food respectively. You can also create a general "Pet Food" category that includes the same products that are in the other categories.
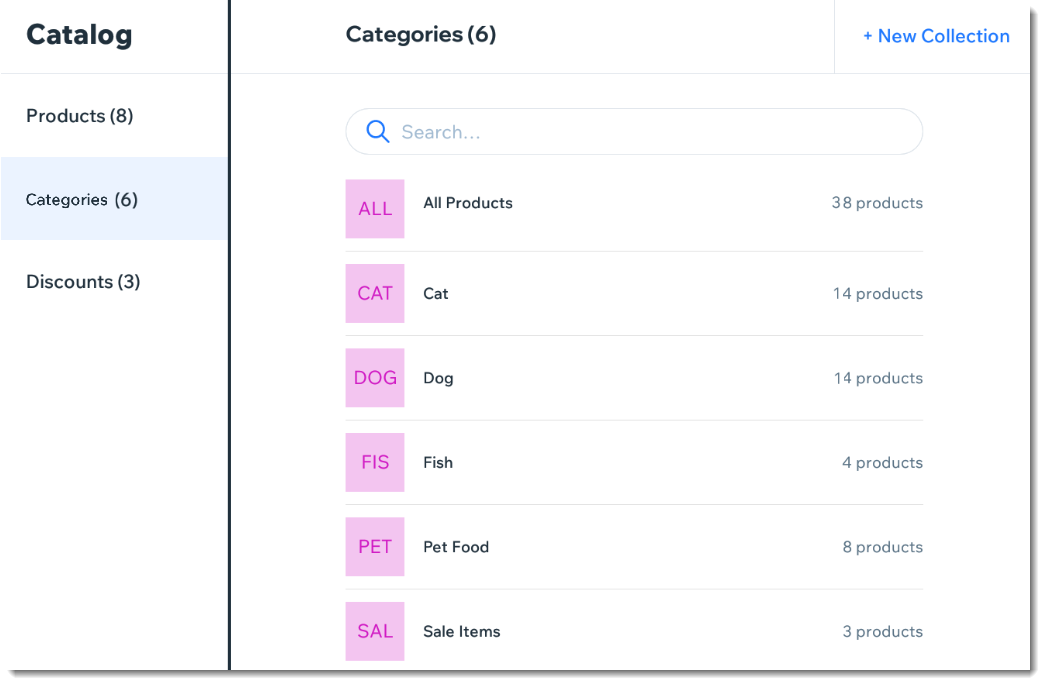
Screenshot of the Categories page in the Wix Retail POS tablet

Note:

Any product categories you create on the POS tablet also appear in your dashboard on desktop and vice versa. You can use categories in your live site to display different types of products on different pages.

To create a product category:

  1. Open the POS tablet.

  2. Tap the Menu icon  at the bottom left.

  3. Tap Catalog.

  4. Tap Categories.

  5. Tap + New Category.

  6. Enter a name for your category and tap Save.

  7. Add products to your new category:Tap Add Products.
    Select the checkboxes next to the products you want to add.
    Note: You can use the search bar to find specific products.
    Tap Add.

Notes:

  • To delete a product category, select the category and tap Delete at the top right. Deleting a category does not delete the products.

  • To remove a product from a category, tap the Remove iconnext to the product.

Need A Professional Website?
Contact Us 
Today!

Wix Automations: Adding and Sending a Coupon

Wix Automations: Sending Automated Emails to Contacts After Form Submissions

Wix Automations: Customizing Automated Emails

Wix Automations: Creating a New Automation

Wix Automations: An Overview

The New Automation Builder: Understanding Email Types

The New Automation Builder: Creating a Multi-Action Automation

The New Automation Builder: Sending Data via Webhook

The New Automation Builder: Adding and Sending a Coupon

The New Automation Builder: Troubleshooting Wix Automations

The New Automation Builder: Understanding Conditions Operators

The New Automation Builder: Setting Up a 'Scheduled Time' Trigger

The New Automation Builder: Sending Data to Google Sheets

The New Automation Builder: Using the Property Picker

The New Automation Builder: Viewing and Managing Automations Installed for You

The New Automation Builder: Customizing Automated Emails

The New Automation Builder: Managing Your Automations

The New Automation Builder: Creating an Automation

The New Automation Builder: Overview

Microsoft Office 365 Mailbox Limits

Resetting the Password for Additional Office 365 Mailboxes

Resetting Your Admin Password for Your Office 365 Mailbox

Accessing Your Microsoft Office 365 Mailbox Through Your Wix Account

Accessing Your Microsoft Office 365 Mailbox Through Your Wix Account

Accessing the Microsoft Office 365 Admin Center

Activating Your Microsoft Office 365 Mailbox Purchased from Wix

Google Workspace: Troubleshooting Login Issues

Google Workspace: FAQs

Google Workspace: Contacting Google Support

Google Workspace Error Message: "You do not have access to Email"

wix experts
Graphic2Traffic web design
©
bottom of page