top of page

Table reservations

Wix Restaurants: Setting Up Prepayment for Table Reservations

Set up prepayment rules for reservations for larger groups or individual guests. Accept credit card payments when guests book online. With automatic approval, customers are charged immediately.

With manual approval, customers aren’t charged right away. After approval, charge them by sharing a payment link, sending an invoice, or handling the payment directly. Plus, you can access detailed analytics for all your table reservation payments.
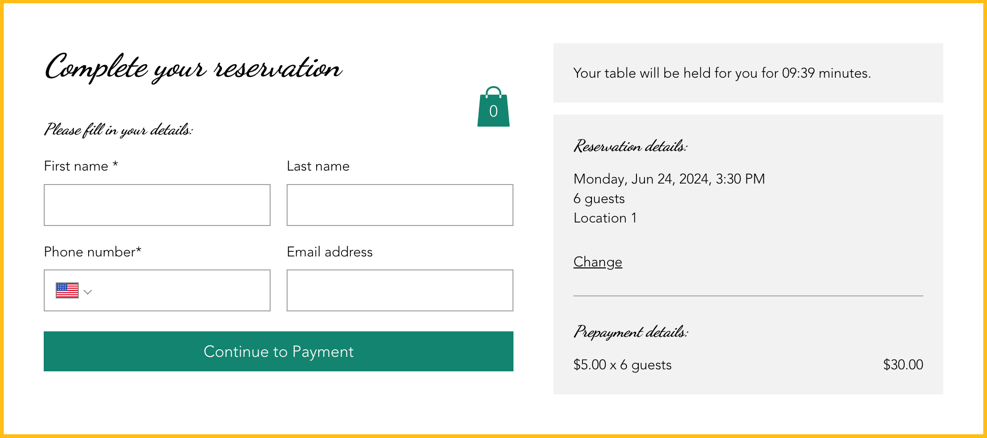
A screenshot of how prepayment appears when a customer reserves a table.

Adding a payment rule

Reduce last minute cancellations by collecting payment upfront. This helps reduce no shows and minimize last minute cancellations.

You can do this from your site's dashboard or straight from the Wix app on your mobile device.

To add a payment rule:

Dashboard

Wix app

  1. Go to Table Reservations in your site's dashboard.

  2. Click Settings at the top right.

  3. Click Prepayment.

  4. Click + Add Prepayment and define your prepayment rules:Party Size: Enter the minimum number of guests the fee applies to.
    Charge Fee: Enter the fee to charge each guest for this reservation.

  5. Click Save.

A screenshot of defining your prepayment rules for table reservations.

FAQs

Click a question below to learn more.

Can I customize the table reservation form?

Customize your table reservation form to include information about your table reservation fees for your guests.

How do I change the currency on my site?

To change the currency on your site, go to language & region in your site's dashboard.

How do I set up tax?

To set up tax for your site, go to tax in your site's dashboard.

Need A Professional Website?
Contact Us 
Today!

Wix Automations: Adding and Sending a Coupon

Wix Automations: Sending Automated Emails to Contacts After Form Submissions

Wix Automations: Customizing Automated Emails

Wix Automations: Creating a New Automation

Wix Automations: An Overview

The New Automation Builder: Understanding Email Types

The New Automation Builder: Creating a Multi-Action Automation

The New Automation Builder: Sending Data via Webhook

The New Automation Builder: Adding and Sending a Coupon

The New Automation Builder: Troubleshooting Wix Automations

The New Automation Builder: Understanding Conditions Operators

The New Automation Builder: Setting Up a 'Scheduled Time' Trigger

The New Automation Builder: Sending Data to Google Sheets

The New Automation Builder: Using the Property Picker

The New Automation Builder: Viewing and Managing Automations Installed for You

The New Automation Builder: Customizing Automated Emails

The New Automation Builder: Managing Your Automations

The New Automation Builder: Creating an Automation

The New Automation Builder: Overview

Microsoft Office 365 Mailbox Limits

Resetting the Password for Additional Office 365 Mailboxes

Resetting Your Admin Password for Your Office 365 Mailbox

Accessing Your Microsoft Office 365 Mailbox Through Your Wix Account

Accessing Your Microsoft Office 365 Mailbox Through Your Wix Account

Accessing the Microsoft Office 365 Admin Center

Activating Your Microsoft Office 365 Mailbox Purchased from Wix

Google Workspace: Troubleshooting Login Issues

Google Workspace: FAQs

Google Workspace: Contacting Google Support

Google Workspace Error Message: "You do not have access to Email"

wix experts
Graphic2Traffic web design
©
bottom of page