Taking online orders
Wix Restaurants: Setting up Contactless Dine-In
Important:
This article is about the original Restaurants Orders app.
We've released a new online ordering app that currently does not support contactless dine-in. Learn more about the differences between the old and new online ordering apps.
Allow your customers to view your menu, place orders online, pay, and get their food delivered to their table without interacting closely with the restaurant staff.
In this article, learn more about:
Setting up contactless dine-in for your restaurant
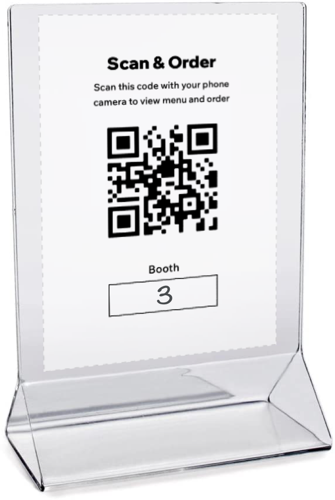
Provide your customers with instructions for ordering via contactless dine-in, and print the QR code and place it on the tables.
Important:
For contactless dine-in to work, you have to enable Pickup. You also have to enable the ASAP toggle in Order scheduling.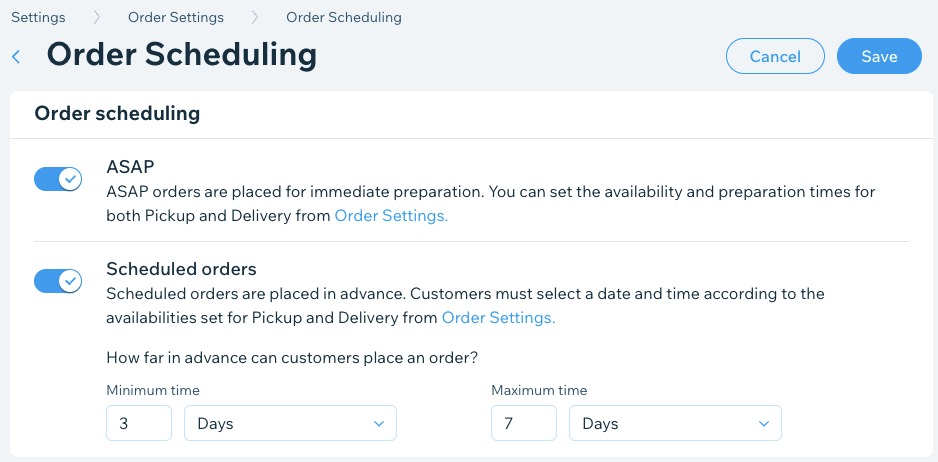
Go to Order Settings in your site's dashboard.
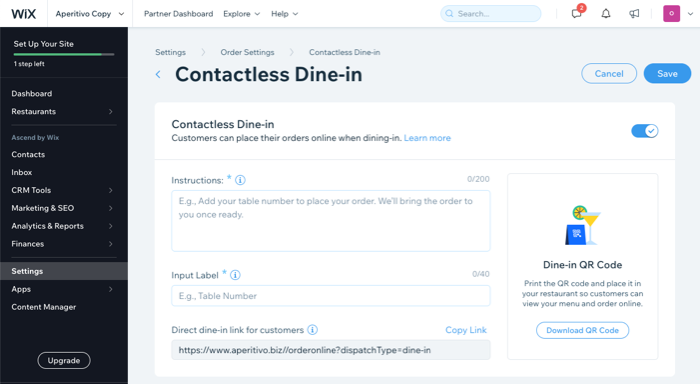
Click the Contactless Dine-in tab.
Click the Contactless Dine-in toggle to enable it.
Enter the information that you want your customers to see when placing their orders:Instructions: Add instructions for your customers (e.g. "Welcome! Fill in your table number and choose your dishes. We'll bring your order right to you when it's ready.").
Input Label: Add a field for table or booth numbers. Customers are asked to fill this out while placing their order.
(Optional) Direct dine-in link for customers: Click Copy Link to share a direct link with your customers for contactless dine-in.
Click Download QR Code to download your code. You can print your QR code and place it in on the tables of your restaurant so that customers can scan it, view your menu and place an order online.
Click Save.
Viewing your contactless dine-in orders
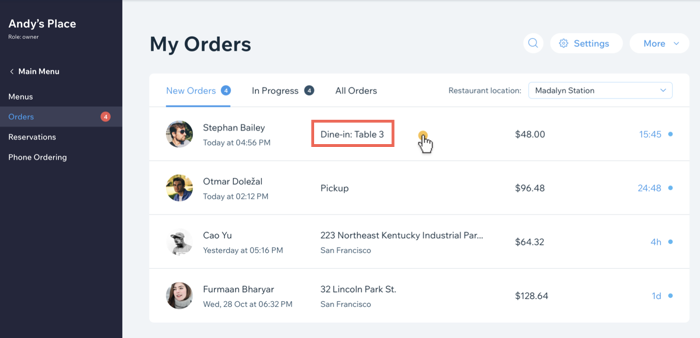
You can see your contactless dine-in orders in My Orders tab marked as Dine-in.
How customers make dine-in orders using QR code
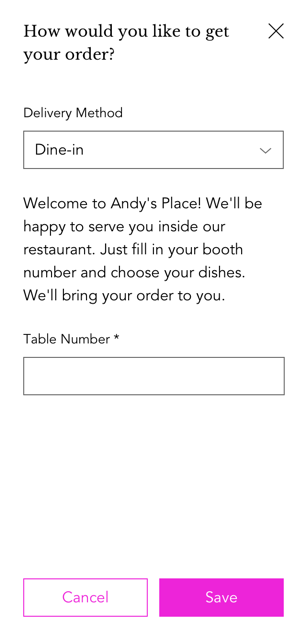
When customers arrive at your restaurant, all they have to do is scan the QR code with their mobile phones to access your menu and place an order. During the checkout process, dine-in is automatically the delivery method and customers have to input their location in the restaurant (e.g. booth or table number).