


Creating Wix Restaurants menus
Wix Restaurants: Displaying Your Menus on Multiple Site Pages
Important:
This article is about the new Wix Menus app.
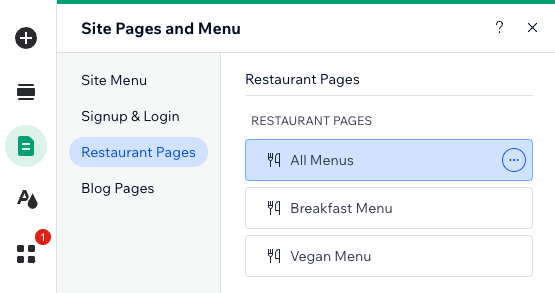
By default, all your published menus appear on the same page, separated by tabs. However, you can create multiple menus and display them on separate menu pages. For example, you may want to showcase today's specials on the homepage, or highlight your new vegan menu on a dedicated page.
In this article, learn more about:
Creating a standalone page for your menu
Create a standalone page for a specific menu on your Wix site. This helps to showcase the menu and make it more discoverable.
Wix Editor
Studio Editor
Create a new menu page:Go to your editor.
Click Pages & Menu on the left side of the editor.
Click the Menu page.
Click your menu on the page.
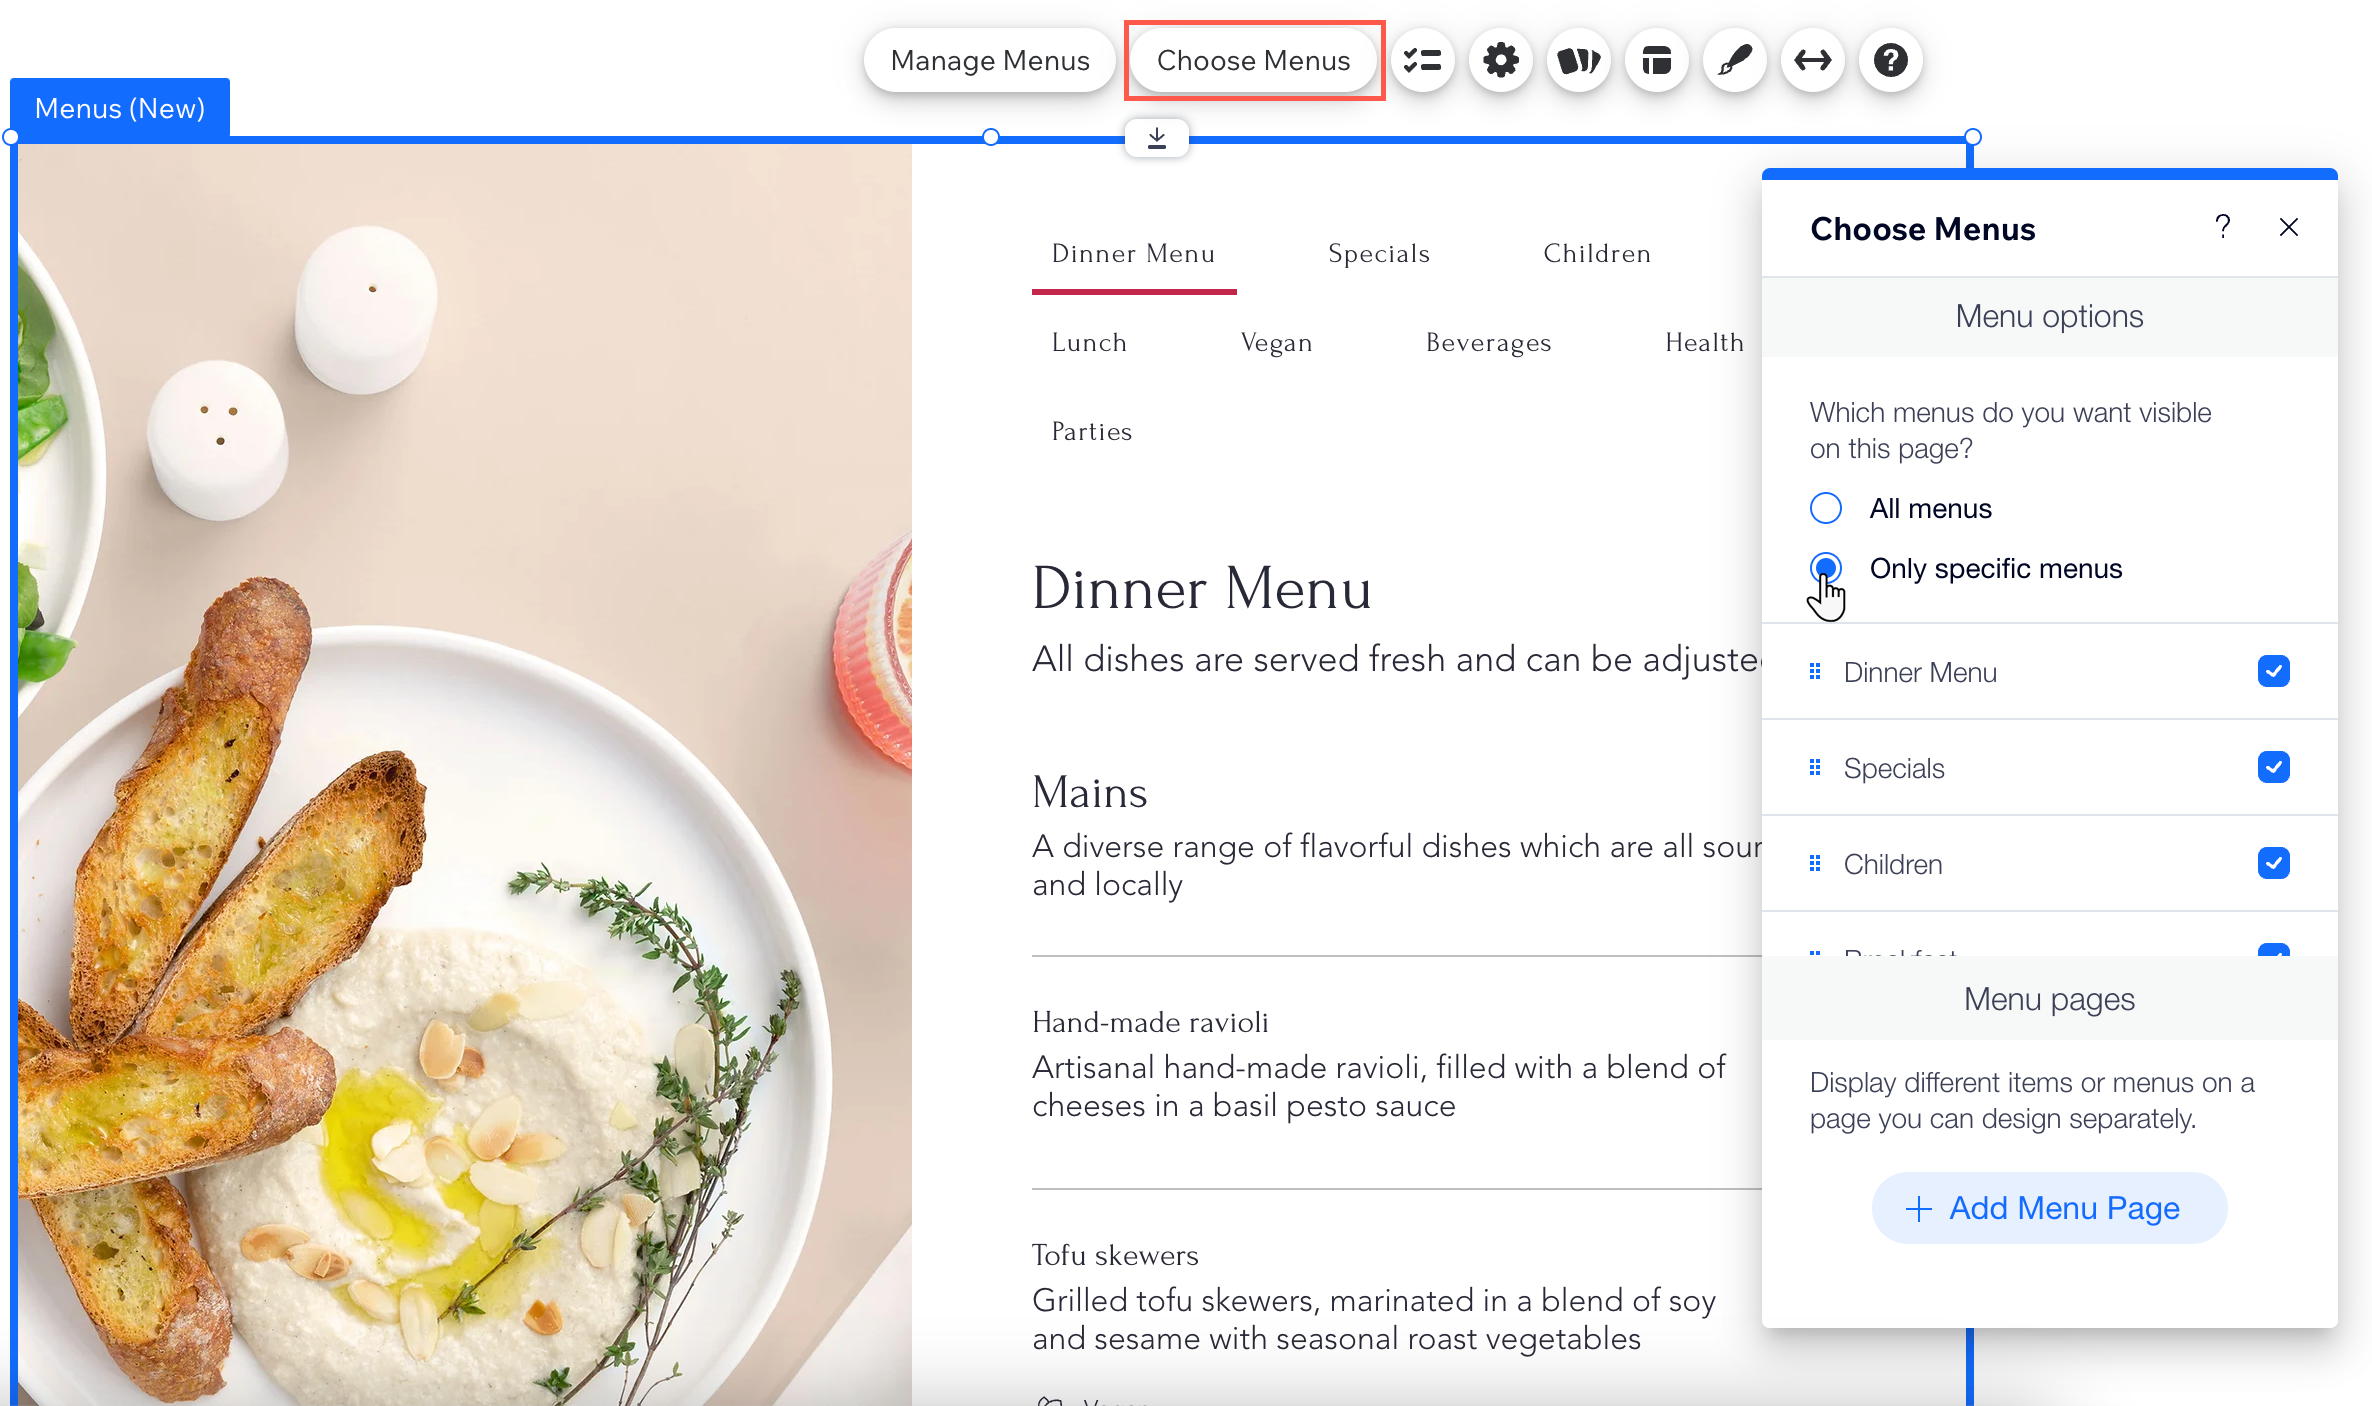
Click Choose Menus.
Click +Add Menu Page to create a new page for your menu.
Edit the new menu page:Click your menu on the new page.
Click Choose Menus.
Select Only specific menus
Select the checkboxes next to the menus you want to display on this page.
Click Pages & Menu on the left side of the editor to rename the new menu page.
Adding your menu to an existing site page
You can copy and paste your menu to any page on your site. This can really boost your menu's discoverability and inspire potential customers. For example, you can promote your seasonal specials on the home page.
Note:
The page's SEO settings will continue to reflect those of a regular site page, not adjusting to a menu page as they would when following the steps in the section above (Creating a standalone page for your menu).
Wix Editor
Studio Editor
Copy your menu element:Go to your editor.
Click Pages & Menu on the left side of the editor.
Click Menu.
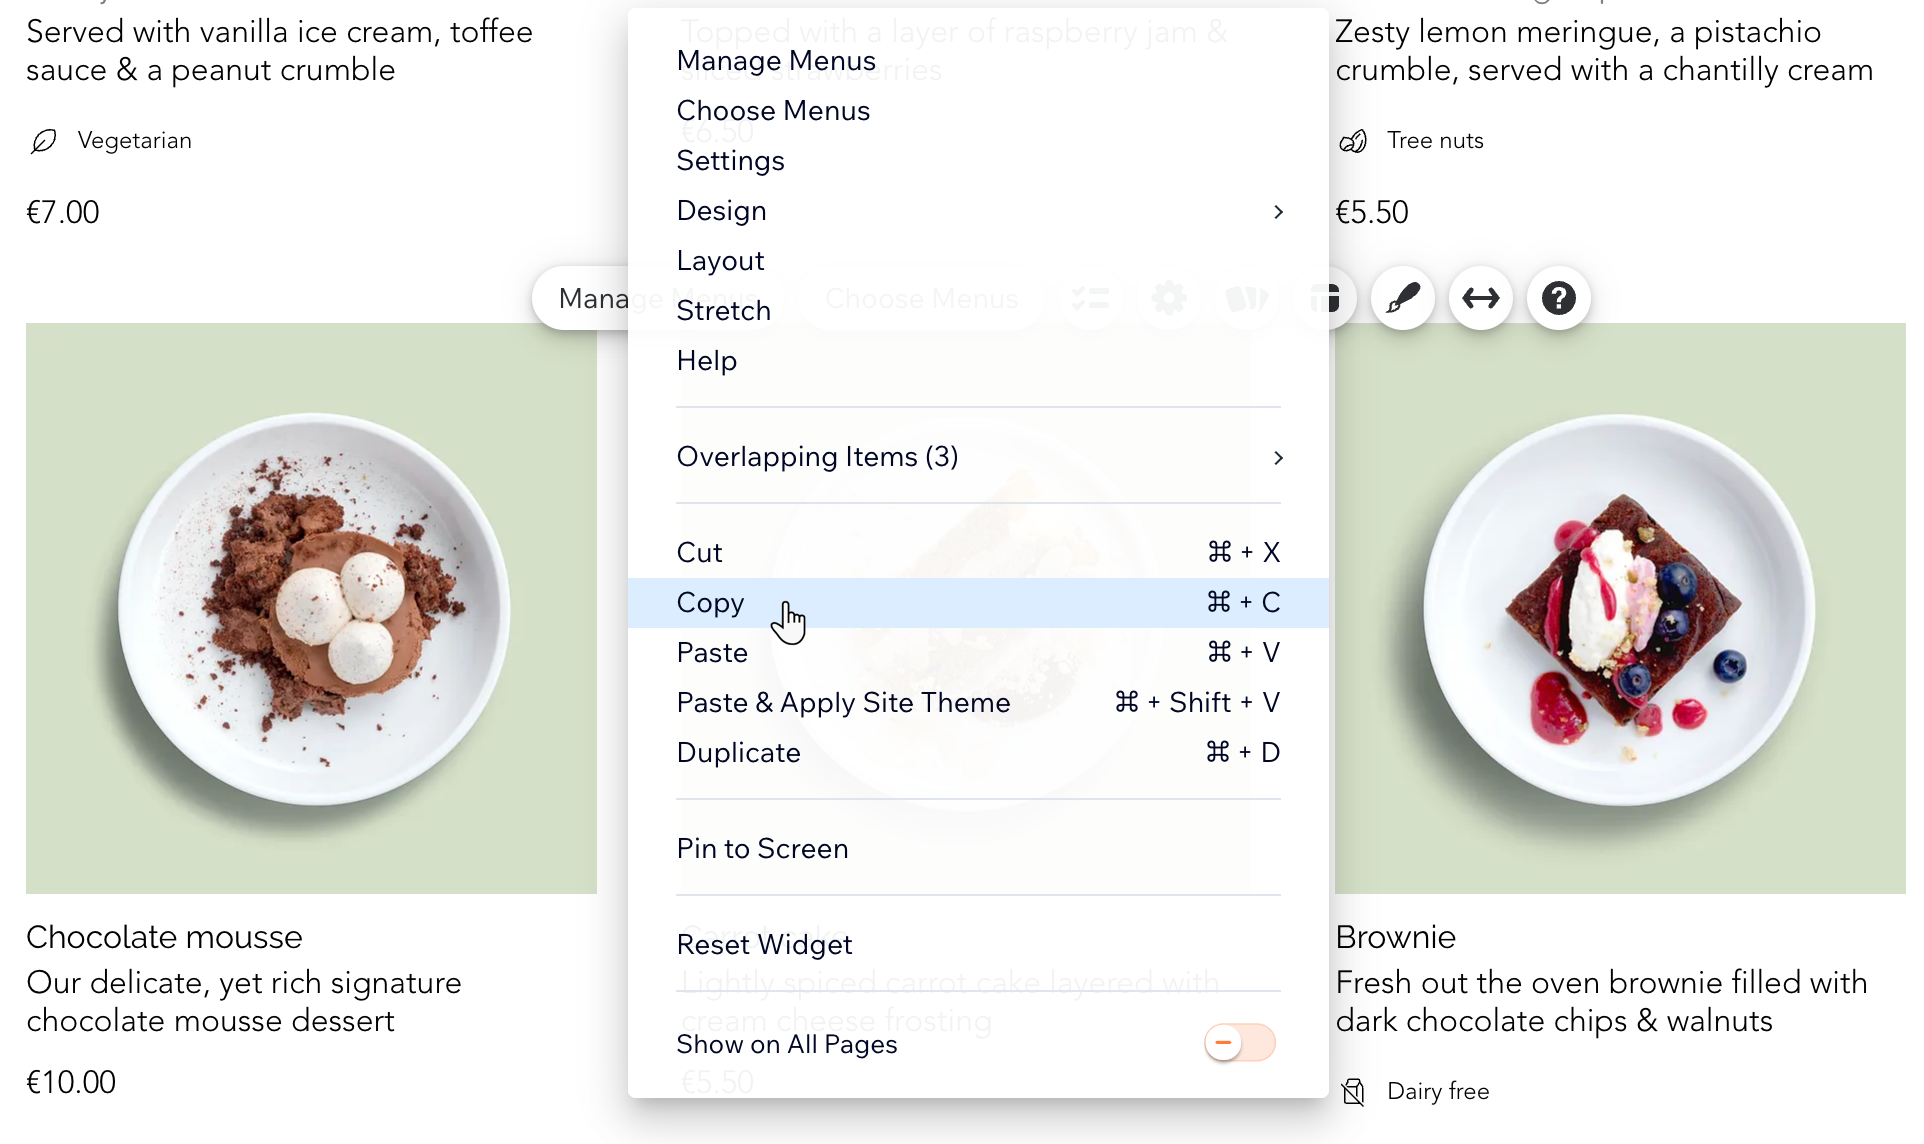
Right-click your menu.
Select Copy.
Go to the relevant page.
(Optional) Add a new section on your page.
Right-click anywhere on your page.
Select Paste.
Edit the look of your menu in the relevant page:Select your menu on the page.
Click Choose Menus.
Select Only specific menus
Select the checkboxes next to the menus you want to display on this page.
FAQs
Click a question below to learn more.
How can I create more menus?
You can create different menus such as Specials, Drinks and more. Learn how to create menus from your site's dashboard.
How can I choose a specific menu to display?
You can choose what menu you want to show on your live site. By default, the menu list includes all of your menus except for those marked as drafts.
Click your menu in your Editor.
Click Choose Menus.
Select Only specific menus.
Select the checkboxes next to the menus you want to display on this page.
How do I duplicate my menu page?
Go to your menu page:Wix Editor: Click Pages & Menu
on the left side of the editor.
Studio Editor: Click Pages on the left side of the editor.
Click the More Actions icon
 next to your menu page.
Click Duplicate.
Enter the new page name.
Click Done.
Design the new page to your liking.
Tip: You can also duplicate your menu to create another draft of it by clicking Duplicate Menu on the Menus (New) tab in your site's dashboard. All menu sections and items are duplicated, and if you're using the Online Orders (New) app, modifiers, variants, tax, stock and settings are also duplicated.
