top of page

Creating your Wix Restaurants menu

Wix Restaurants: Designing and Printing Your Menu

Important:

This article is about the original Wix Restaurants Menus App. Try out our new, improved menu app. Learn how to add and set up Wix Restaurants Menus (New) app.

Choose one of our designed templates and customize a printable menu for your restaurant. You can set the font style and colors, add your restaurant logo and a scannable QR code for your customers to scan and order online. Once you're done, click Download Menu to download your menu in PDF format.
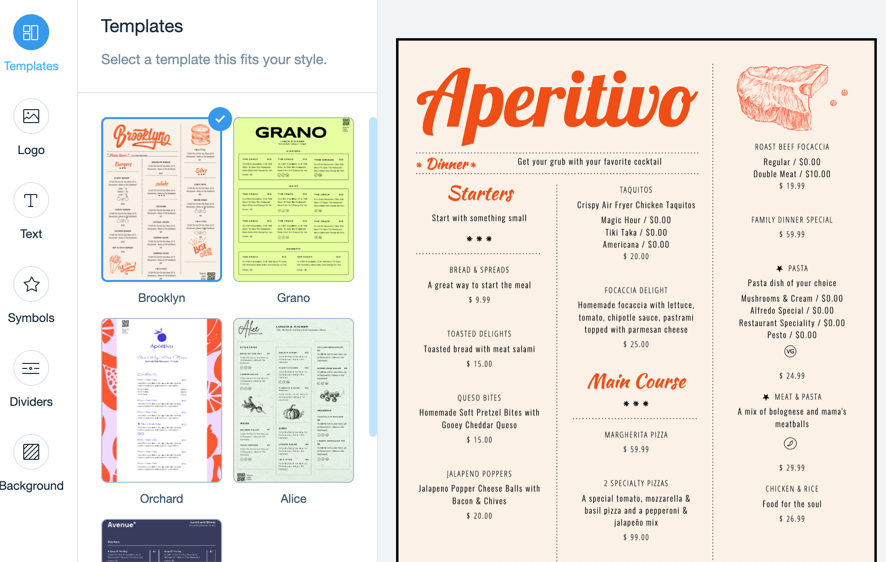
Screenshot of setting the template for your printable menu

To design and print your menu:

  1. Go to Menus in your site's dashboard.

  2. Hover over the menu you want to customize and click the Print icon Print icon in Menu screen.

  3. Customize your printable menu:Templates: Click on a template that suits your restaurant.

    Logo: Add your restaurant's logo and QR code for online orders:Click Upload to upload your restaurant's logo from your computer.
    You can also click Create a Logo to create one with the Wix Logo Maker.
    Enable the QR Code toggle to include a scannable QR code on your menu for customers to scan and order online.

    Text: Hover over the relevant text style and click Customize to set the styles for text on your menu (menu, section and dishes):Dish description: Click the toggle to show or hide descriptions of dishes in your menu.
    Font: Click Change Font and choose a font for your menu.
    Text style: Click to bold, italicize or underline the text.
    Alignment: Choose to align the text to the left, center or right.
    Text color: Choose a color for the text or enter a hex code.
    Size (px): Set a size for the text or drag the slider.
    Symbols: Select a set of symbols and set their colors.
    Dividers: Use dividers to separate the different sections on your menu.
    Background: Choose a background color for your menu. You can also enter a hex code.
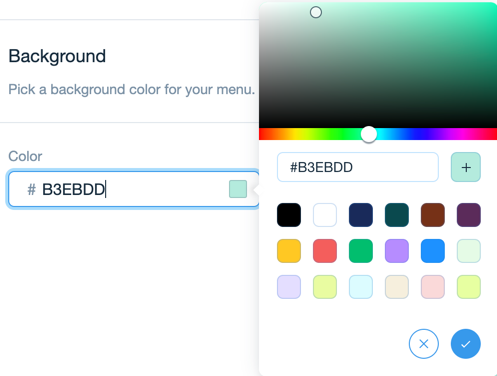
Background color picker with hex code option and color palette

  1. Click Download Menu to download your menu in PDF format.

Need A Professional Website?
Contact Us 
Today!

Wix Automations: Adding and Sending a Coupon

Wix Automations: Sending Automated Emails to Contacts After Form Submissions

Wix Automations: Customizing Automated Emails

Wix Automations: Creating a New Automation

Wix Automations: An Overview

The New Automation Builder: Understanding Email Types

The New Automation Builder: Creating a Multi-Action Automation

The New Automation Builder: Sending Data via Webhook

The New Automation Builder: Adding and Sending a Coupon

The New Automation Builder: Troubleshooting Wix Automations

The New Automation Builder: Understanding Conditions Operators

The New Automation Builder: Setting Up a 'Scheduled Time' Trigger

The New Automation Builder: Sending Data to Google Sheets

The New Automation Builder: Using the Property Picker

The New Automation Builder: Viewing and Managing Automations Installed for You

The New Automation Builder: Customizing Automated Emails

The New Automation Builder: Managing Your Automations

The New Automation Builder: Creating an Automation

The New Automation Builder: Overview

Microsoft Office 365 Mailbox Limits

Resetting the Password for Additional Office 365 Mailboxes

Resetting Your Admin Password for Your Office 365 Mailbox

Accessing Your Microsoft Office 365 Mailbox Through Your Wix Account

Accessing Your Microsoft Office 365 Mailbox Through Your Wix Account

Accessing the Microsoft Office 365 Admin Center

Activating Your Microsoft Office 365 Mailbox Purchased from Wix

Google Workspace: Troubleshooting Login Issues

Google Workspace: FAQs

Google Workspace: Contacting Google Support

Google Workspace Error Message: "You do not have access to Email"

wix experts
Graphic2Traffic web design
©
bottom of page